How Can We Help?
Attributes for Landscape Splines
Attributes are really useful. They can store additional information about each of the lines in your data (road name, speed limit, width, surface material etc.), which you can then use with TerraForm to create set import options and content.
LANDSCAPE SPLINE ATTRIBUTE SETTINGS
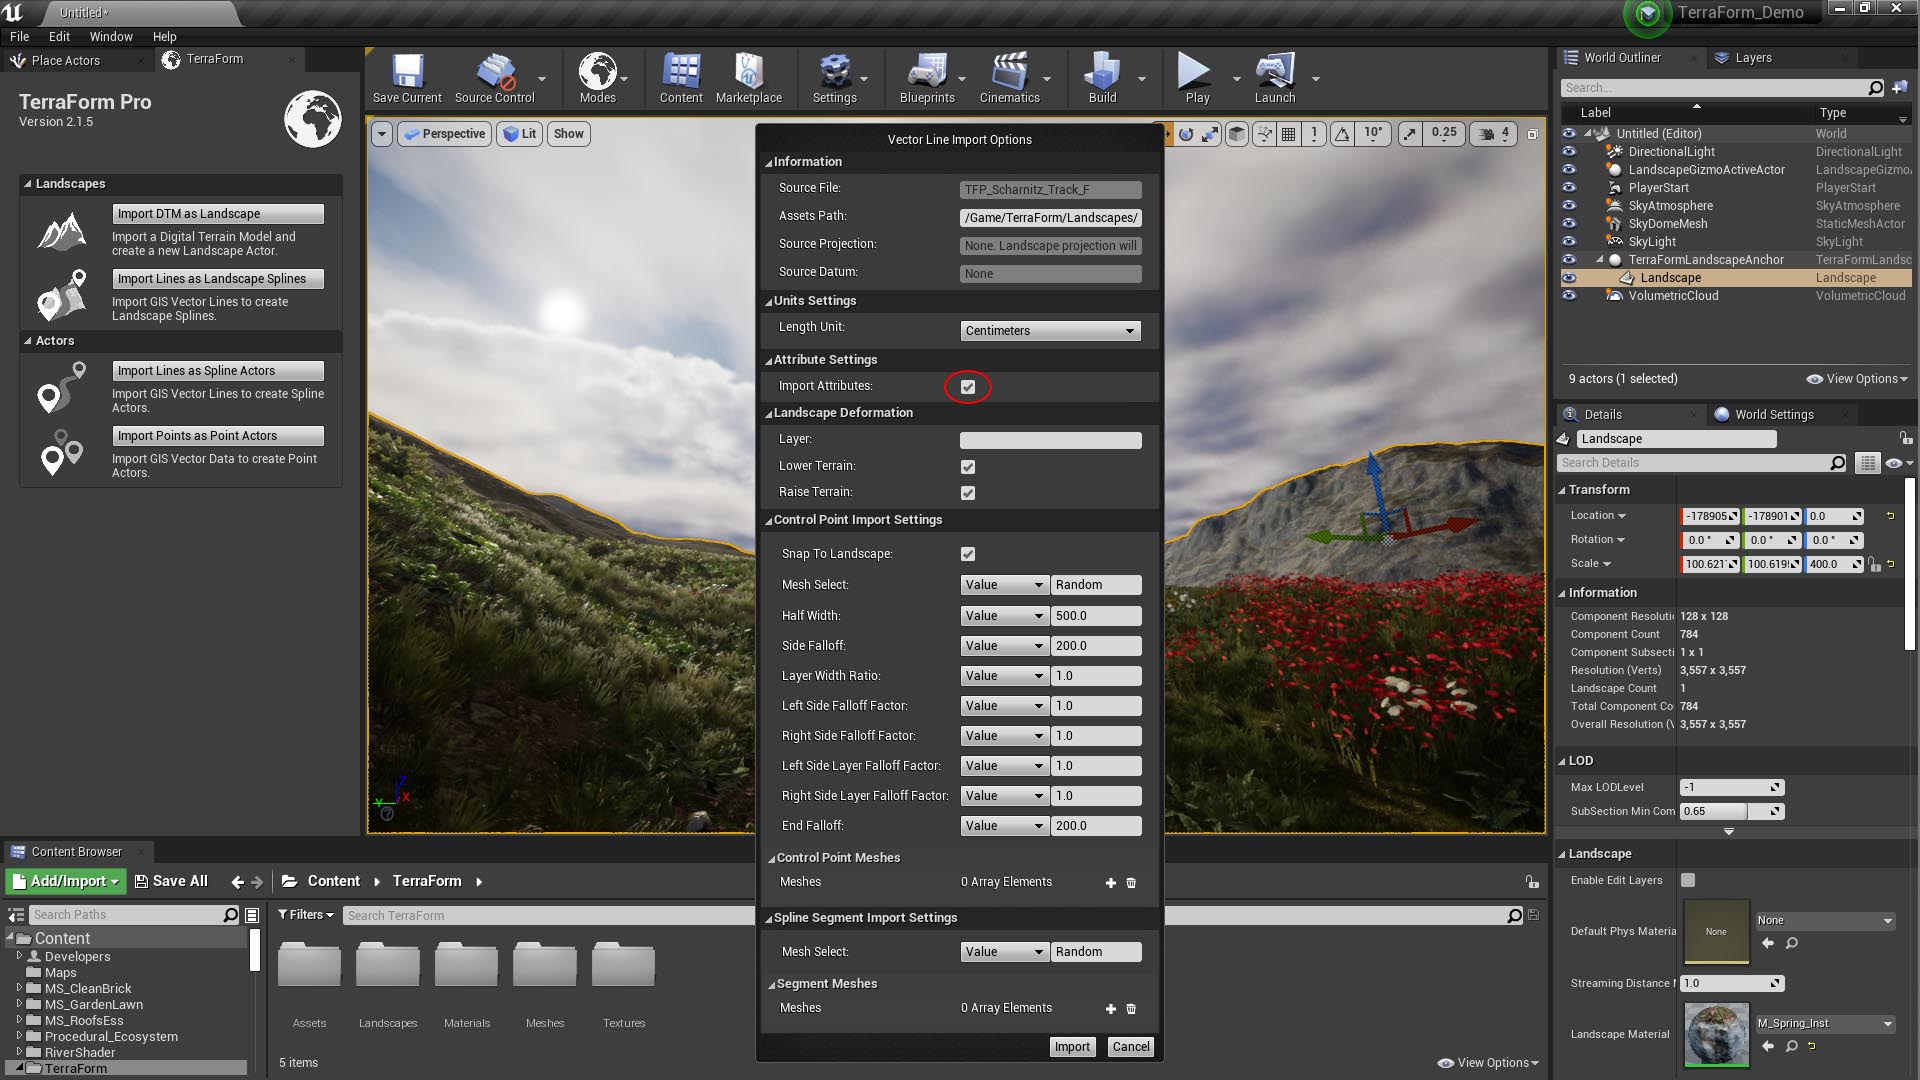
Landscape Splines have a limited number of settings, but pretty much all of them can be controlled using attributes. The selection drop-down list appear once you’ve checked Import Attributes, and include:
Control Point Import Settings:
- Mesh Select
- Half Width
- Side Falloff
- Layer Width Ratio
- Left Side Falloff Factor
- Right Side Falloff Factor
- Left Side Layer Falloff Factor
- Right Side Layer Falloff Factor
- End Falloff
Spline Segment Import Settings:
- Mesh Select
USING ATTRIBUTES WITH LANDSCAPE SPLINES
You can use attributes for some or all of the import settings (i.e. you can mix-and-match attribute controlled settings with normal ‘typed in’ values).
With landscape splines, attributes are most useful when you want to add variety to the data you’re importing – for example, if you want your walking trails to have different widths, or want to use different spline meshes for roads in the same ShapeFile.
If the data you’re using already includes attributes for things like road type (primary, secondary, dirt, residential, etc), you can use them. It’s unlikely however you’ll have things like Half Width, since most attributes would simply specify this as width.
IMPORTANT
ShapeFile format (and most other vector line formats) supports only one attribute value per line feature (i.e. you can only set a single width value for a single road). This is fine when you’re adding features like railway tracks, which pretty much always have the same width, but less helpful when creating things like rivers, where the width varies along the length – this is where using Points to create Landscape Splines can be really useful. We’ll go through that in another guide.
EDITING ATTRIBUTES
It’s really quite straightforward to create and edit attributes with QGIS, and it’s got some really useful features that even allow you to do calculations with the data to create more. We’ve also found plugins that do some really clever things too, but for now, we’ll just use the basic editing tools available in QGIS to create some attributes for our landscape splines.
OSM data often has lots of attributes to it, so there may already be some in there we can use. We’ll start by looking at what’s available in the residential roads, then add some that we’ll find useful.
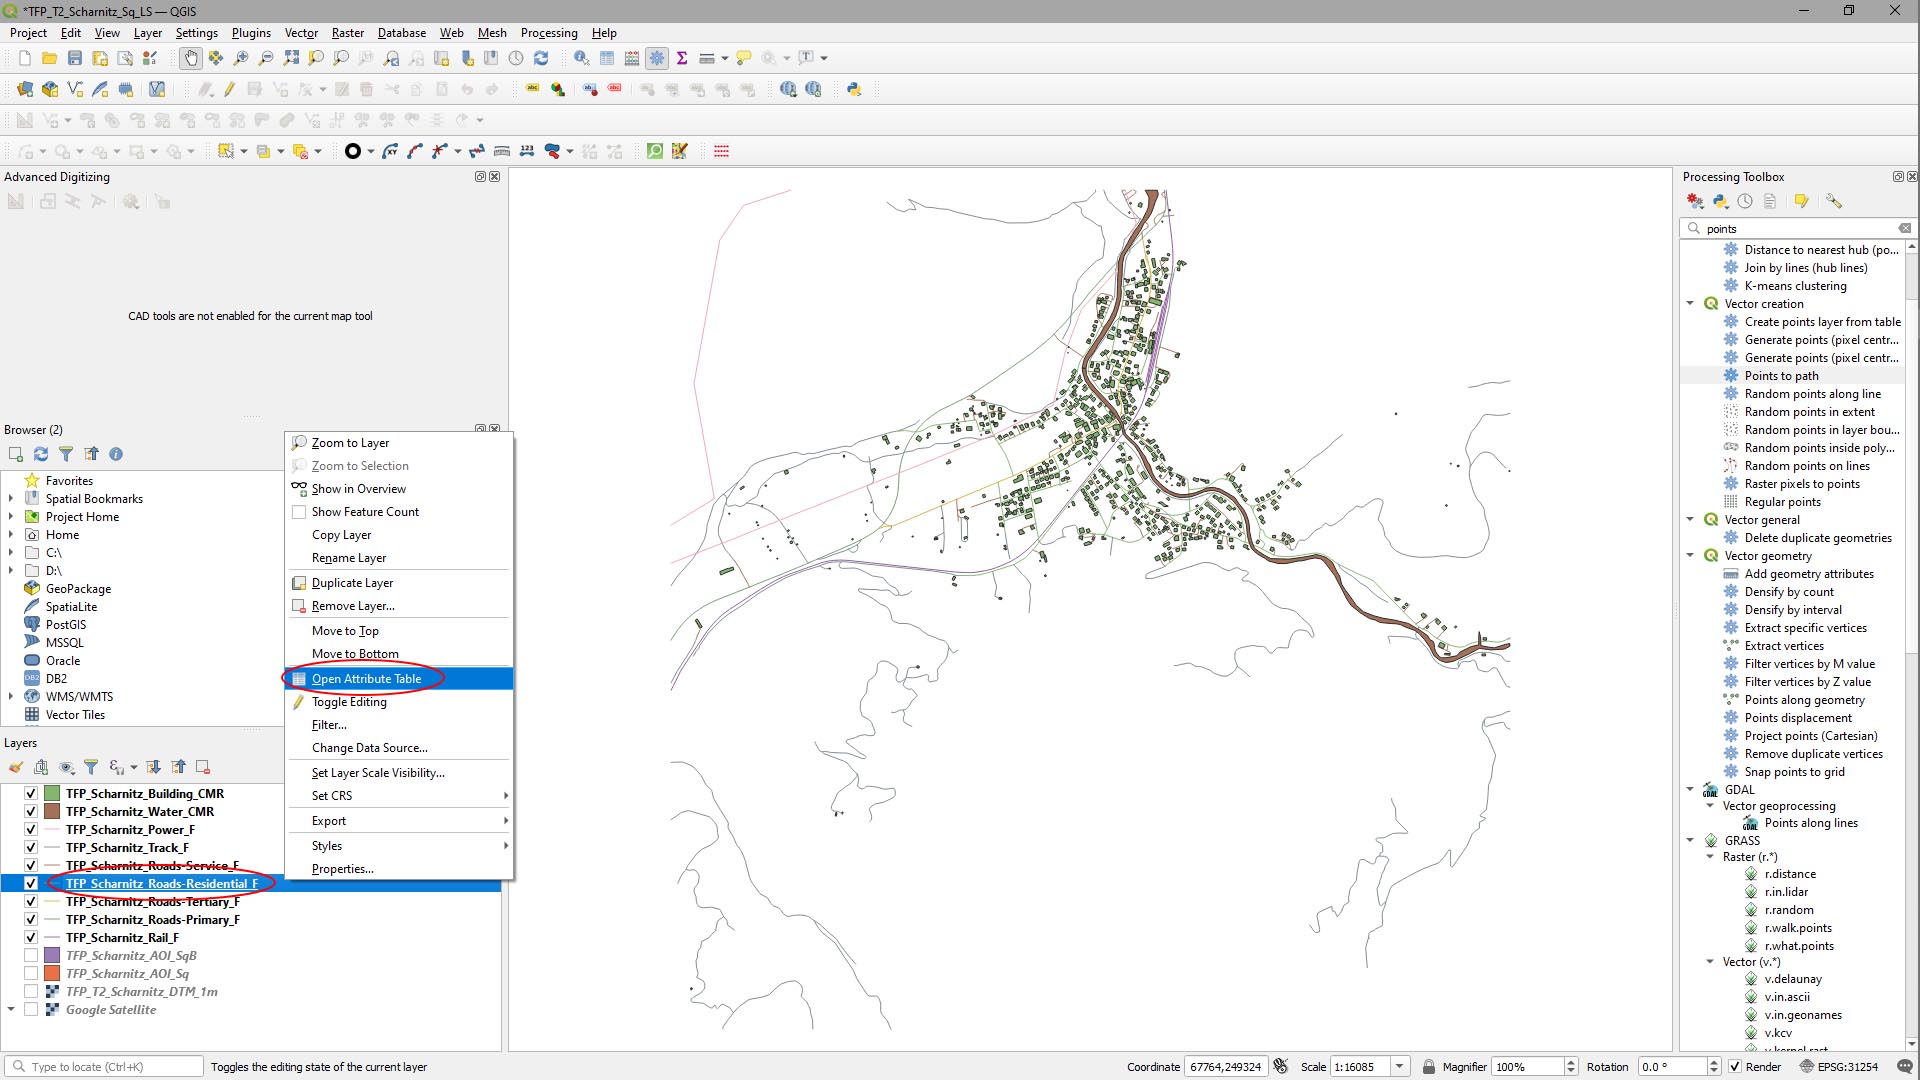
Step 1
Open the Attribute Table to see what’s already there.
- [Right-Click] on the residential roads layer in the Layers panel.
- On the right-click menu, select Open Attribute Table.
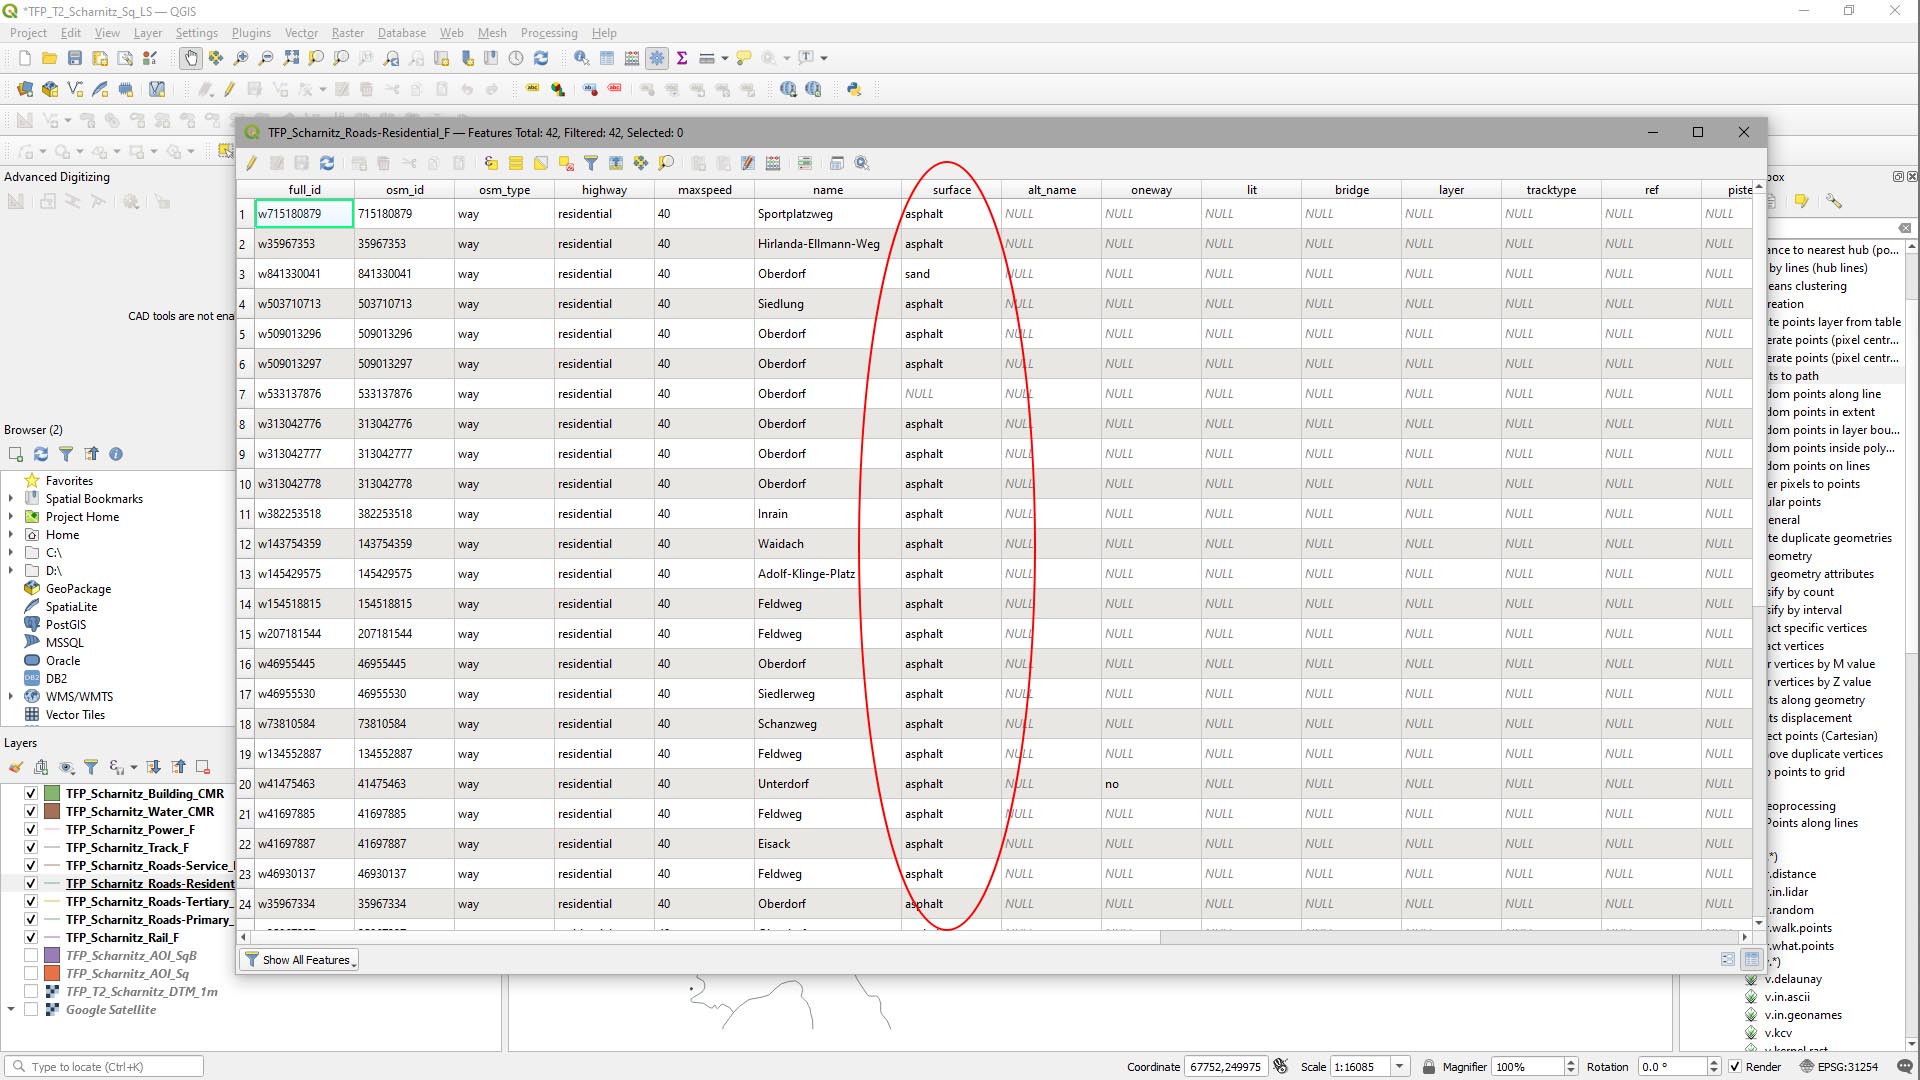
Our attribute table shows there’s some interesting data, including highway type, max speed, road name, etc. However only one of the columns will be helpful for creating our landscape splines – surface – this shows the surface material of the road – we can use it to select different spline meshes to apply to the roads.
Step 2
Add Missing Values.
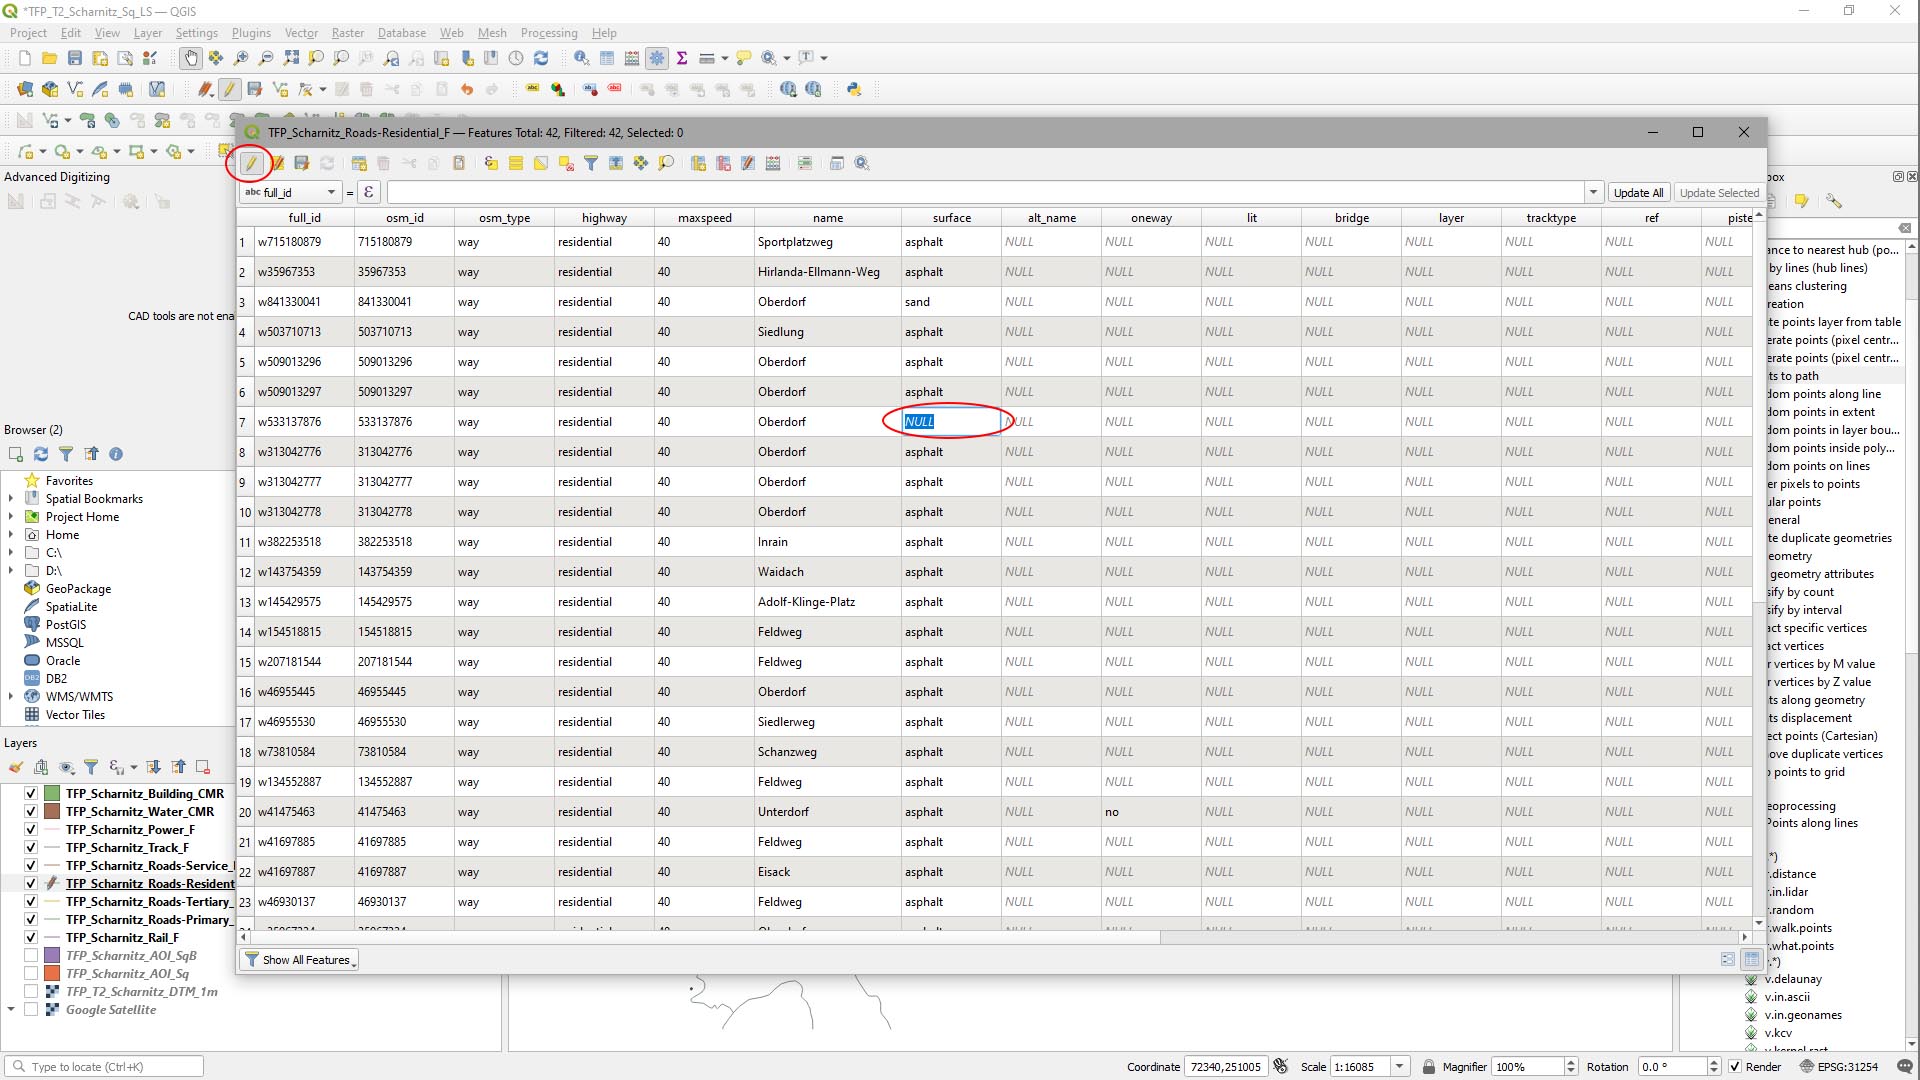
We’ve got a NULL value in our data. Rather than leave it blank, we’ll change it to asphalt (in line with the other parts of the Oberdorf Road).
- Click the Toggle Editing Mode on the Attribute Table.
- [Double-Click] the NULL value to edit it.
- Type asphalt then hit [ENTER] value to commit it.
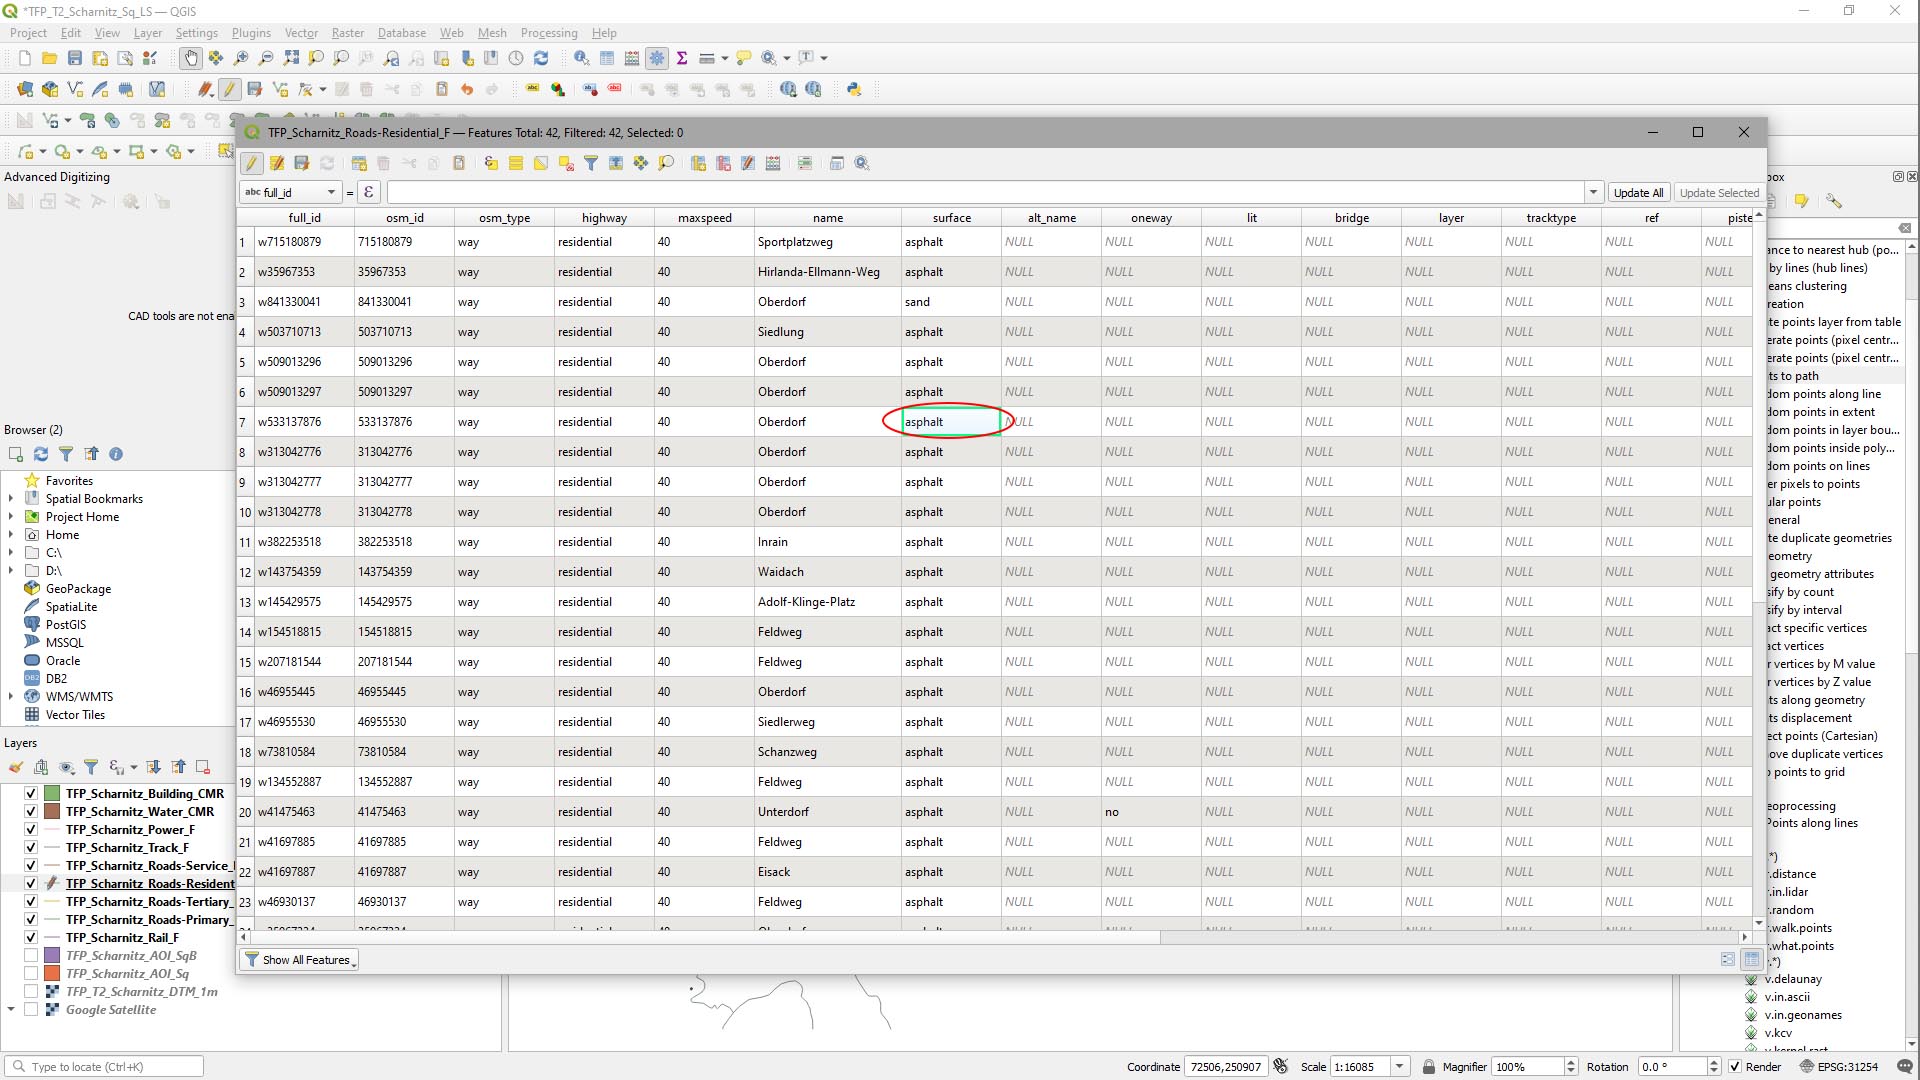
The edited attribute table now has our new value.
CREATING ATTRIBUTES
Let’s now add some attributes for Half-Width and Side Falloff.
Step 1
We need to add Attribute Fields (columns) for our new data.
We’ve got a NULL value in our data. Rather than leave it blank, we’ll change it to asphalt (in line with the other parts of the Oberdorf Road).
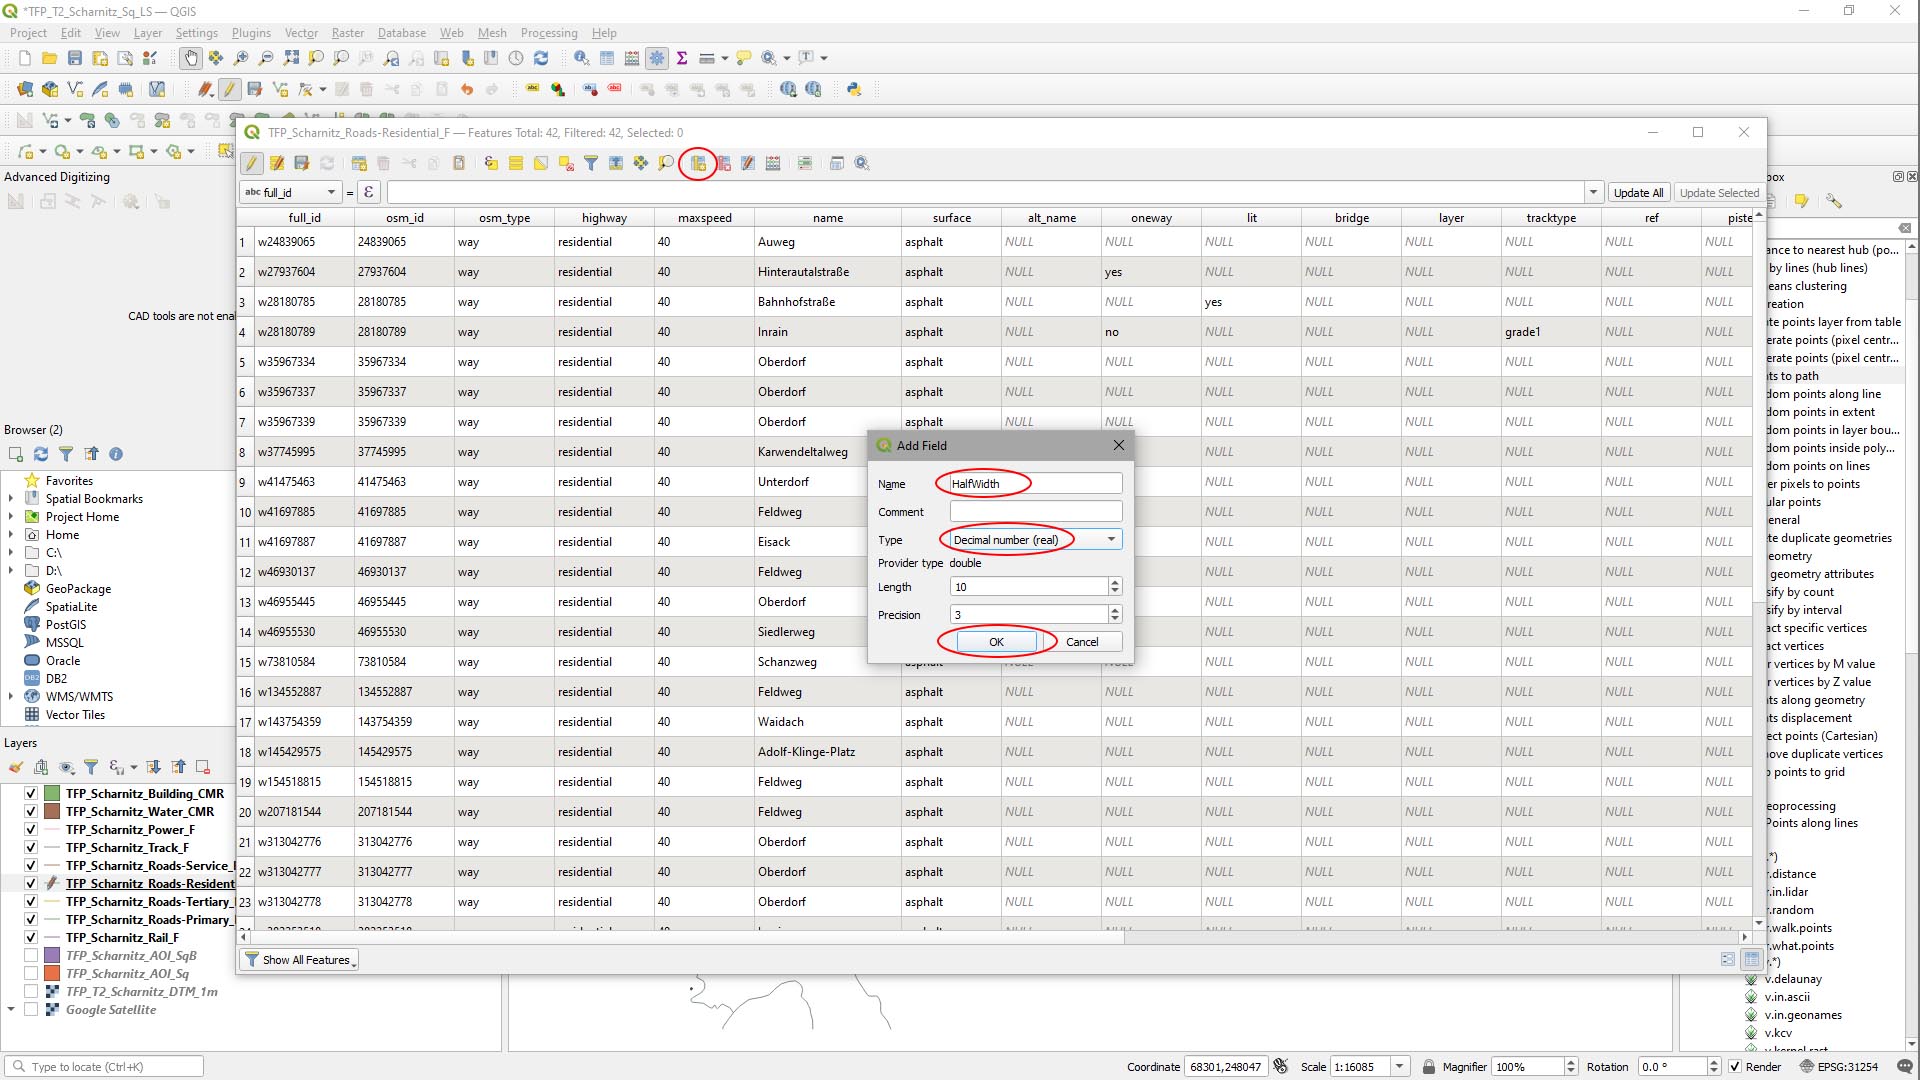
- Click the Add Field button.
In the Add Field panel that appears:
- In the Name field, type HalfWidth.
- Set Type to Decimal Number (Real).
- We’ll leave Length (number of digits), and Precision (number of decimal places) as 10 and 3 respectively.
- Click OK.
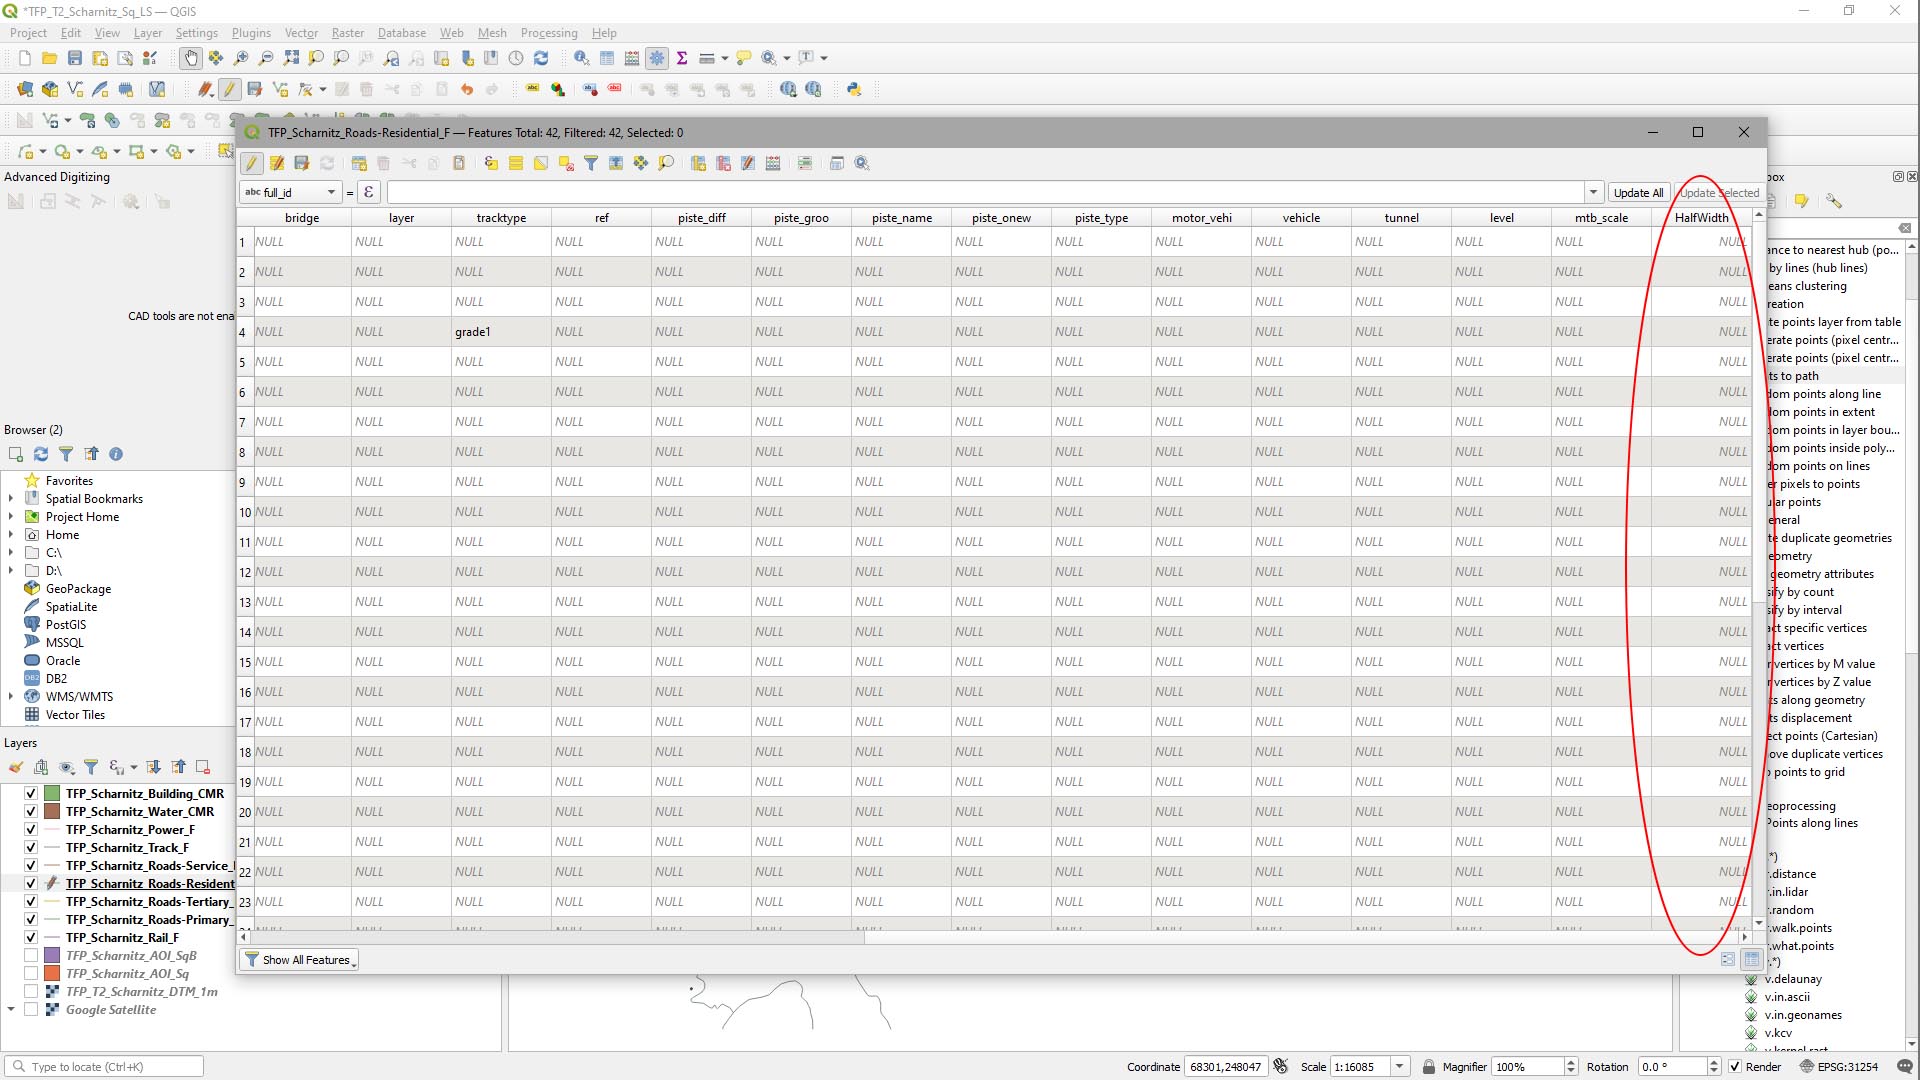
It’ll appear as the last column in the Attribute Table (scroll right).
Step 2
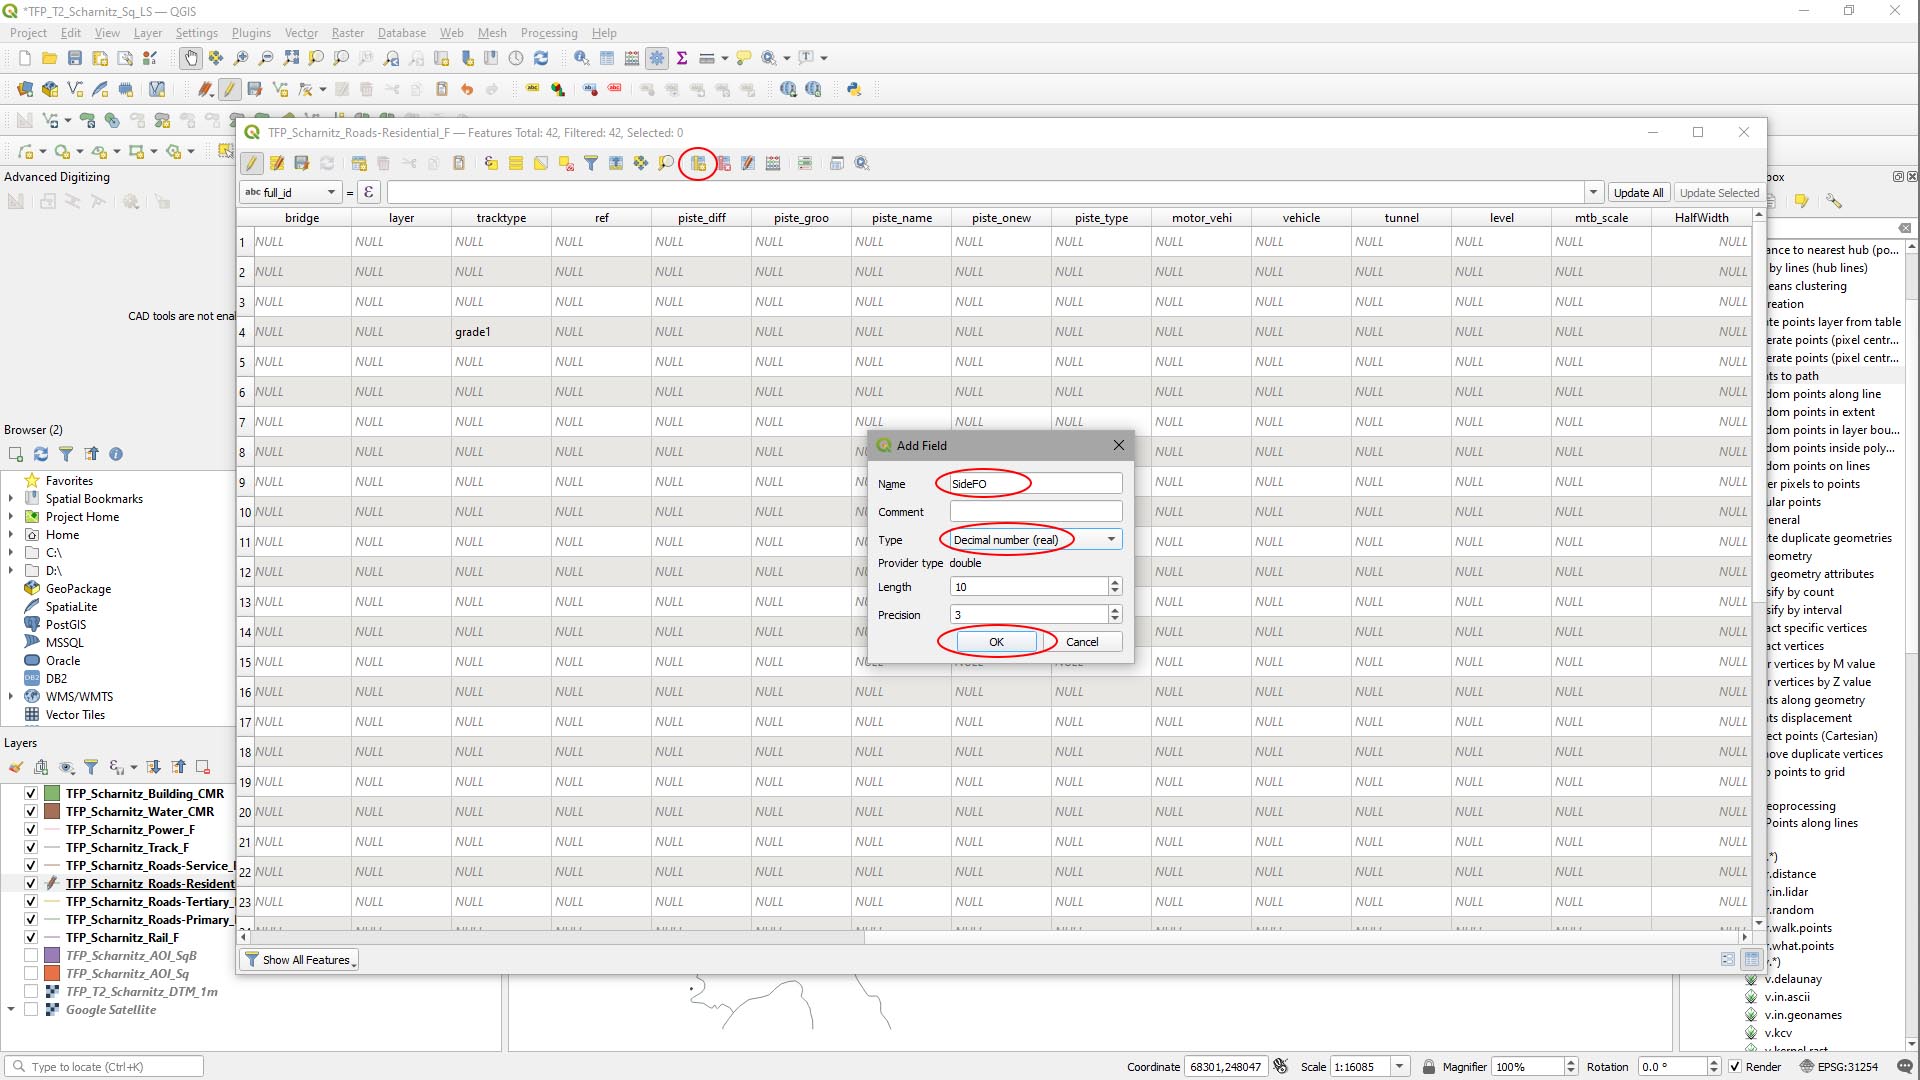
Repeat the above to create a Side Falloff field.
- In the Name field, type SideFO.
- Set Type to Decimal Number (Real).
- We’ll leave Length and Precision.
- Click OK.
Step 3
Add attribute values.
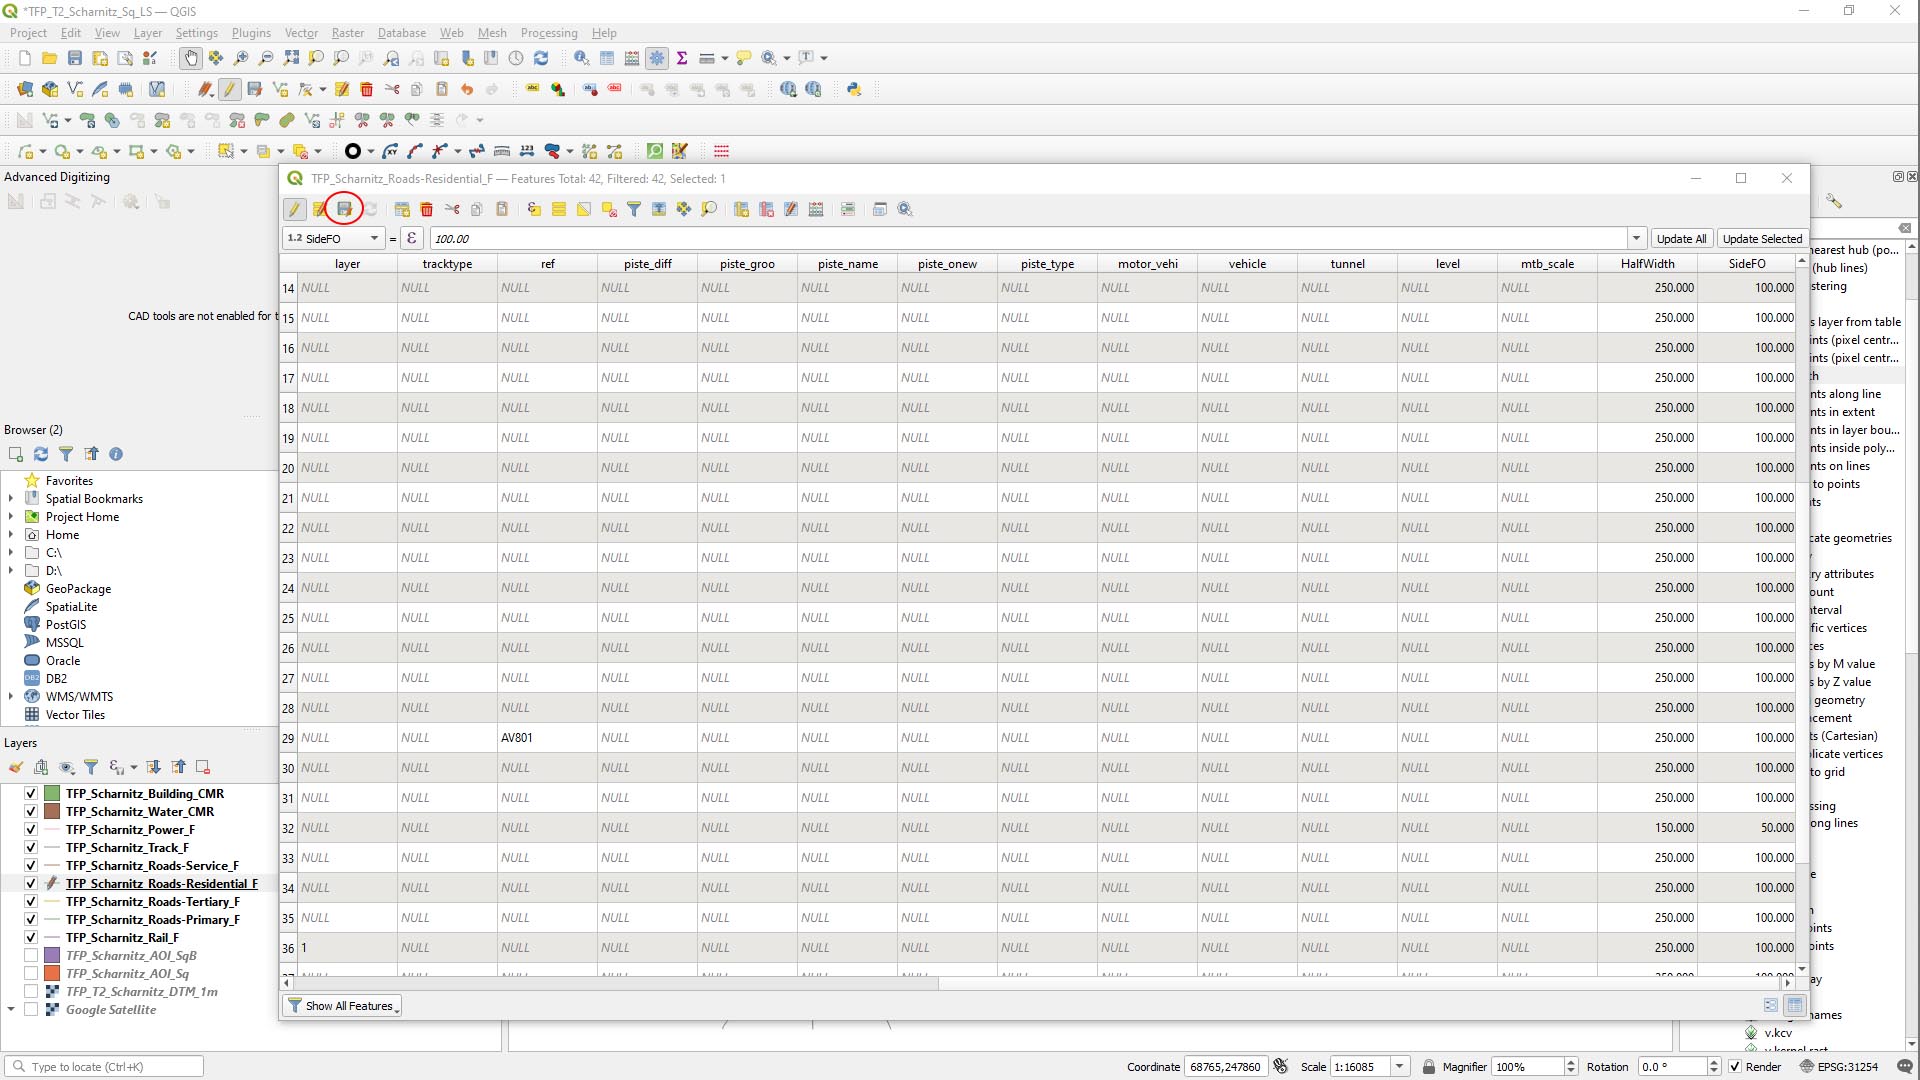
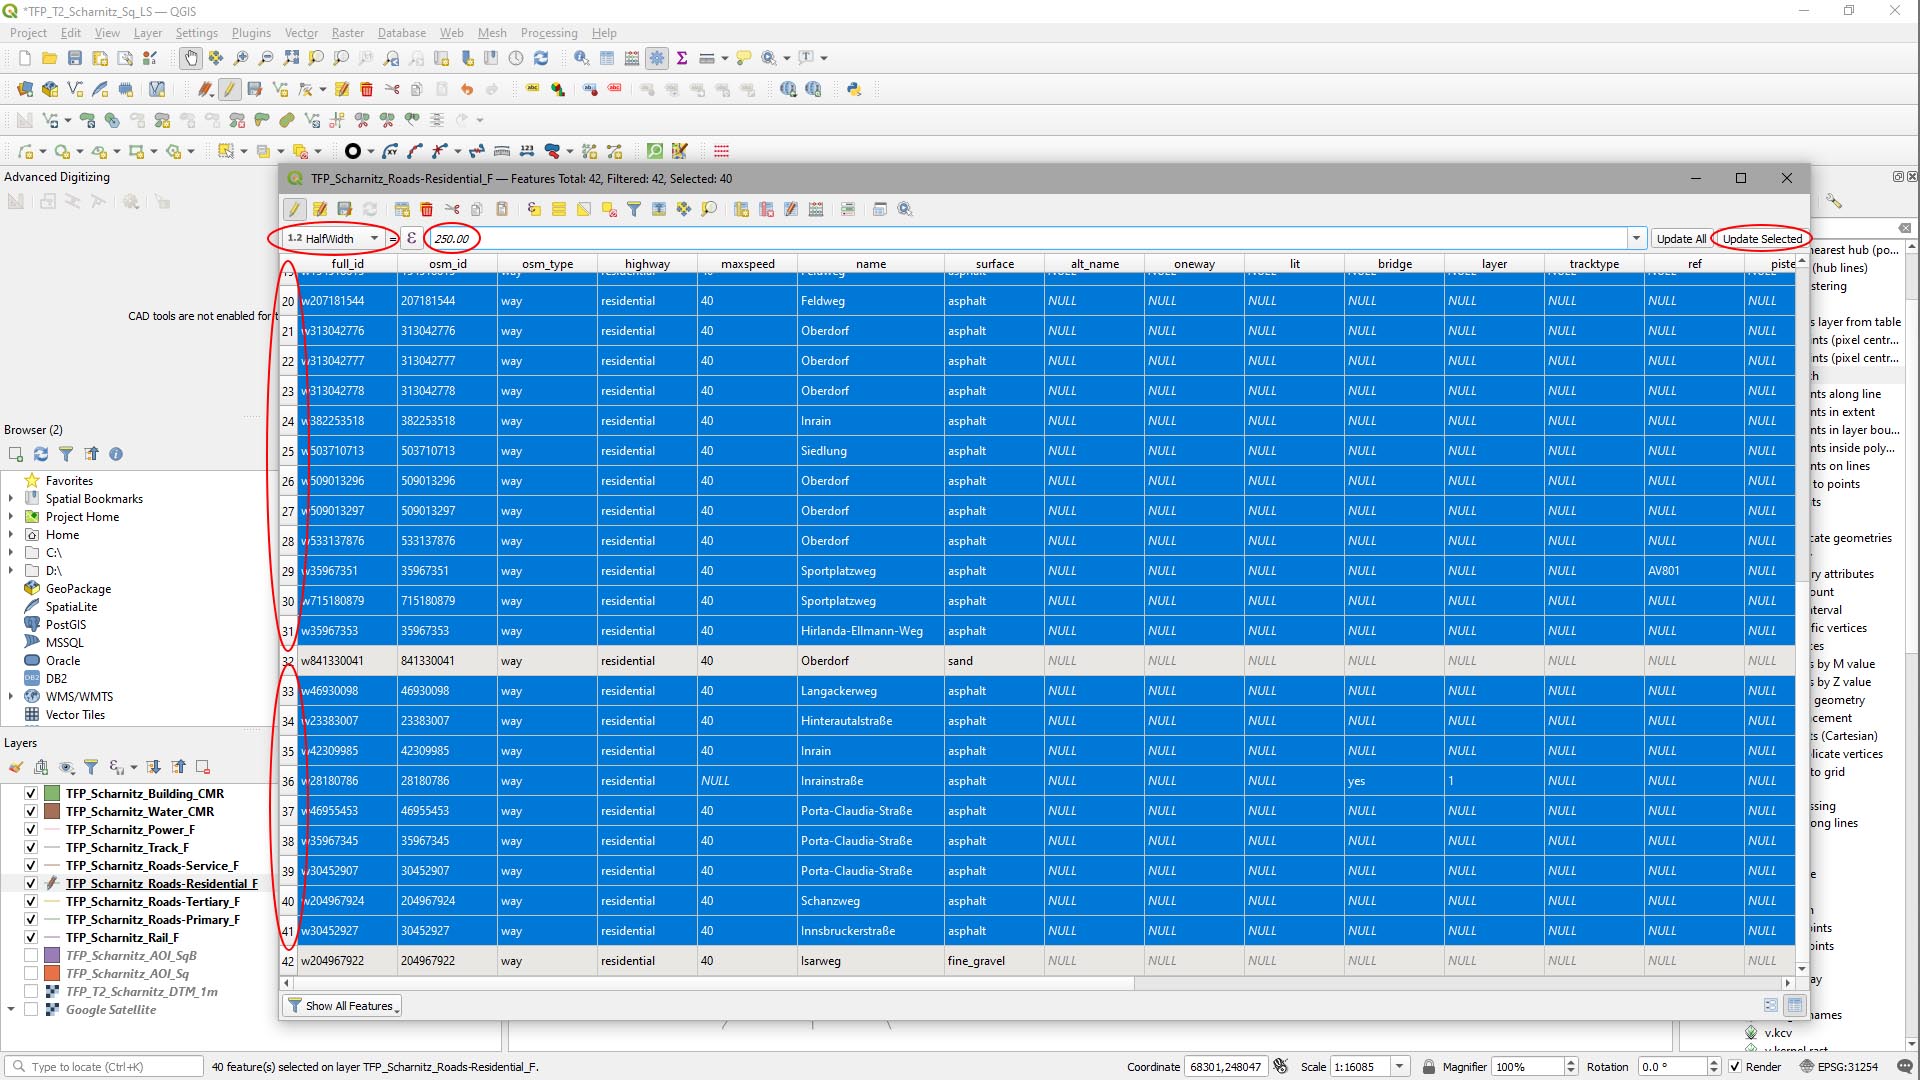
Most of the residential roads are asphalt, but there’s also a sand road and a fine gravel road. To keep things simple, we’re going to set the Half-Width value for all the asphalt roads to 250cm.
- Select all the Asphalt roads by holding [CTRL] and clicking on the numbers to the left of the table.
- Change the Field Selector drop down to HalfWidth.
- Type 250.00 in the Attribute Value field.
- Click Update Selected.
Step 4
Edit remaining half width values.
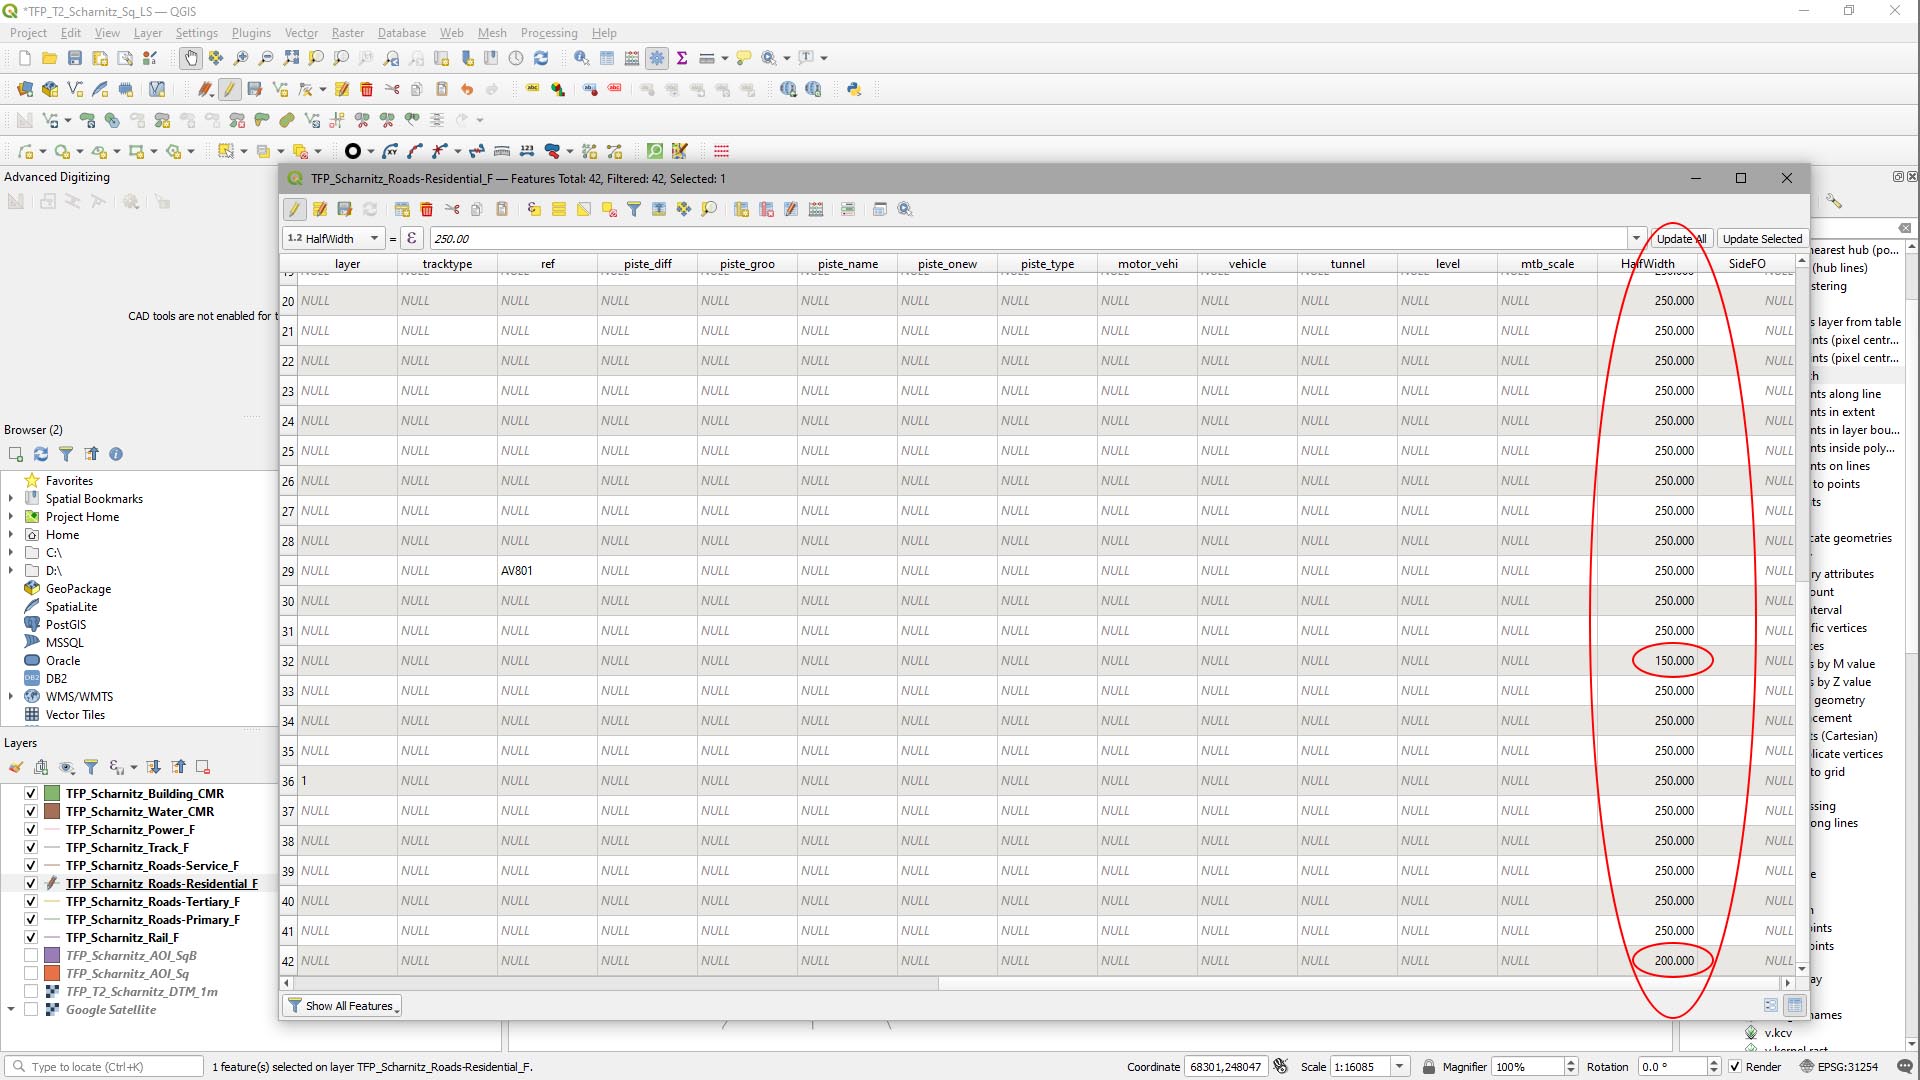
Scrolling to the right, we can see the HalfWidth attribute values have been filled in.
We’ve also manually typed in the values 200 for fine_gravel and 150 for the sand surface roads.
Step 6
Add attribute values for side falloff.
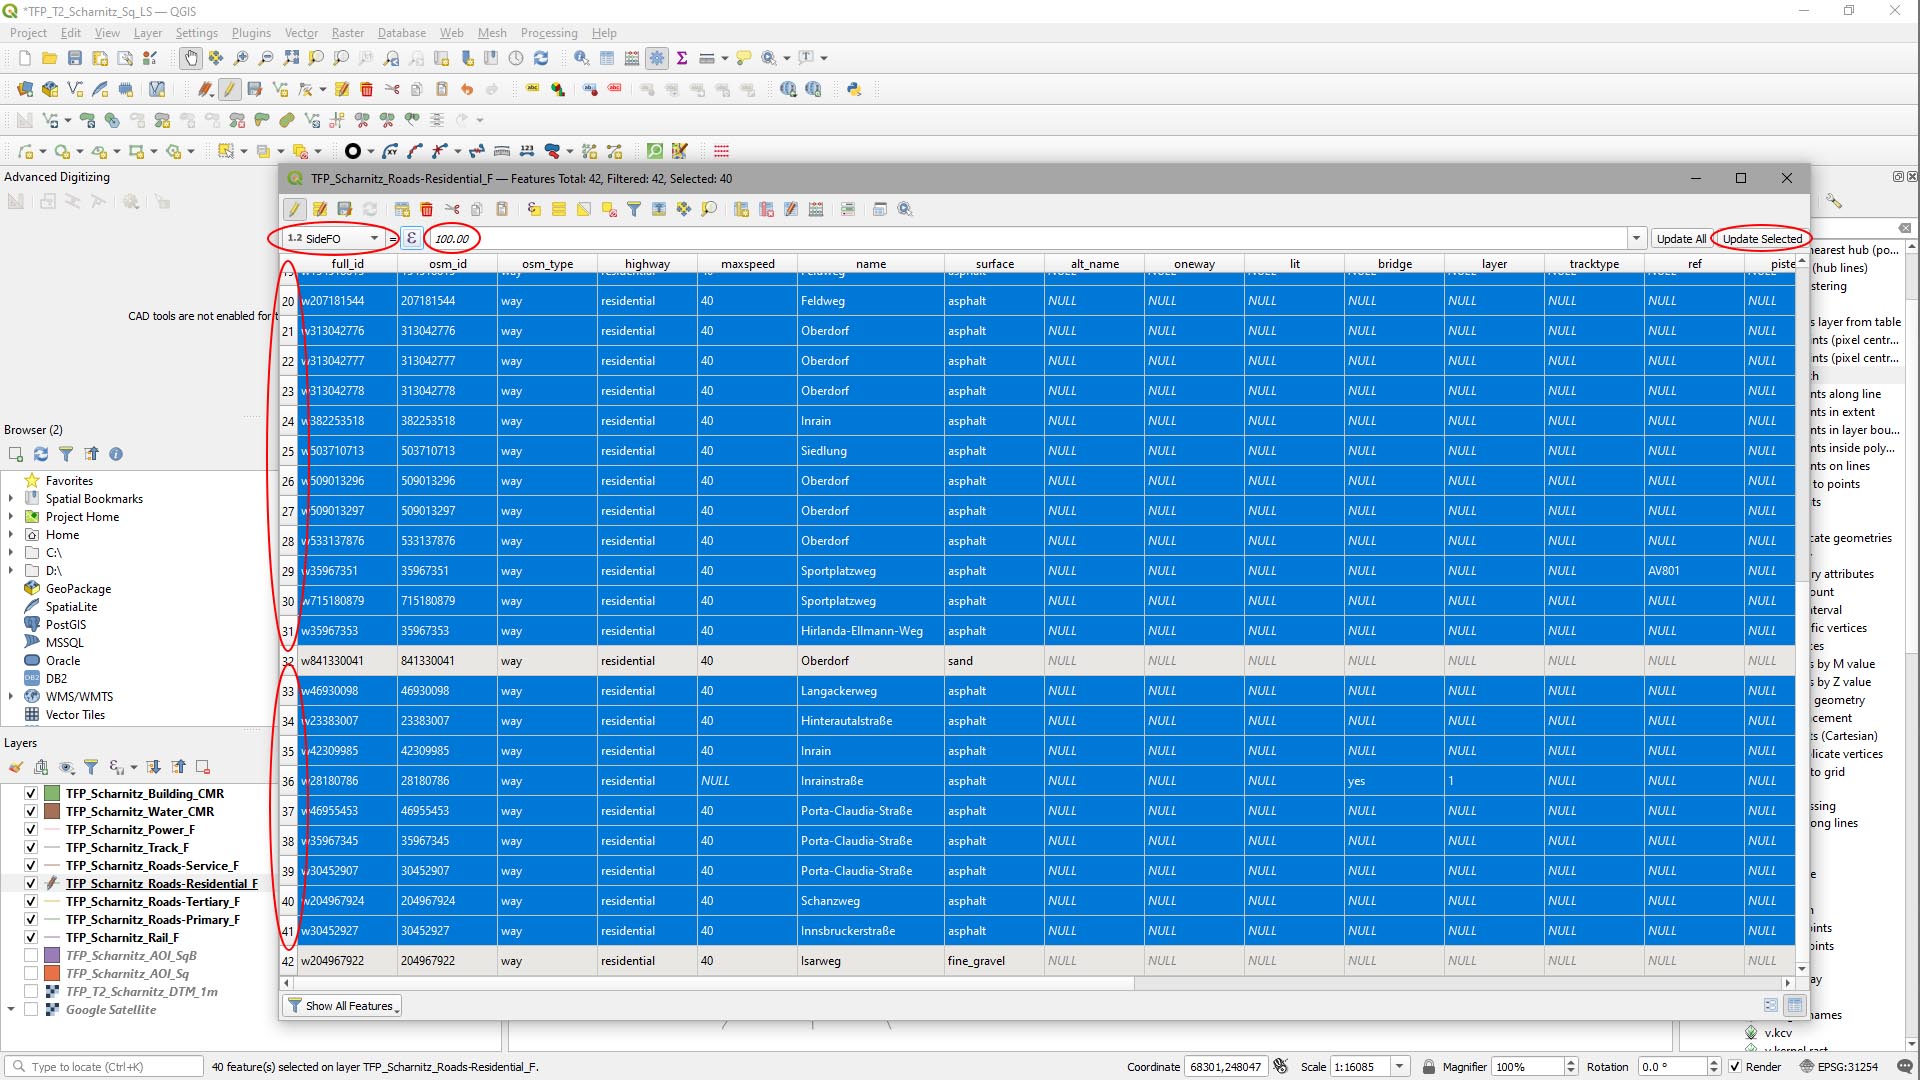
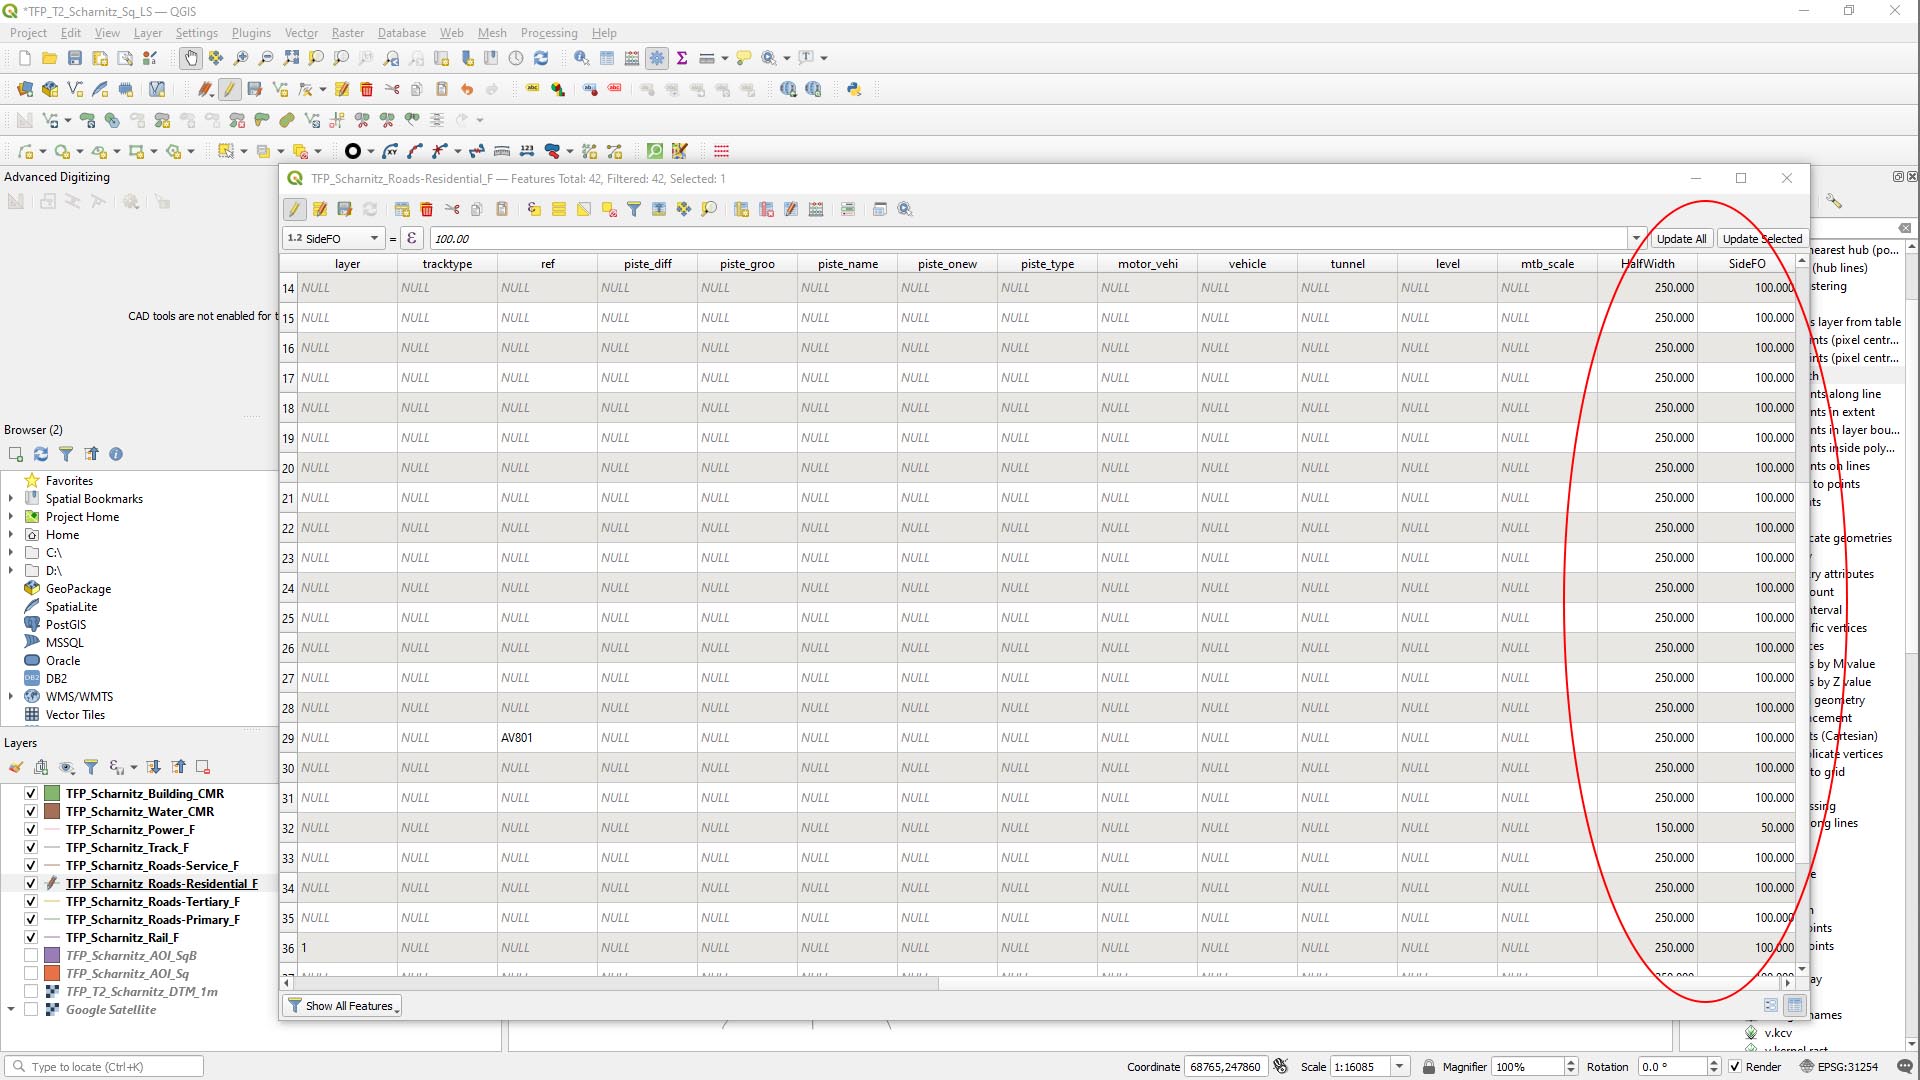
We’re going to set arbitrary values here of 100cm for asphalt roads, and 50cm for sand and fine gravel.
- Select all the Asphalt roads by holding [CTRL] and clicking on the numbers to the left of the table.
- Change the Field Selector drop down to SideFO.
- Type 100.00 in the Attribute Value field.
- Click Update Selected.
- Scroll right and edit the sand and fine gravel side falloff attributes to 50.000.
It should look like this:
Step 7
Finally we need to save our modifications to attribute table.
- Click the Save Edits button on the Attributes Table main toolbar.