How Can We Help?
Rivers: Adding Water
To add water to our river, we’re going to need a river spline blueprint. Fortunately there’s a good one on the UE4 Marketplace called River Tool.
To push GIS data into the blueprint using TerraForm, we need to make a couple of minor modifications:
MODIFY RIVER TOOL
We need to reparent the blueprint to a TerraForm Spline Actor class, then replace the existing spline component with the Spline Component inherited from TerraForm Spline Actor class.
Step 1
Make a copy of the river shader blueprint to edit.
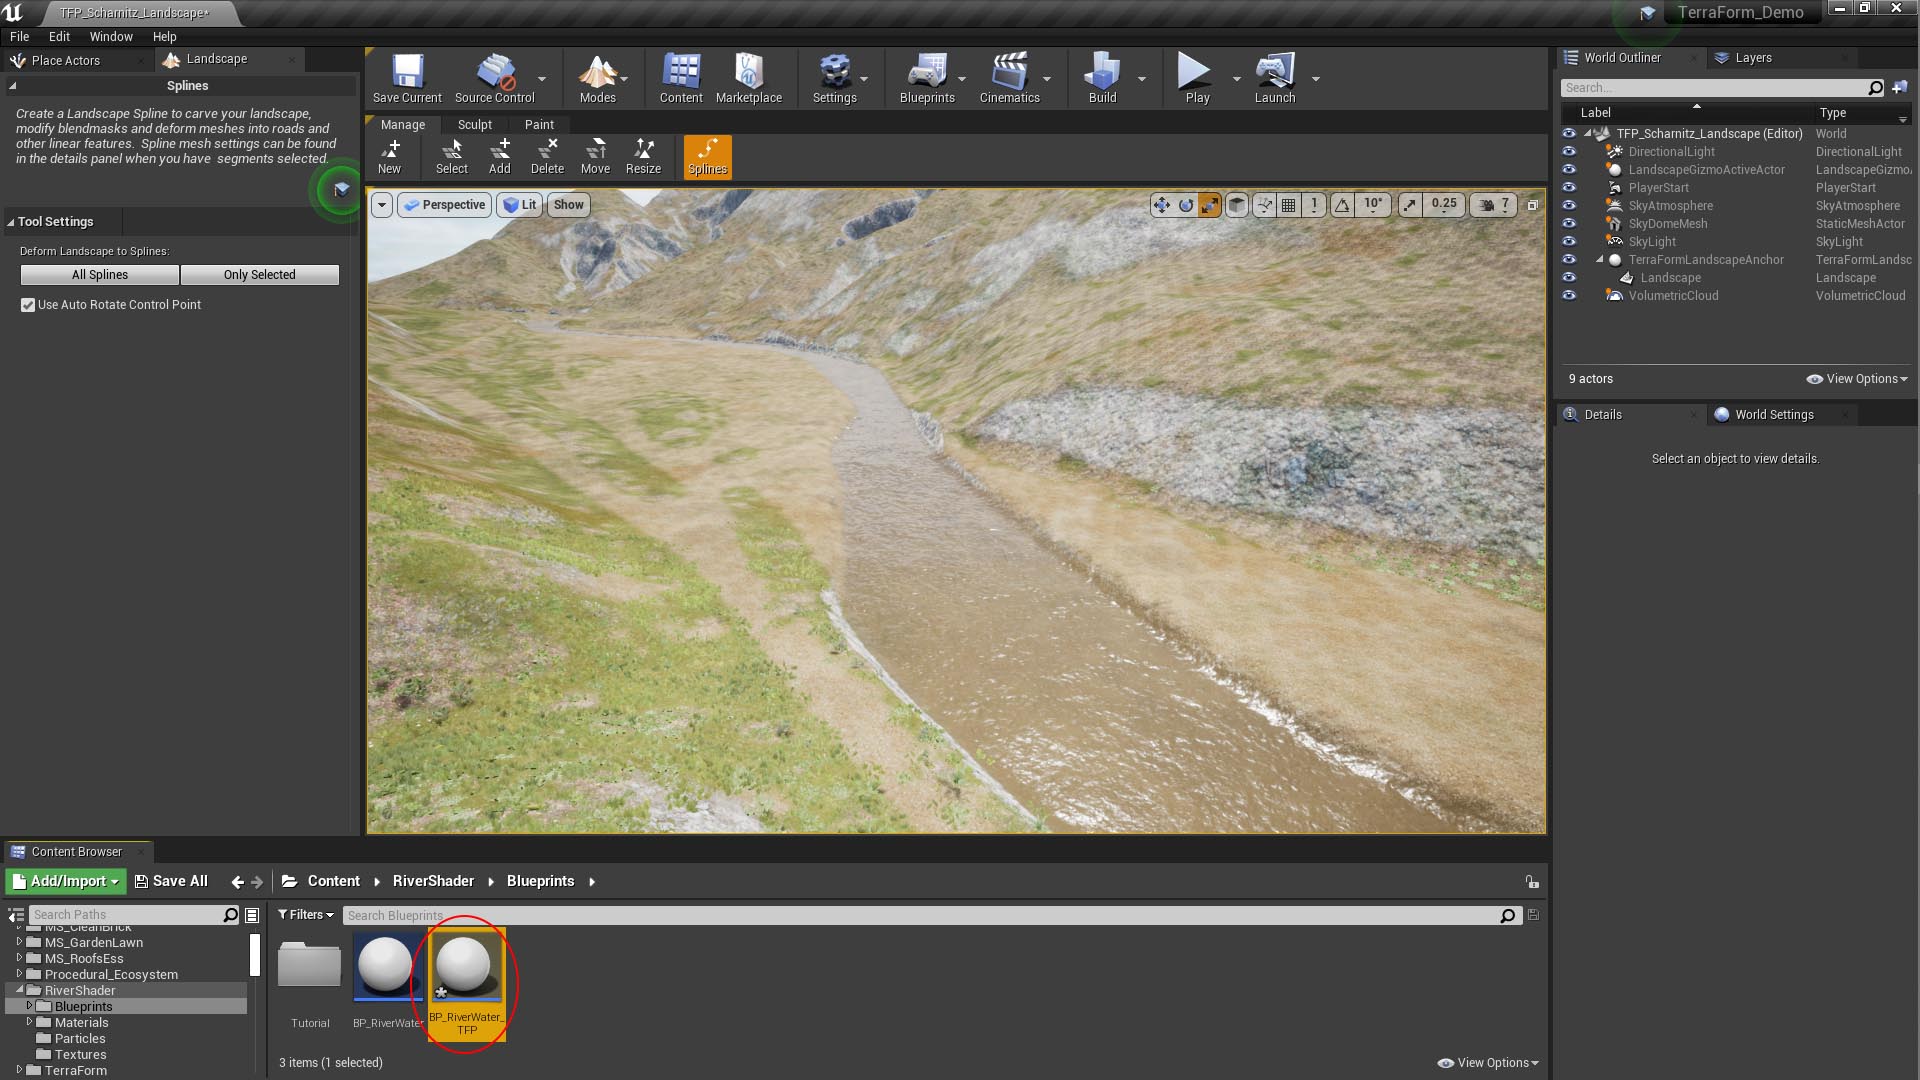
- Once you’ve added River Tool to your project, navigate to it’s Blueprints folder.
- [Right-Click] the BP_RiverWater blueprint and select Duplicate to create a copy and name it BP_RiverWater_TFP.
Step 2
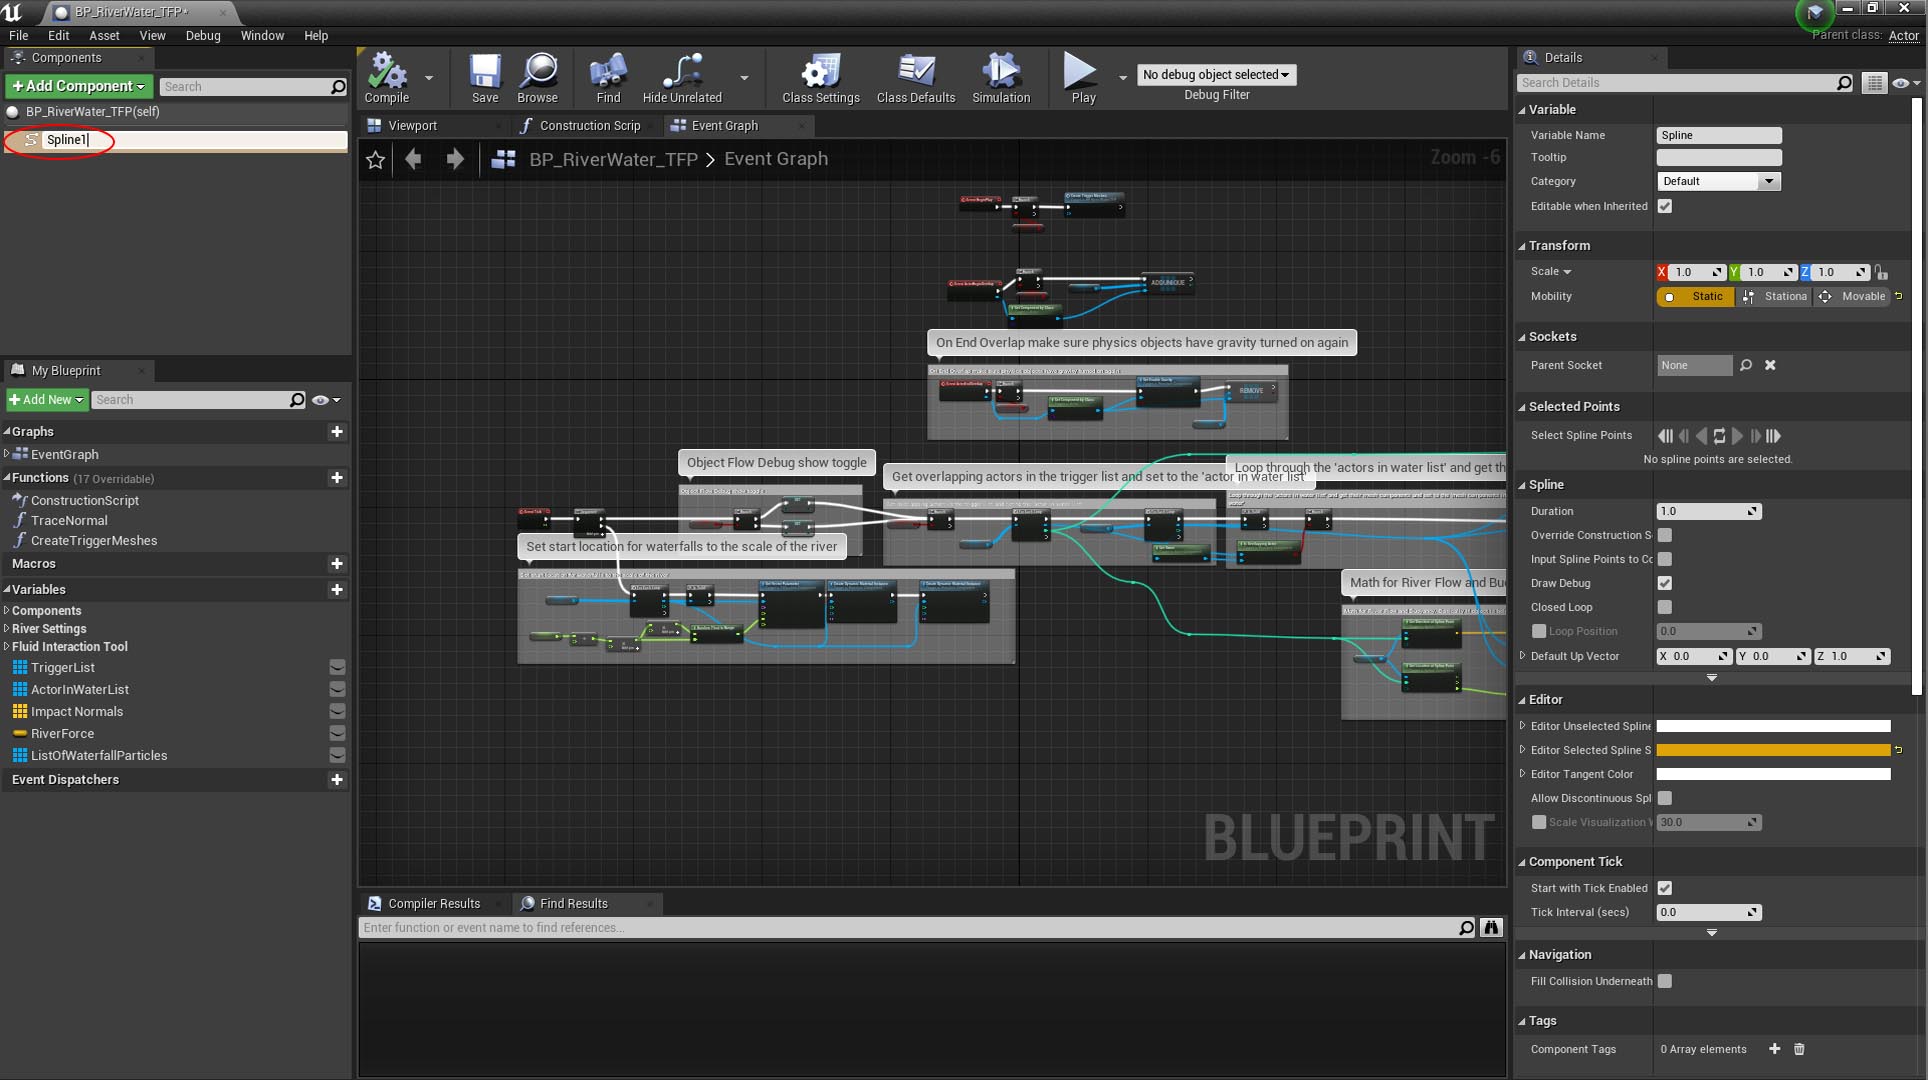
Rename the existing spline component.
- In the Components panel on the left, click Spline to select it, then click it again to enable you to edit the name.
- Rename it to ‘Spline1‘.
Step 3
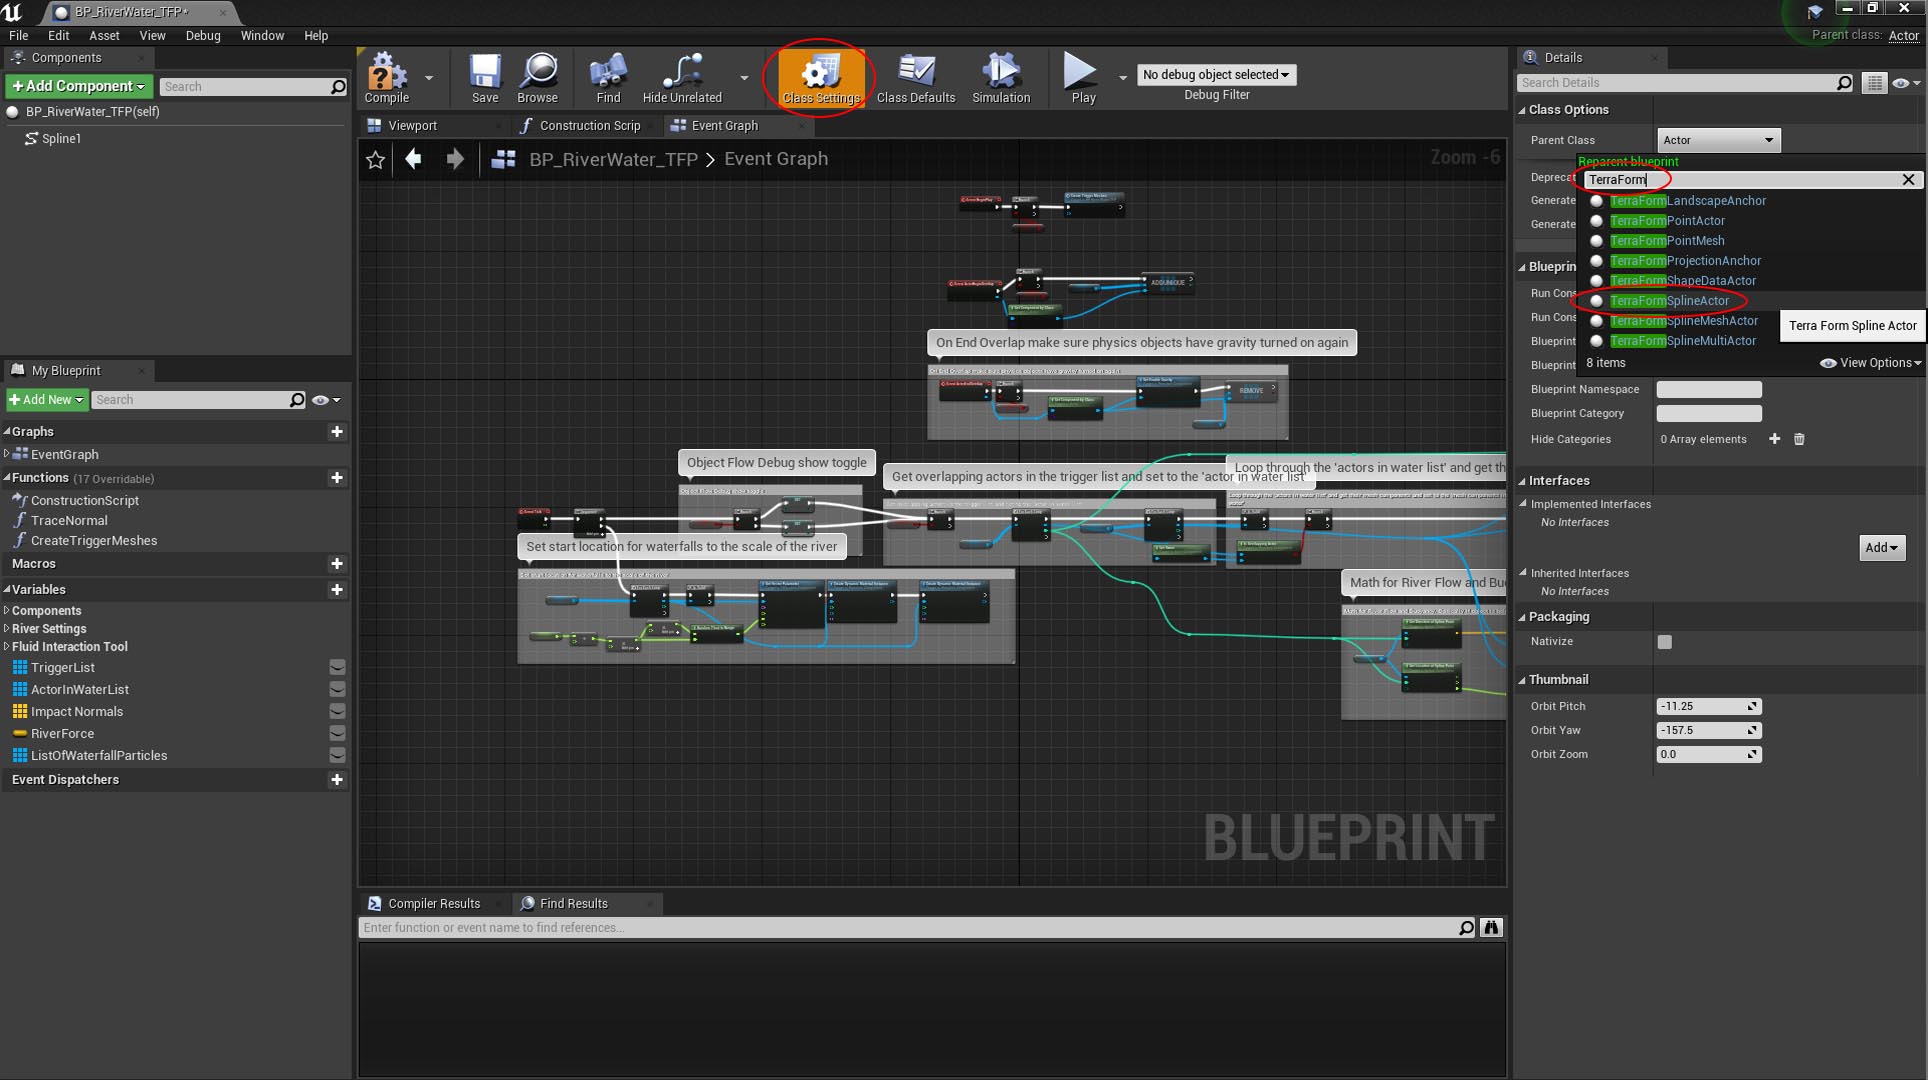
Reparent the blueprint to TerraFormSplineActor.
- On the menu above the graphs, select Class Settings.
- In the Class Options settings to the right, click the Parent Class drop-down and type ‘TerraForm‘ in the Search box, then select TerraFormSplineActor.
Step 4
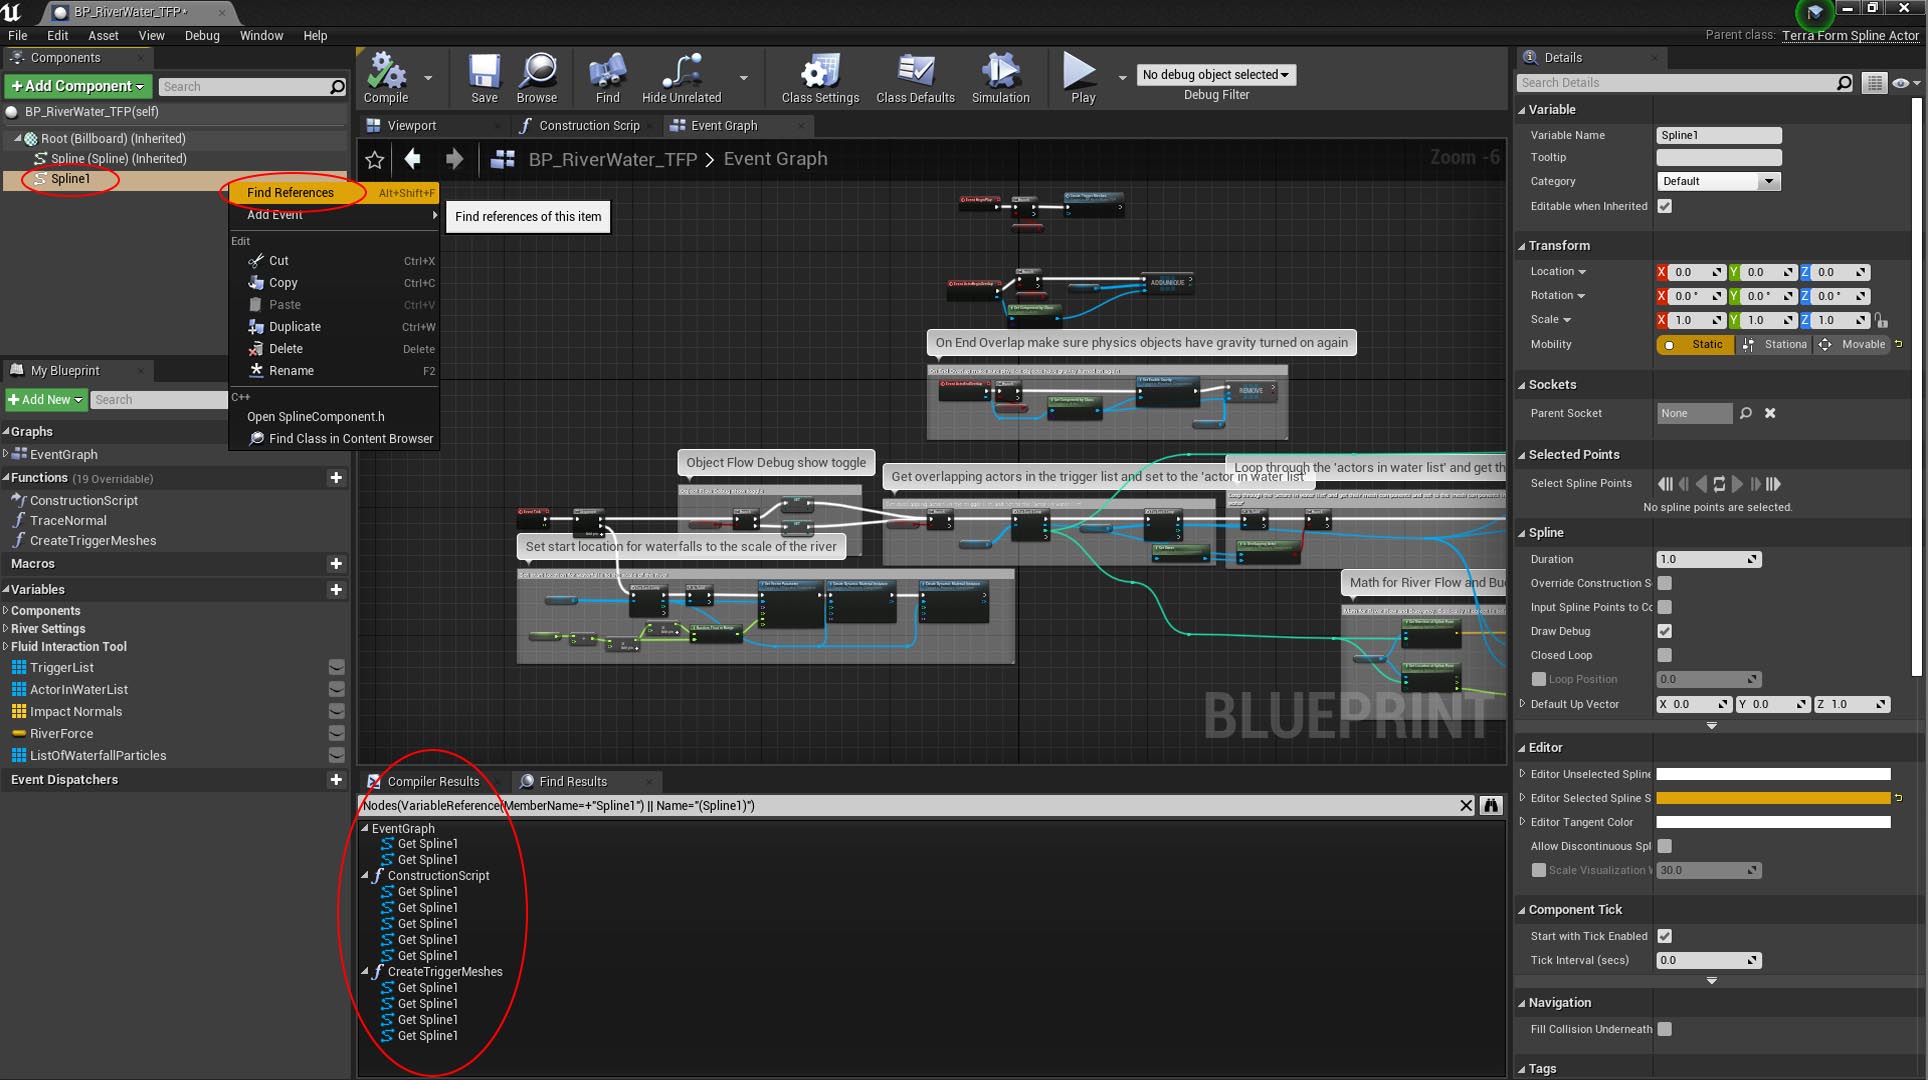
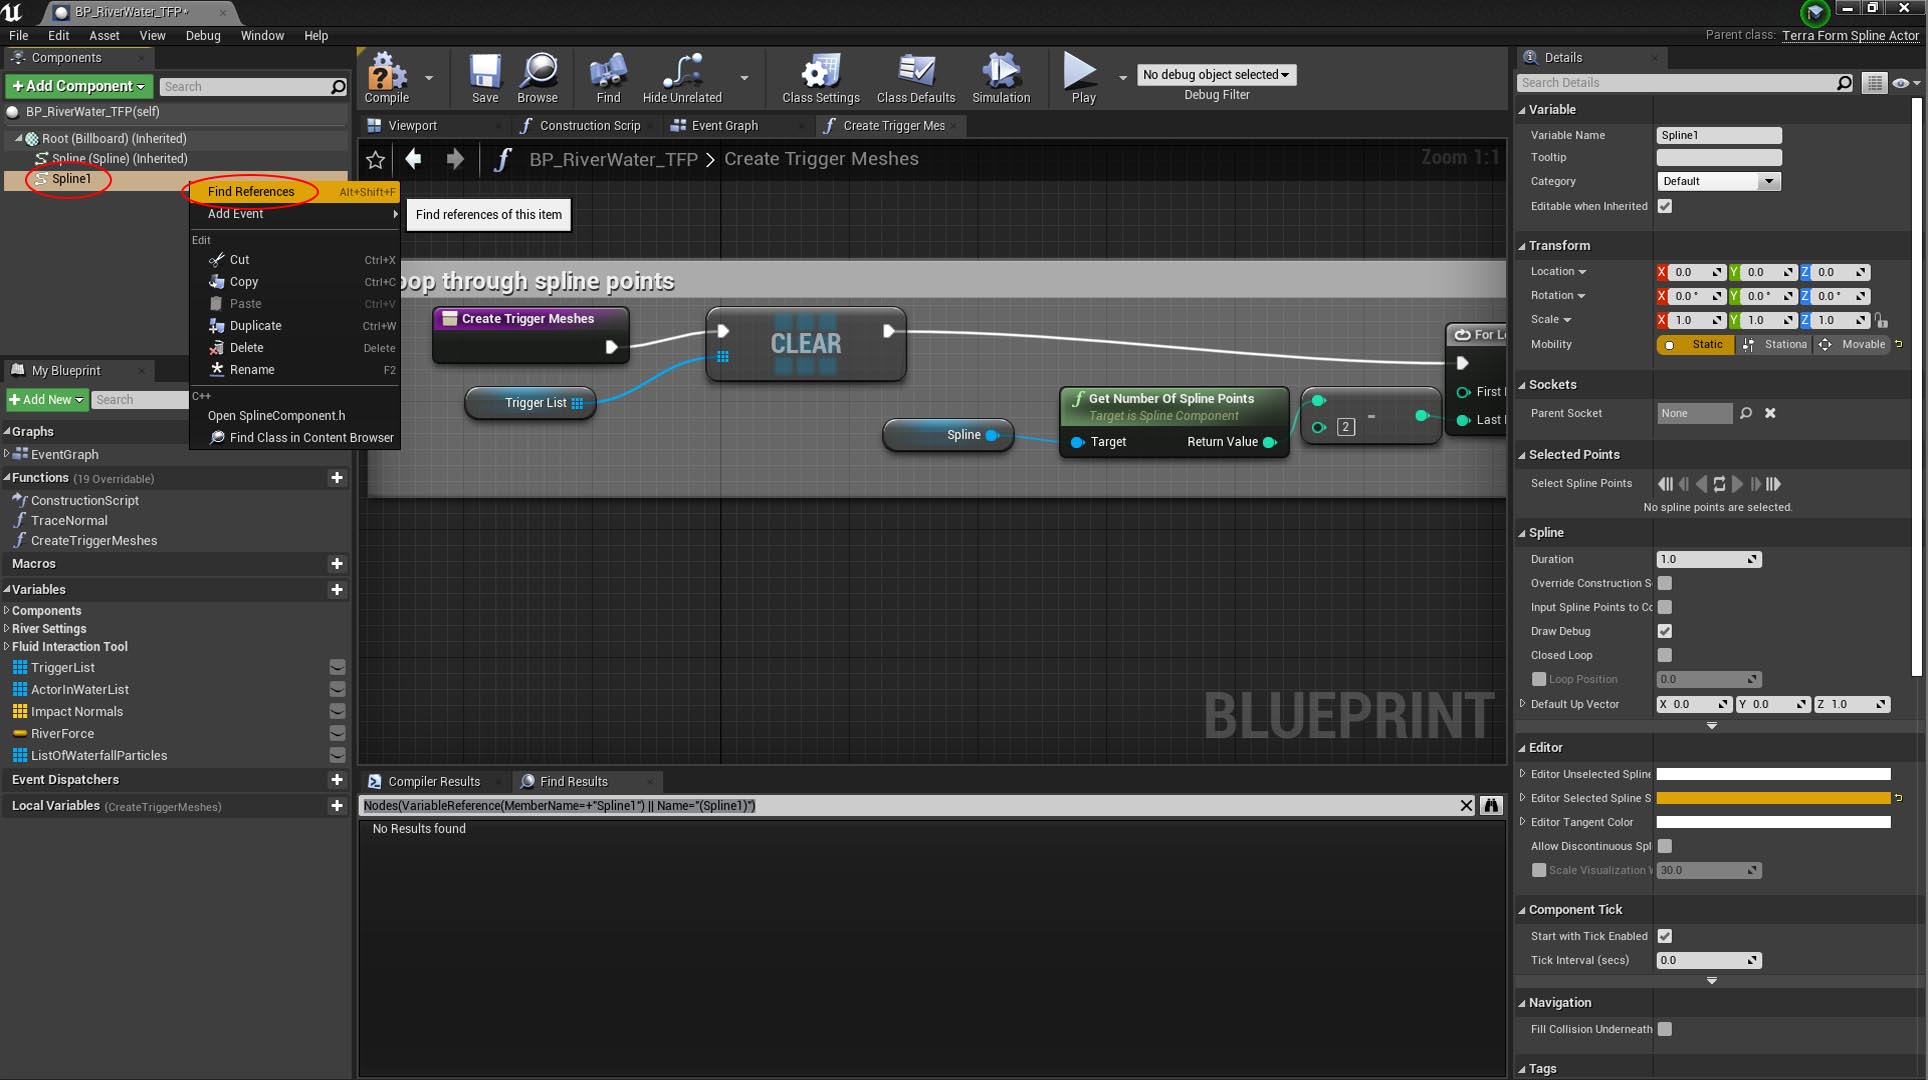
Find references to the existing spline component.
- Next, [Right-Click] the Spline1 component and select ‘Find References‘.
- A Find Results panel will appear with the references to Spline1 listed.
Step 5
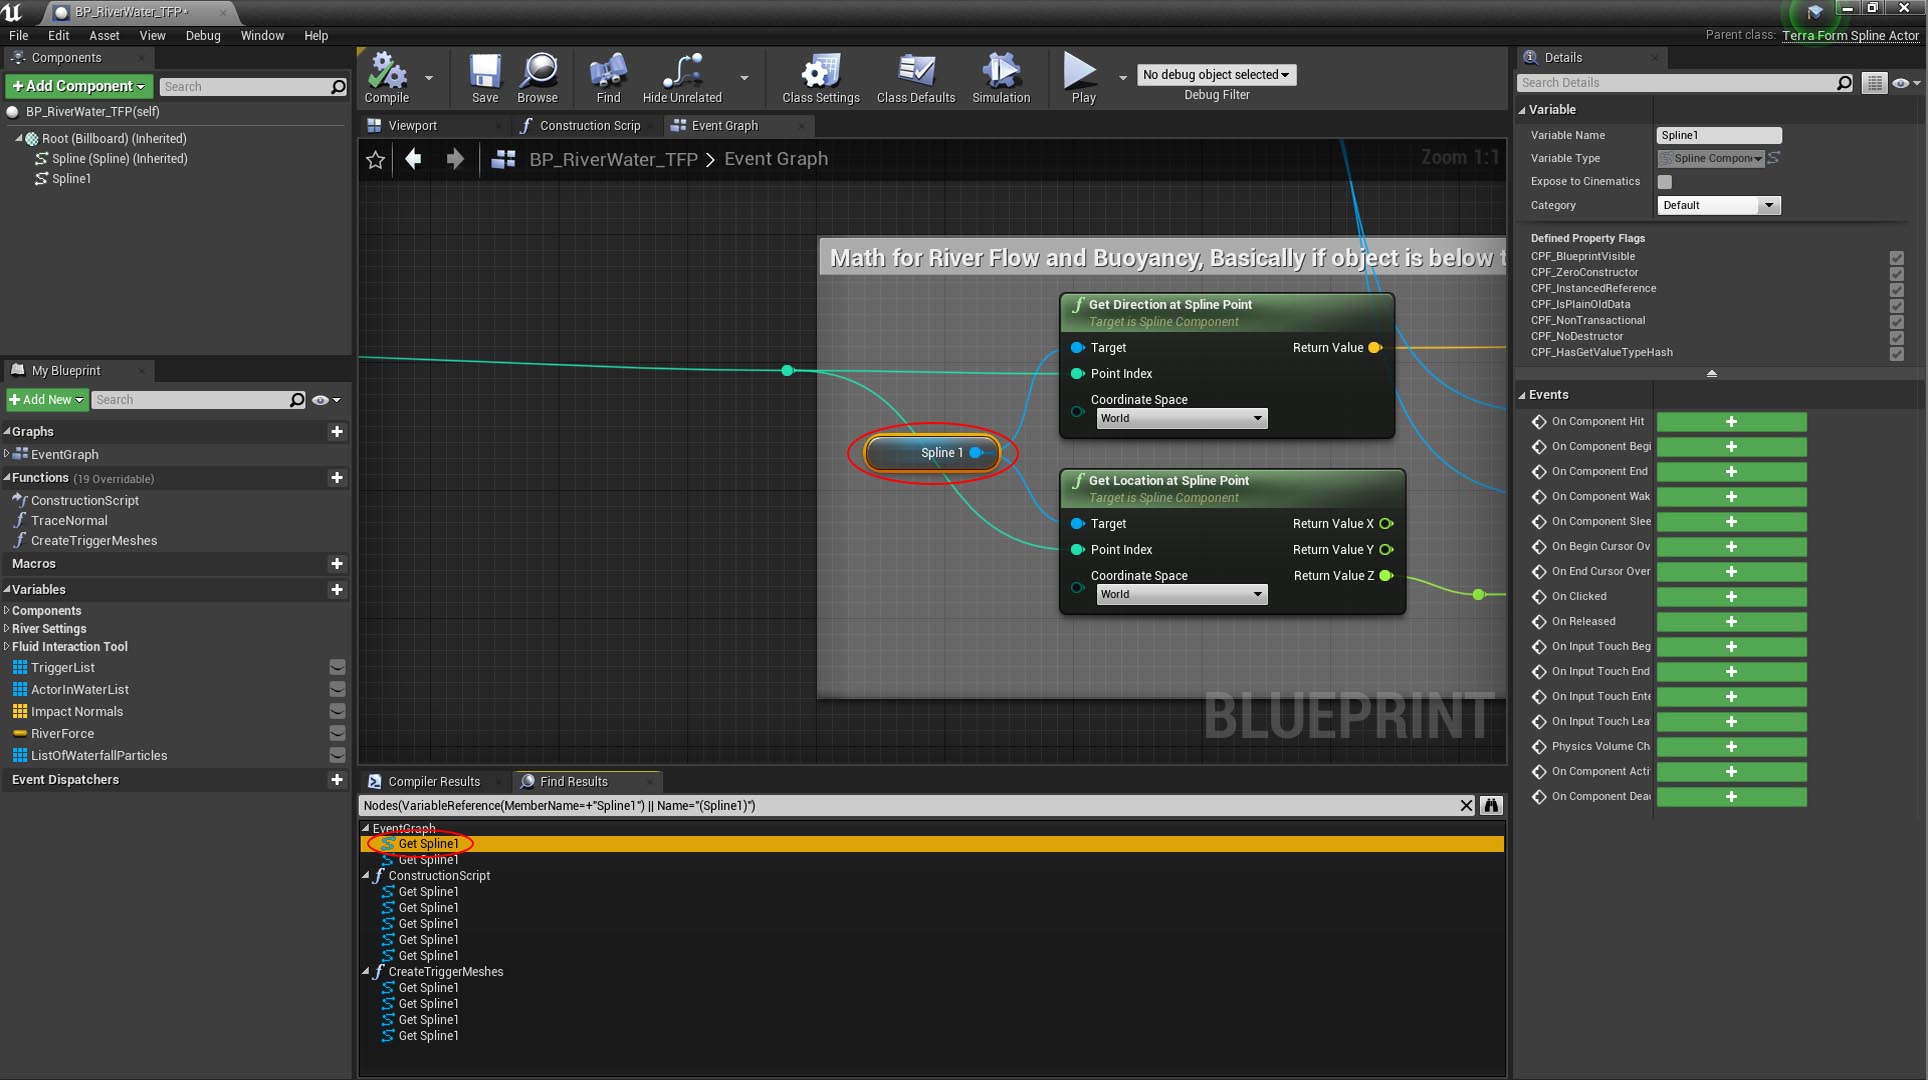
Replace references to the existing spline component.
- [Double-Click] the first reference in the list. The blueprint editor will jump to its location.
- A Find Results panel will appear with the references to Spline1 listed.
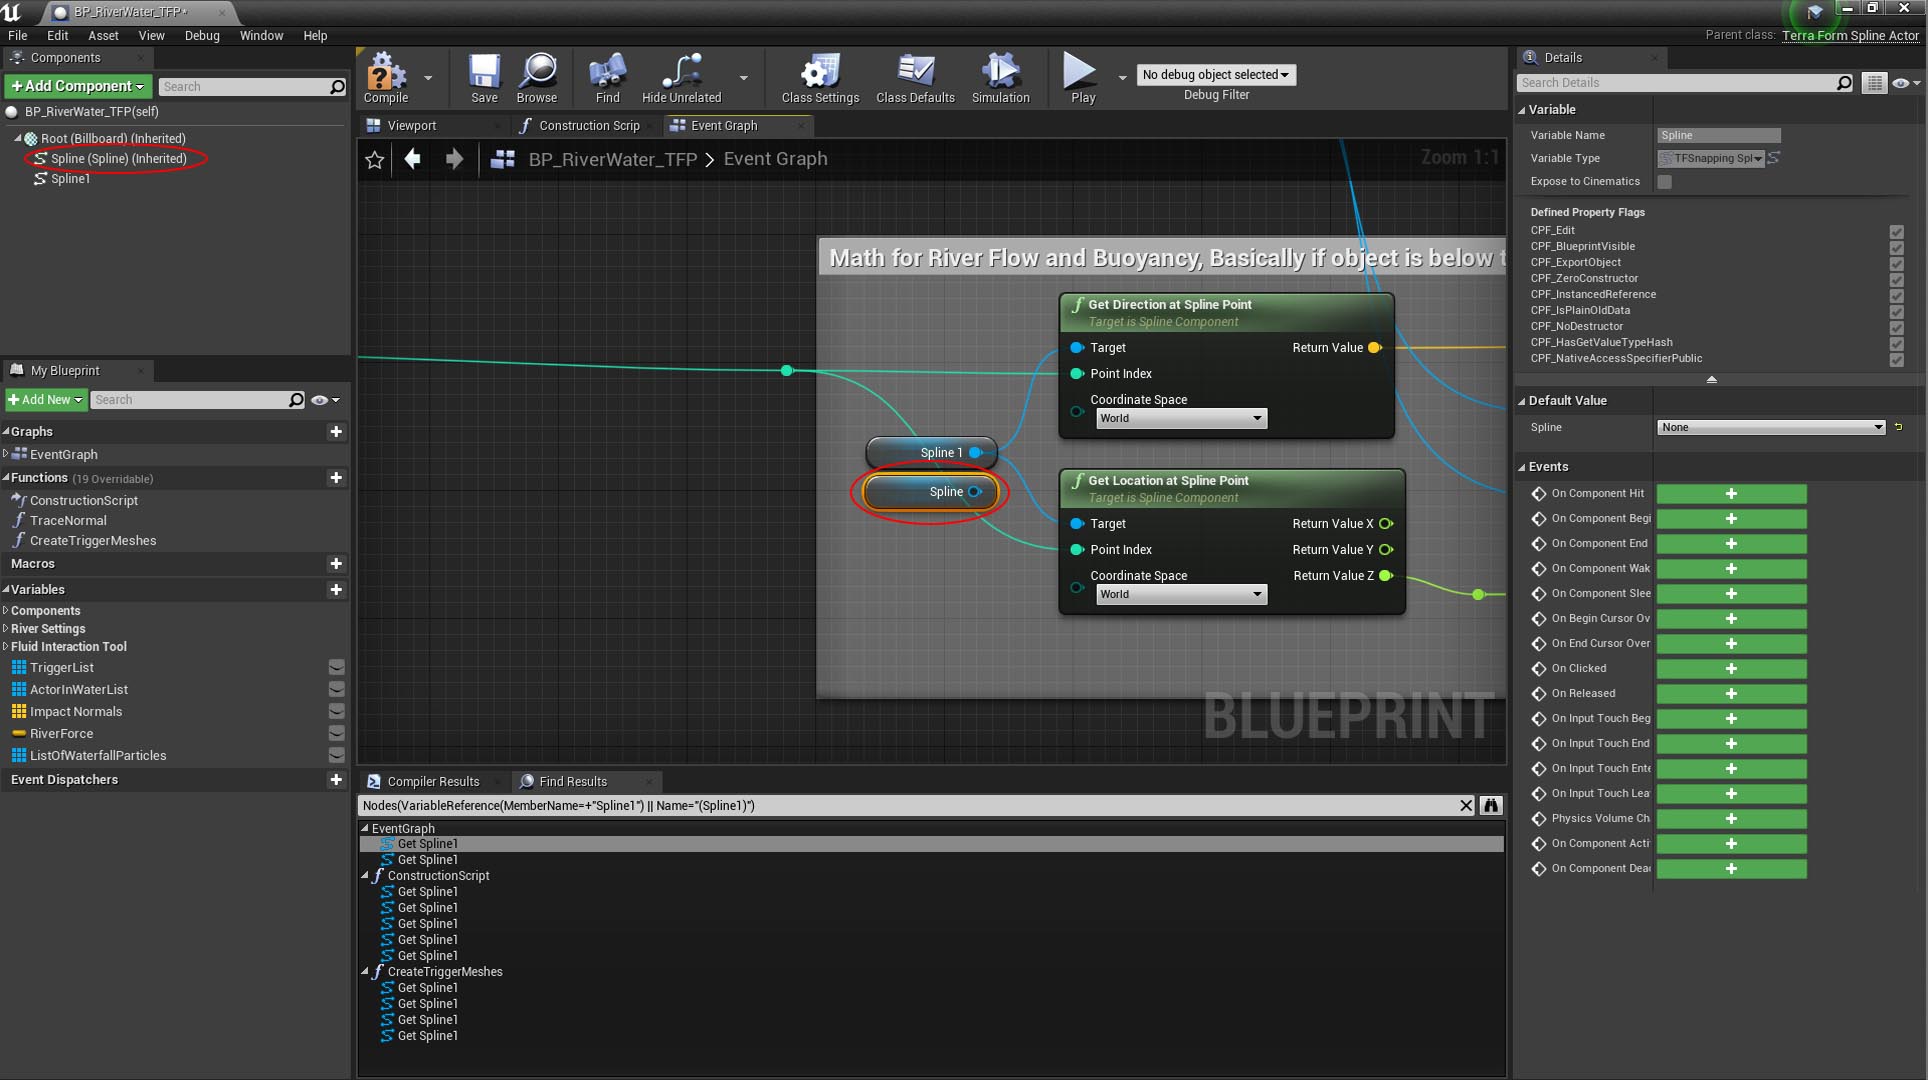
- Click on and drag the Inherited Spline Component next to the reference to Spline1.
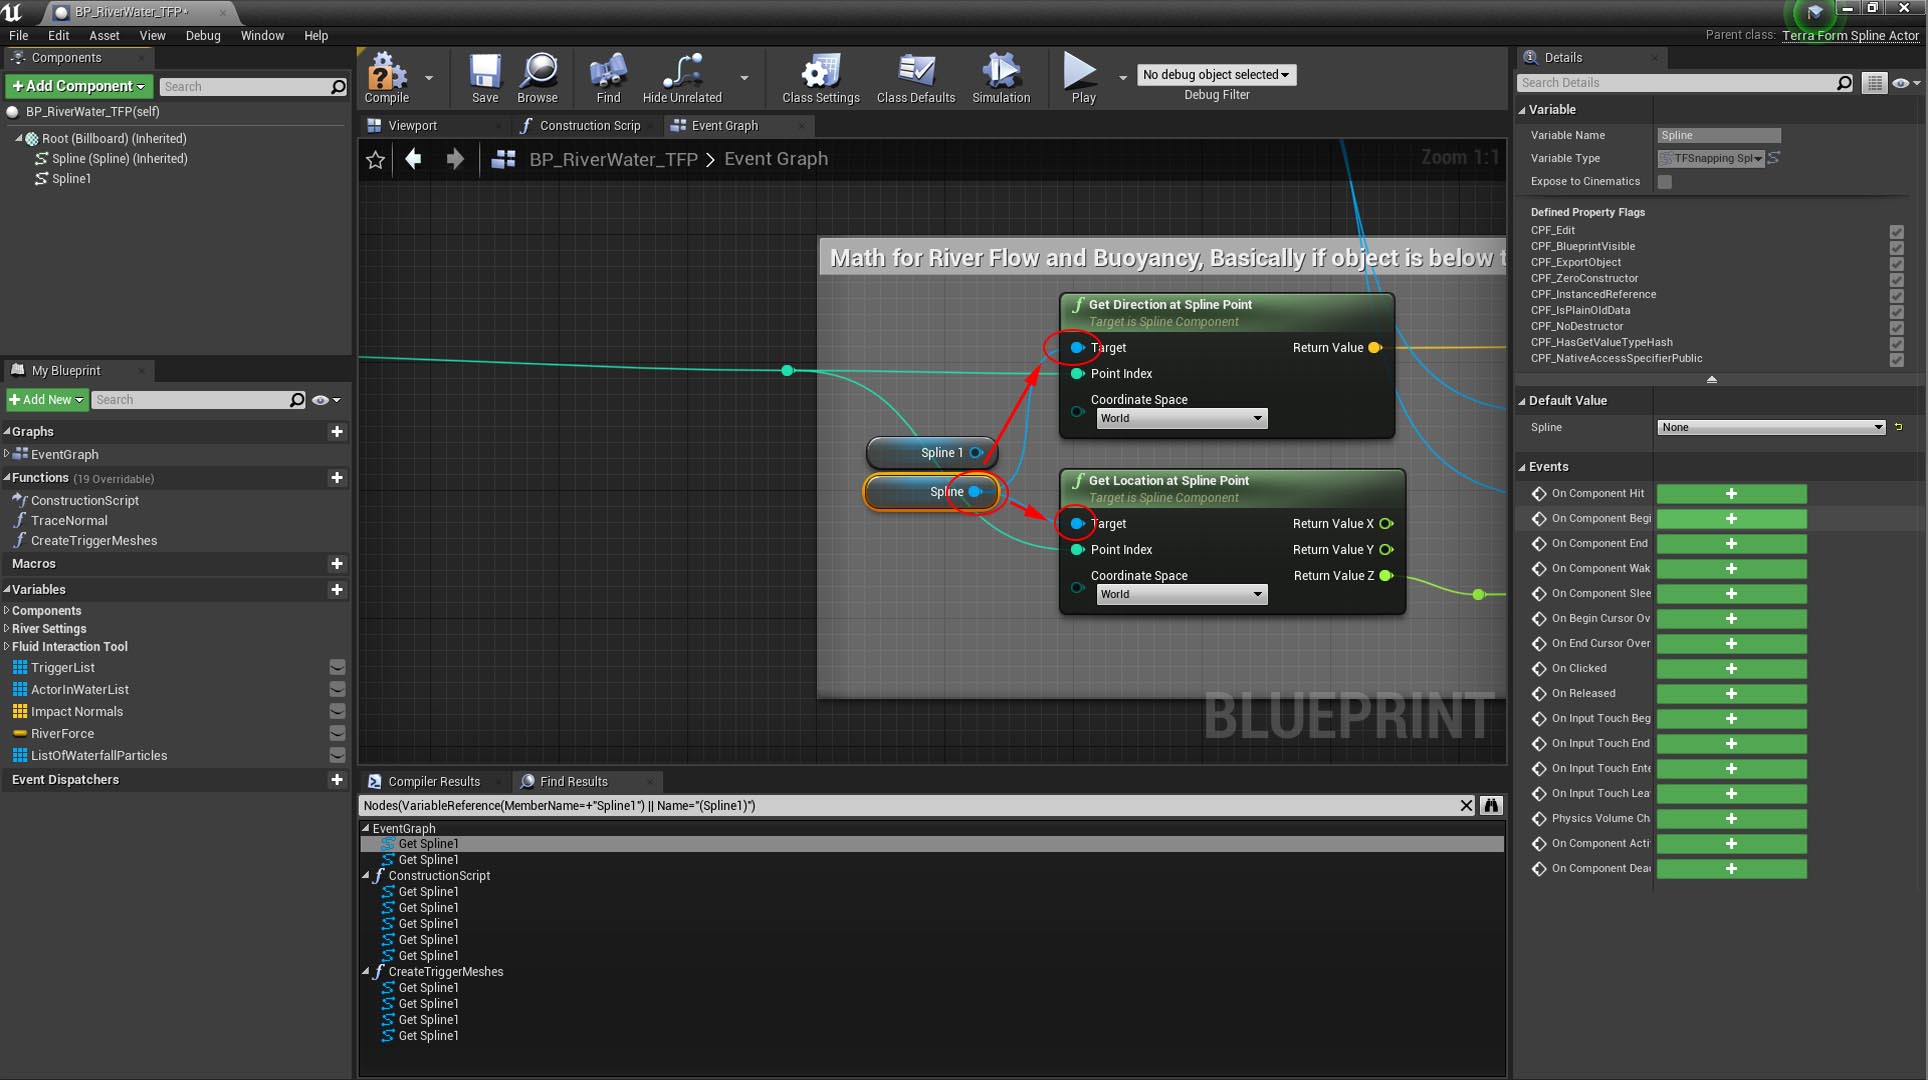
- Next, click on and drag the pin connector from the new Spline component to replace the connections for the Spline1 spline component.
- Delete that reference of Spline1 in the graph.
- Repeat the above by replacing the other references listed in the Find Results window, deleting those you’ve replaced along the way.
- When you’re done, [Right-Click] the reference to Spline1 in the Components panel and select Find References again.
- You should find the Find Results panel now reports No Results Found.
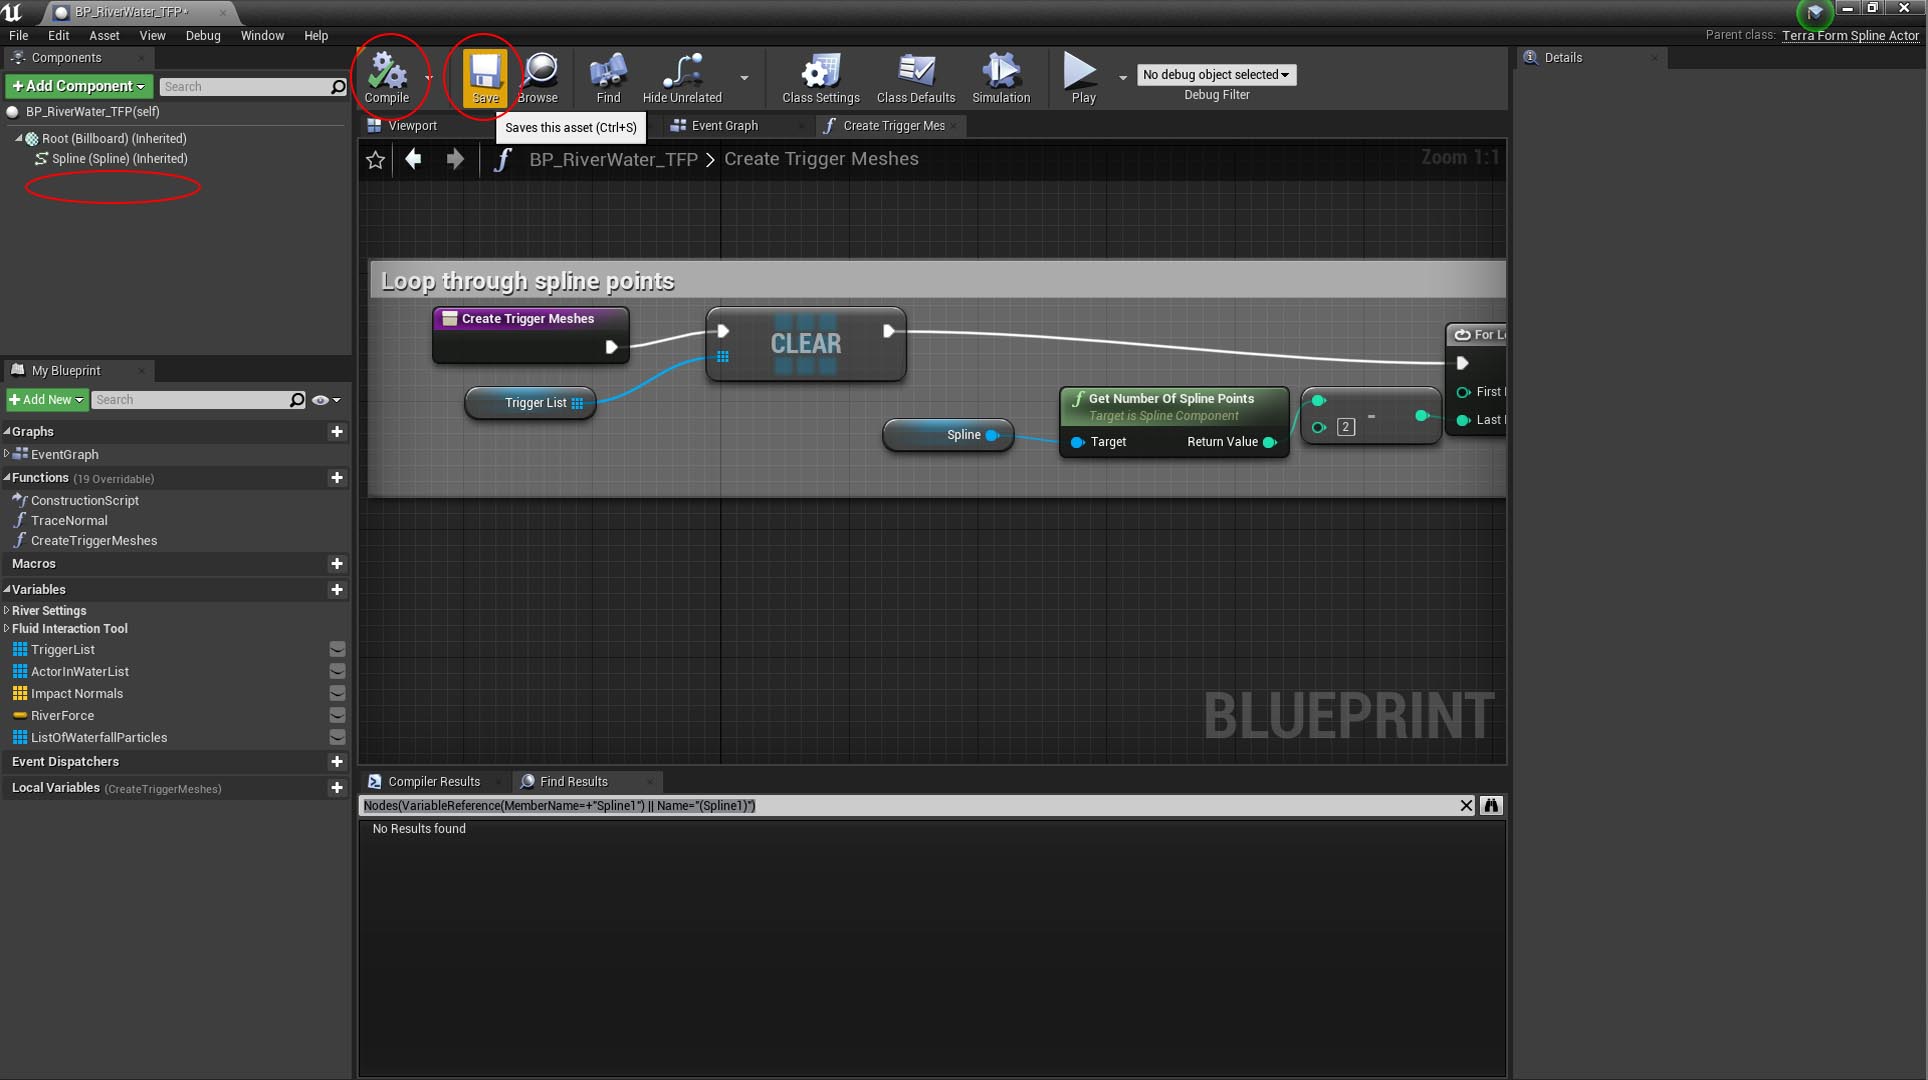
Step 6
Delete the original spline component, then compile and save the blueprint.
- Select the Spline1 component in the Components panel, then hit Delete.
- Click Compile. The blueprint should compile without errors.
- Click Save.
IMPORT VECTOR DATA INTO BLUEPRINT
The final step in creating rivers is to import the vector data we created into the river blueprint, using TerraForm PRO’s Import Lines as Spline Actors function.
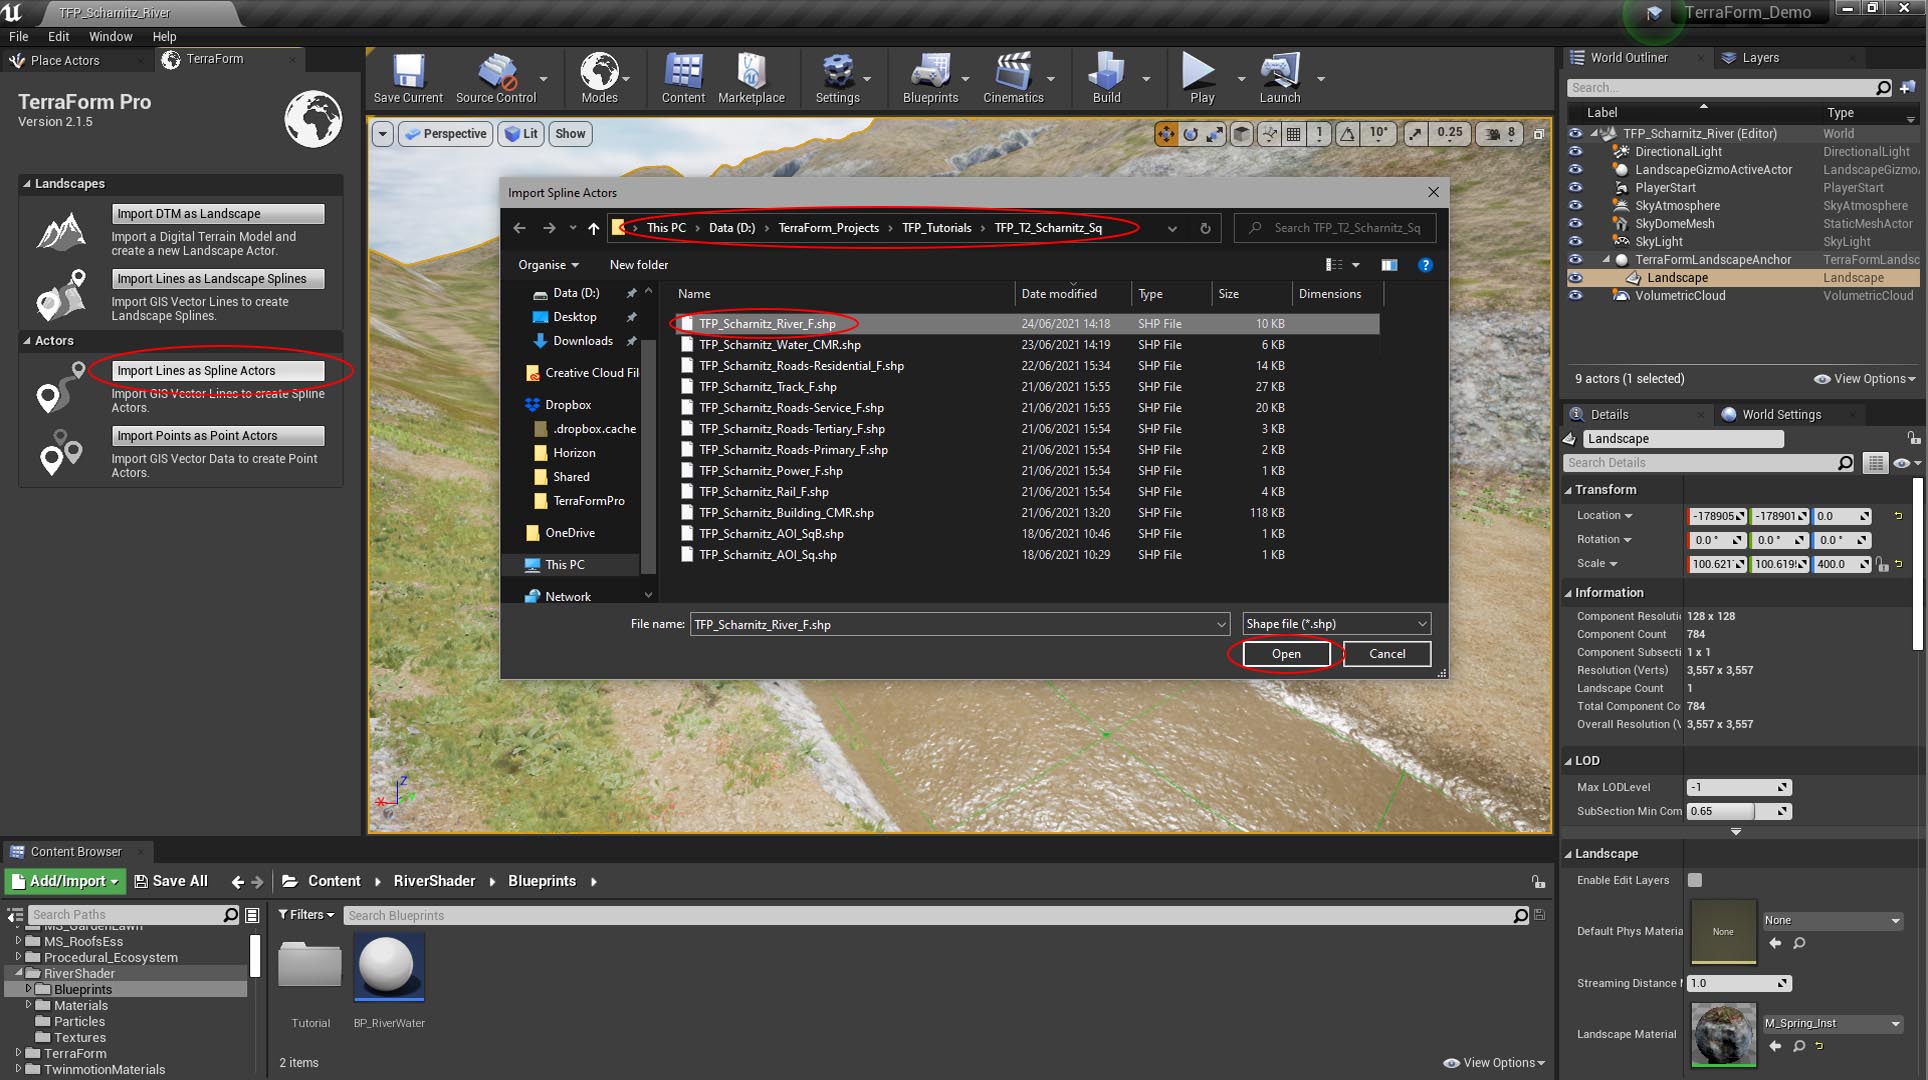
Step 1
Select your landscape and click Import Lines as Spline Actors:
- Navigate to and select your river vector data file, then click Open.
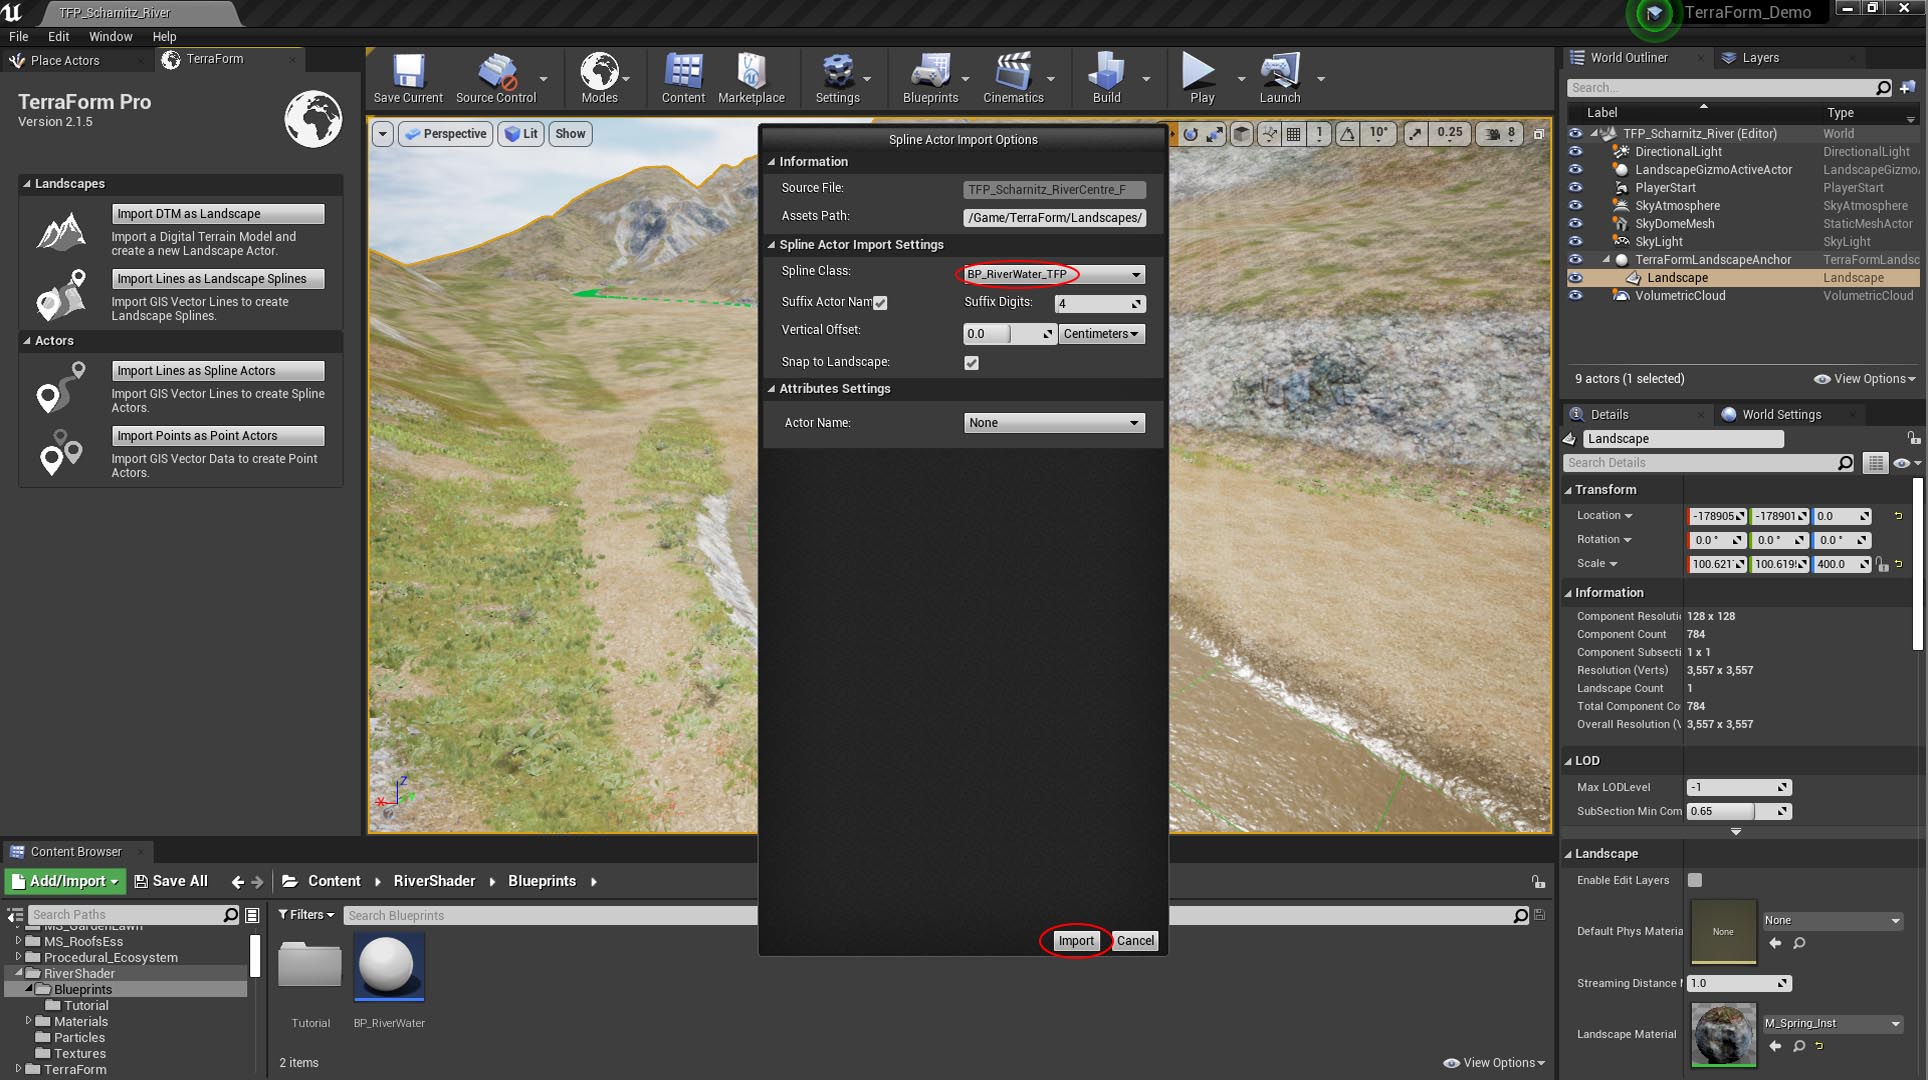
In the Spline Actor Import Options window:
- In Spline Class select the modified River Tool blueprint BP_RiverWater_TFP.
- Hit Import.
Step 2
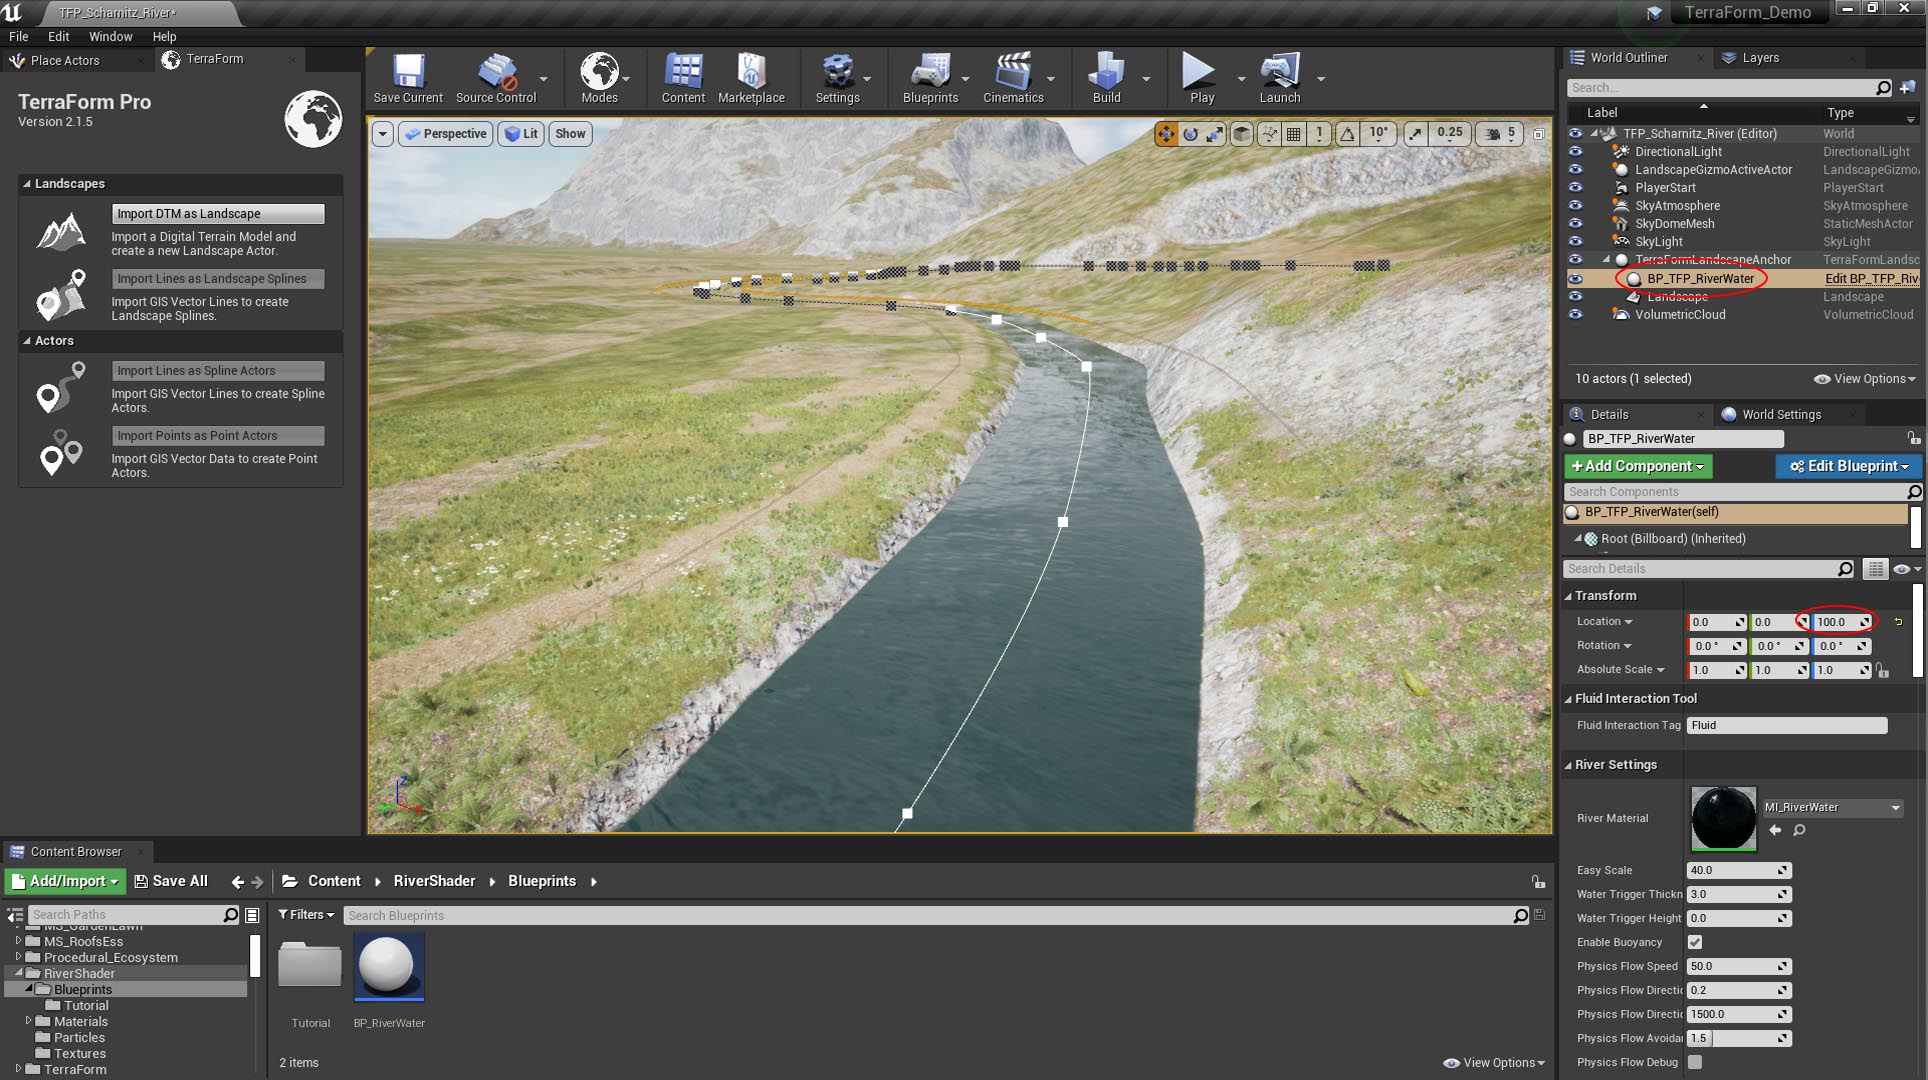
The final thing to do it modify the river water spline actor’s position, to add some depth to the water.
- Select the river tool blueprint in the World Outliner.
- In the Details Panel of the blueprint, change the Location Z-value to 100 to move the water up 1m (i.e. to give the river 1m depth).