How Can We Help?
Merging Tiles of DTM Data
MERGING DATA
Depending on how big an area the DTM covers and the sample spacing, DTM data is can be split up into tiles to make the file size more manageable. With TerraForm, currently you can only import 1 DTM file to 1 landscape (we’re working to add tiling support), so what do you do if area you want to create a landscape for falls across multiple tiles in the source data you’ve downloaded? Merge the tiles first, then cut out and export the area tou want.
THIS ARTICLE
This article shows you how to merge multiple tiles of DTM data together in QGIS to create a single DTM file that you can import into UE4 with TerraForm.
If you haven’t got any source data yet, you can download the samples used in this guide to help you follow the steps.
Step 1
Load the data files into QGIS:
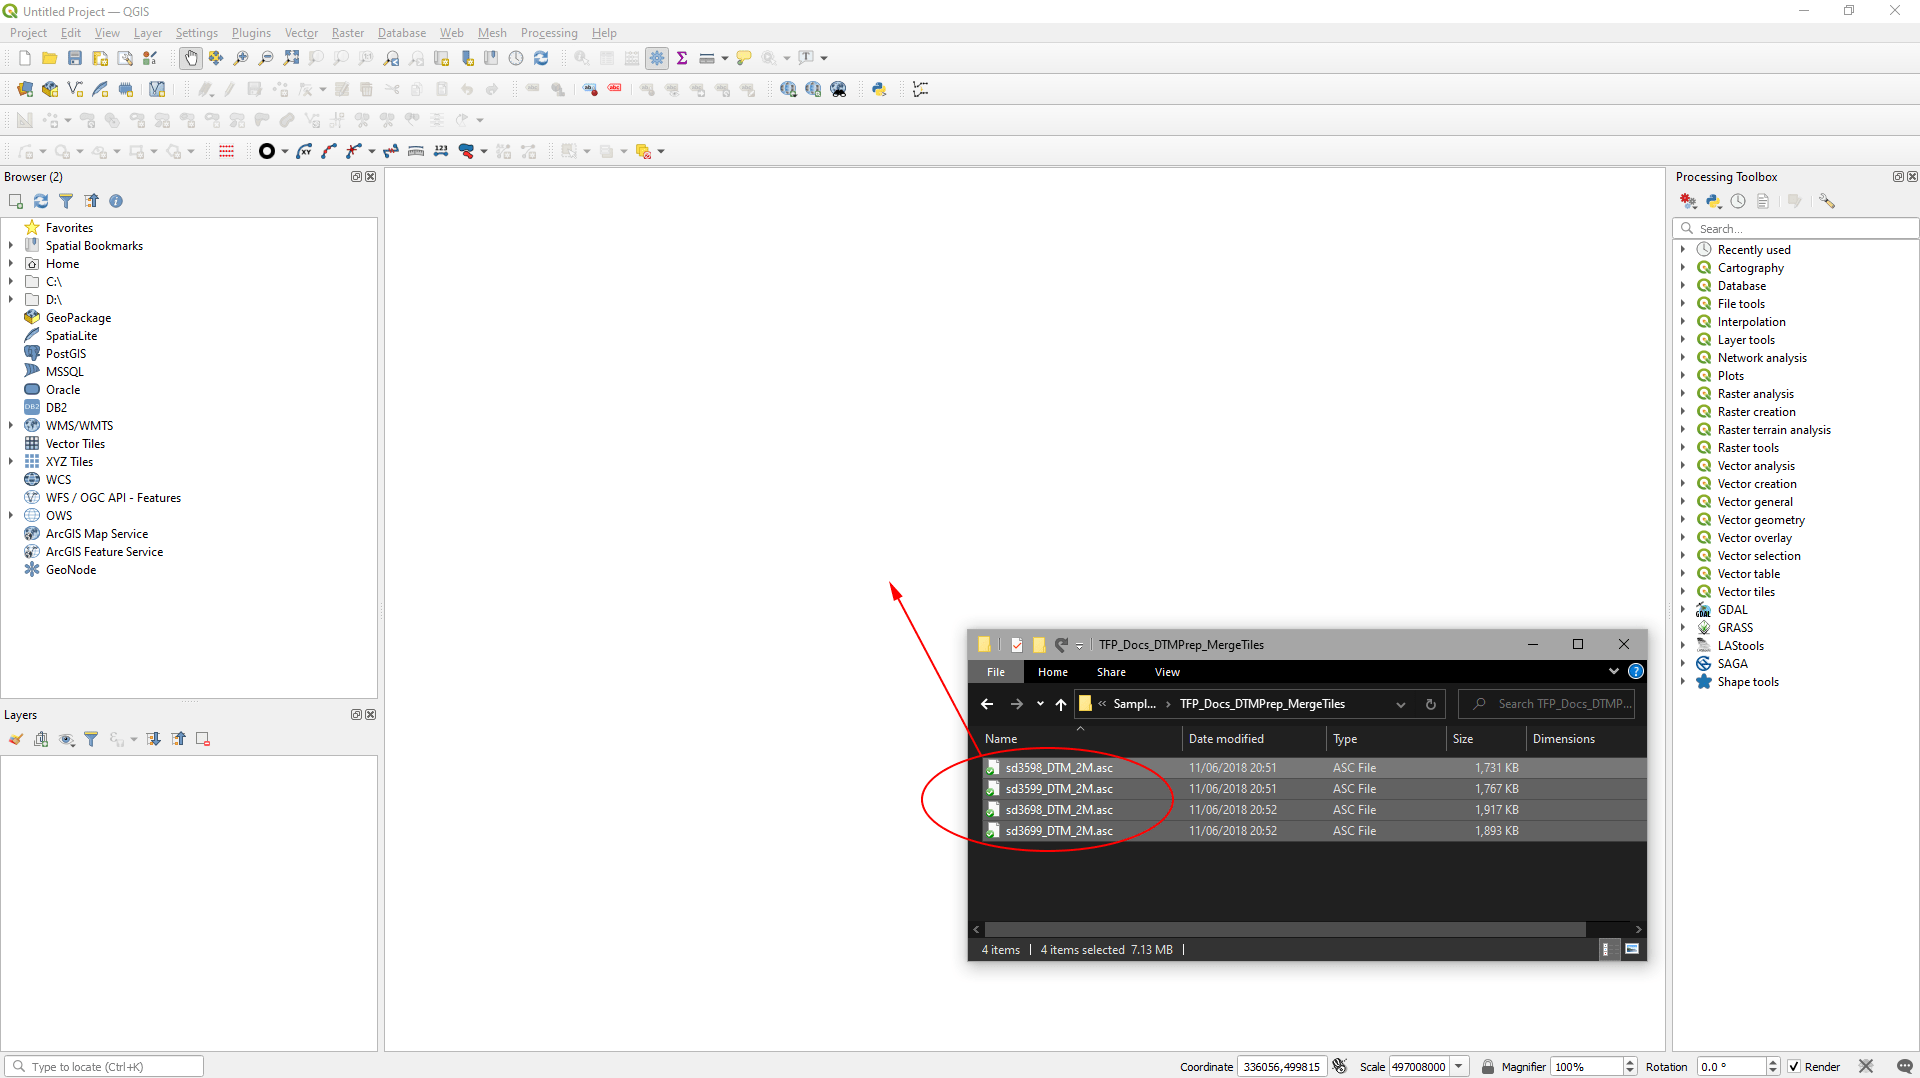
- Select the DTM files in File Explorer and drag them into QGIS:
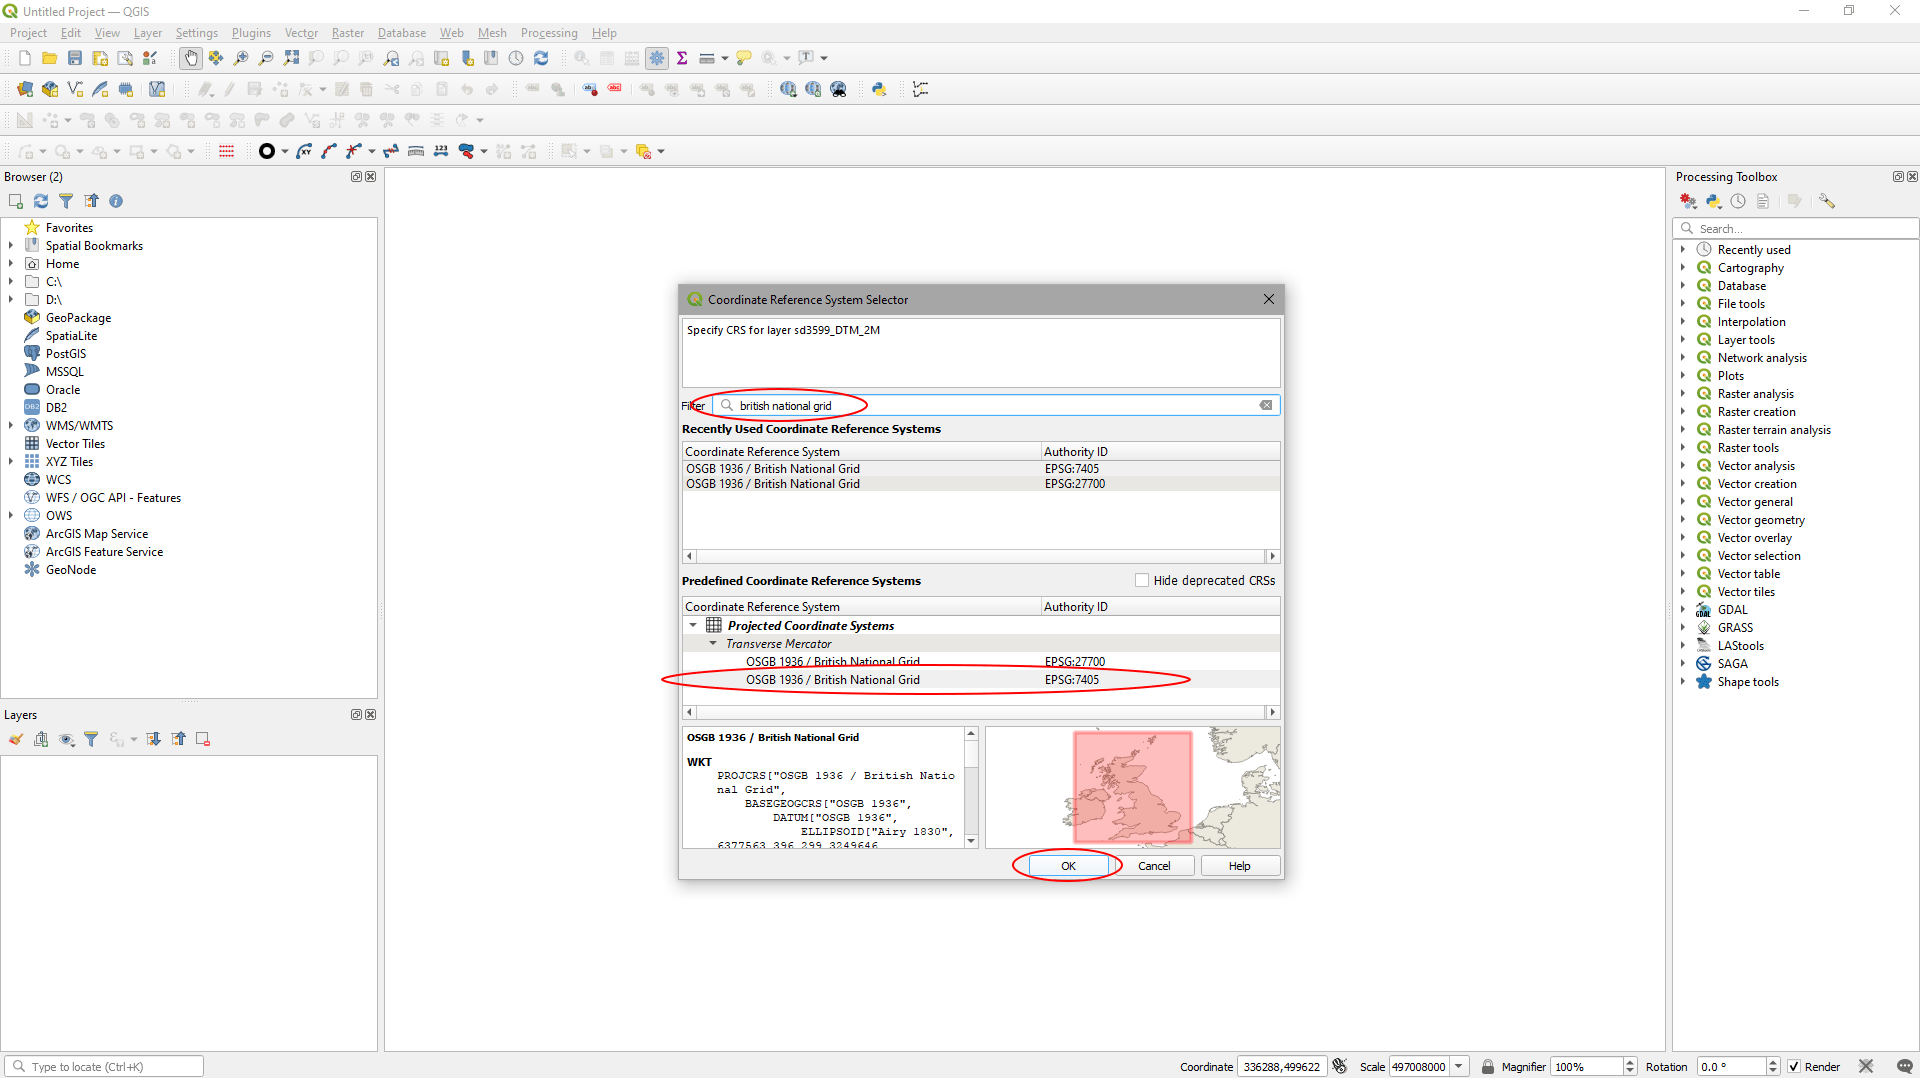
If not available in the file, QGIS may request you confirm the Coordinate Reference System (“CRS”) of the data you’re importing.
- If you’re using our samples, type ‘British National Grid’ into the search bar and select one of the projection systems listed with the OSGB36 datum.
- Hit ‘OK’.
QGIS will ask you to ‘Select Transformation’ for the DTM files to the default CRS of the Project:
- Click ‘Cancel’ to force QGIS to use the CRS of the DTM files as the CRS for the project.

Finally, select the CRS for the remaining DTM files you’re importing.
Step 2
Merge the DTM tiles into a single layer:
You will see each of the DTM files is shown with a range of greyscale values from white to black, scaled according to the maximum and minimum elevations in that DTM tile.
While the DTM files are shown as a mosaic in QGIS, they remain individual layers. To export a single file, we need to merge them into the same layer.
- Select ‘Raster’ > ‘Miscellaneous’ > ‘Merge…’

In the ‘Merge’ window that appears:
- In ‘Input Layers’, click the ‘…’ button and check the DTM layers you want to merge. (We selected all 4 layers we loaded.)
- Set the ‘Output data type’ to ‘Float32’.
- Click ‘Run’.

Step 3
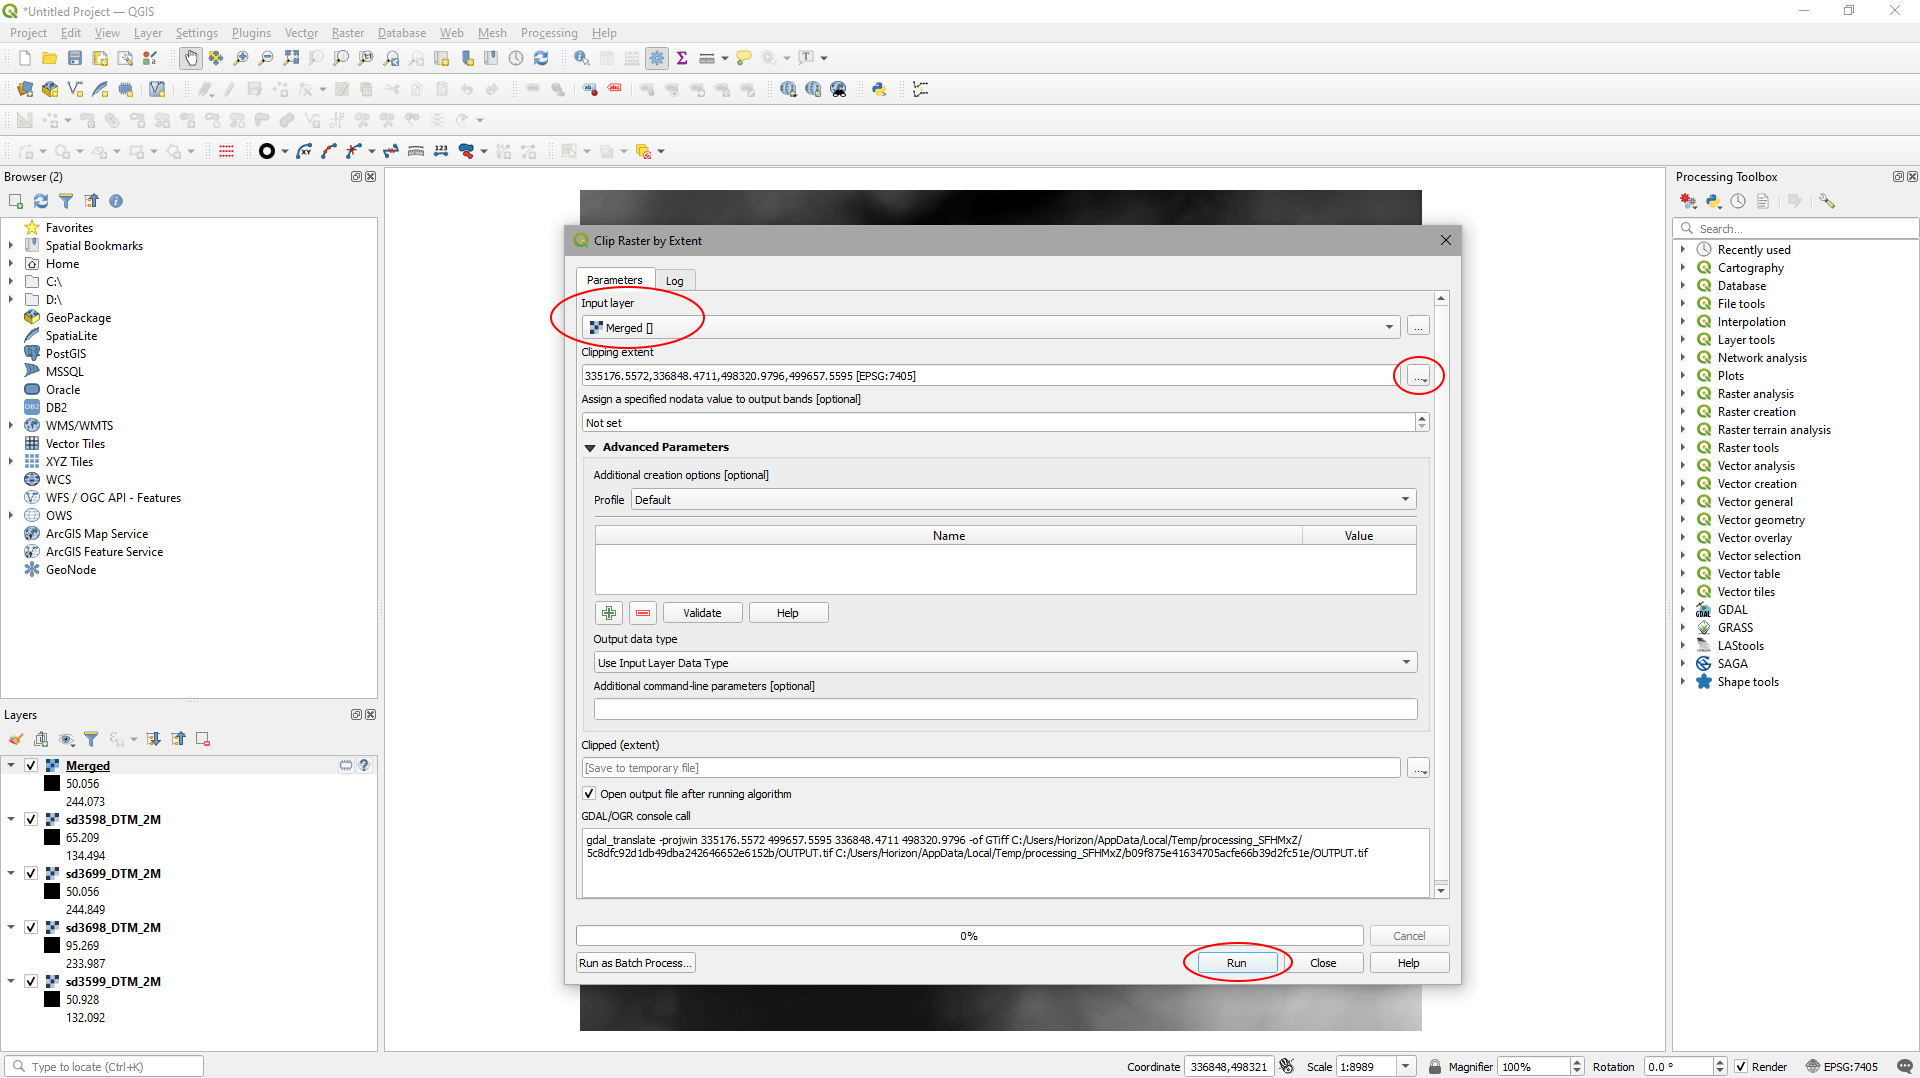
Clip the merged DTM file to the area you want to use to generate your landscape in UE4:
- Select ‘Raster’ > ‘Extraction’ > ‘Clip by Raster Extent…’
In the ‘Clip Raster by Extent’ window:
- The ‘Input layer’ should be set to ‘Merged []’.
- In ‘Clipping Extent’, click the ‘…’ button to the right and choose your clipping method. We used ‘Draw on Canvas’ and drew a box in the main window.
- Hit ‘run’.
Step 4
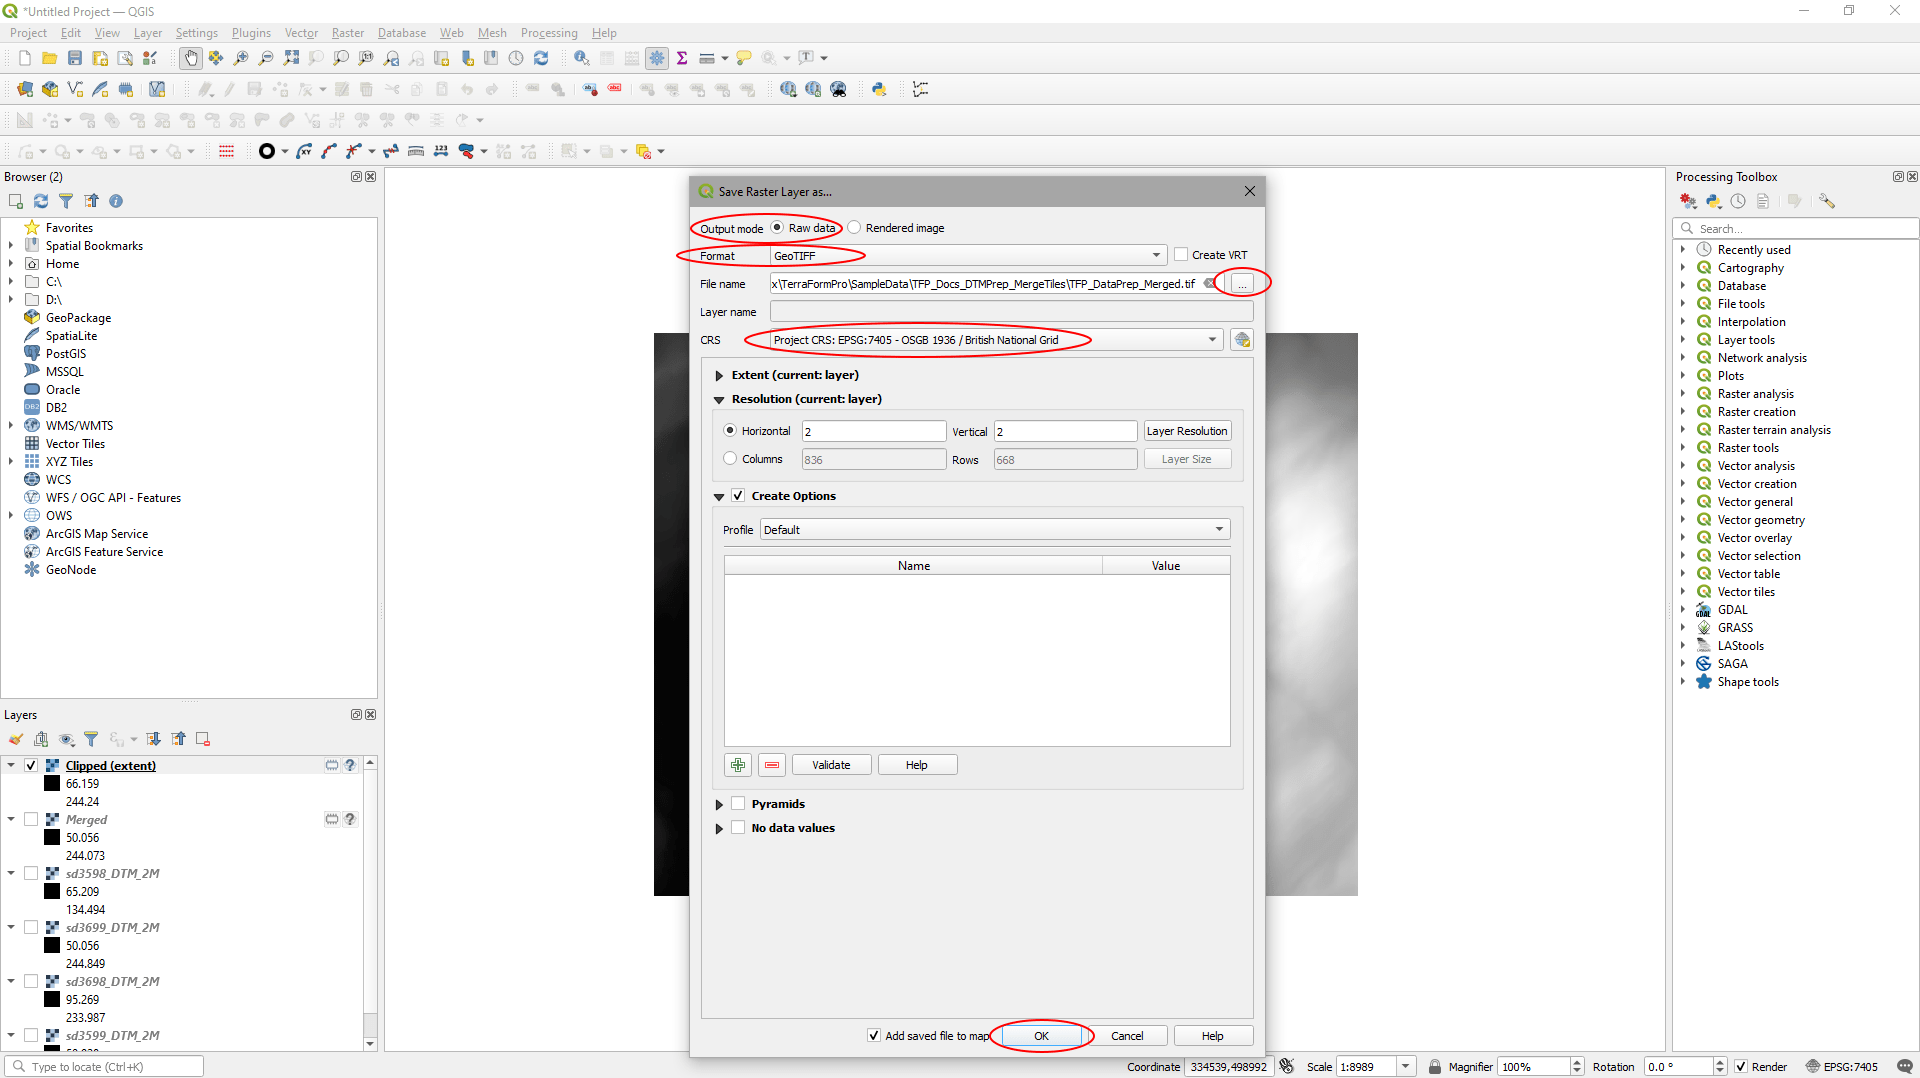
Export the clipped DTM as a GeoTIFF:
If you turn off all the layers in the Layers panel other than ‘Clipped (extent)’, you will be able to see that the merged DTM layer has been clipped to the extents you specified.
To export the data:
- Right click on the ‘Clipped (extent)’ layer and select ‘Export > ‘Save As…’.
In the ‘Save Raster Layer as…’ window:
- Make sure the ‘Output mode’ is set to ‘Raw data’.
- Set the ‘Format’ to ‘GeoTIFF’.
- Click the ‘…’ button to the right of ‘File name’, navigate to a location to save the file, and give it a suitable name.
- Set ‘CRS’ to the ‘Project’ CRS.
- Click ‘OK’ to export the data.
Result
Here’s what the data looks like as a landscape in UE4.
