How Can We Help?
Create AOI & Clip Data
Now the Project CRS is a planar projection, we can define our area of interest (AOI) by creating a bounding box around the DTM data.
Step 1
- On the main menu, select Vector > Research Tools > Extract Layer Extent…
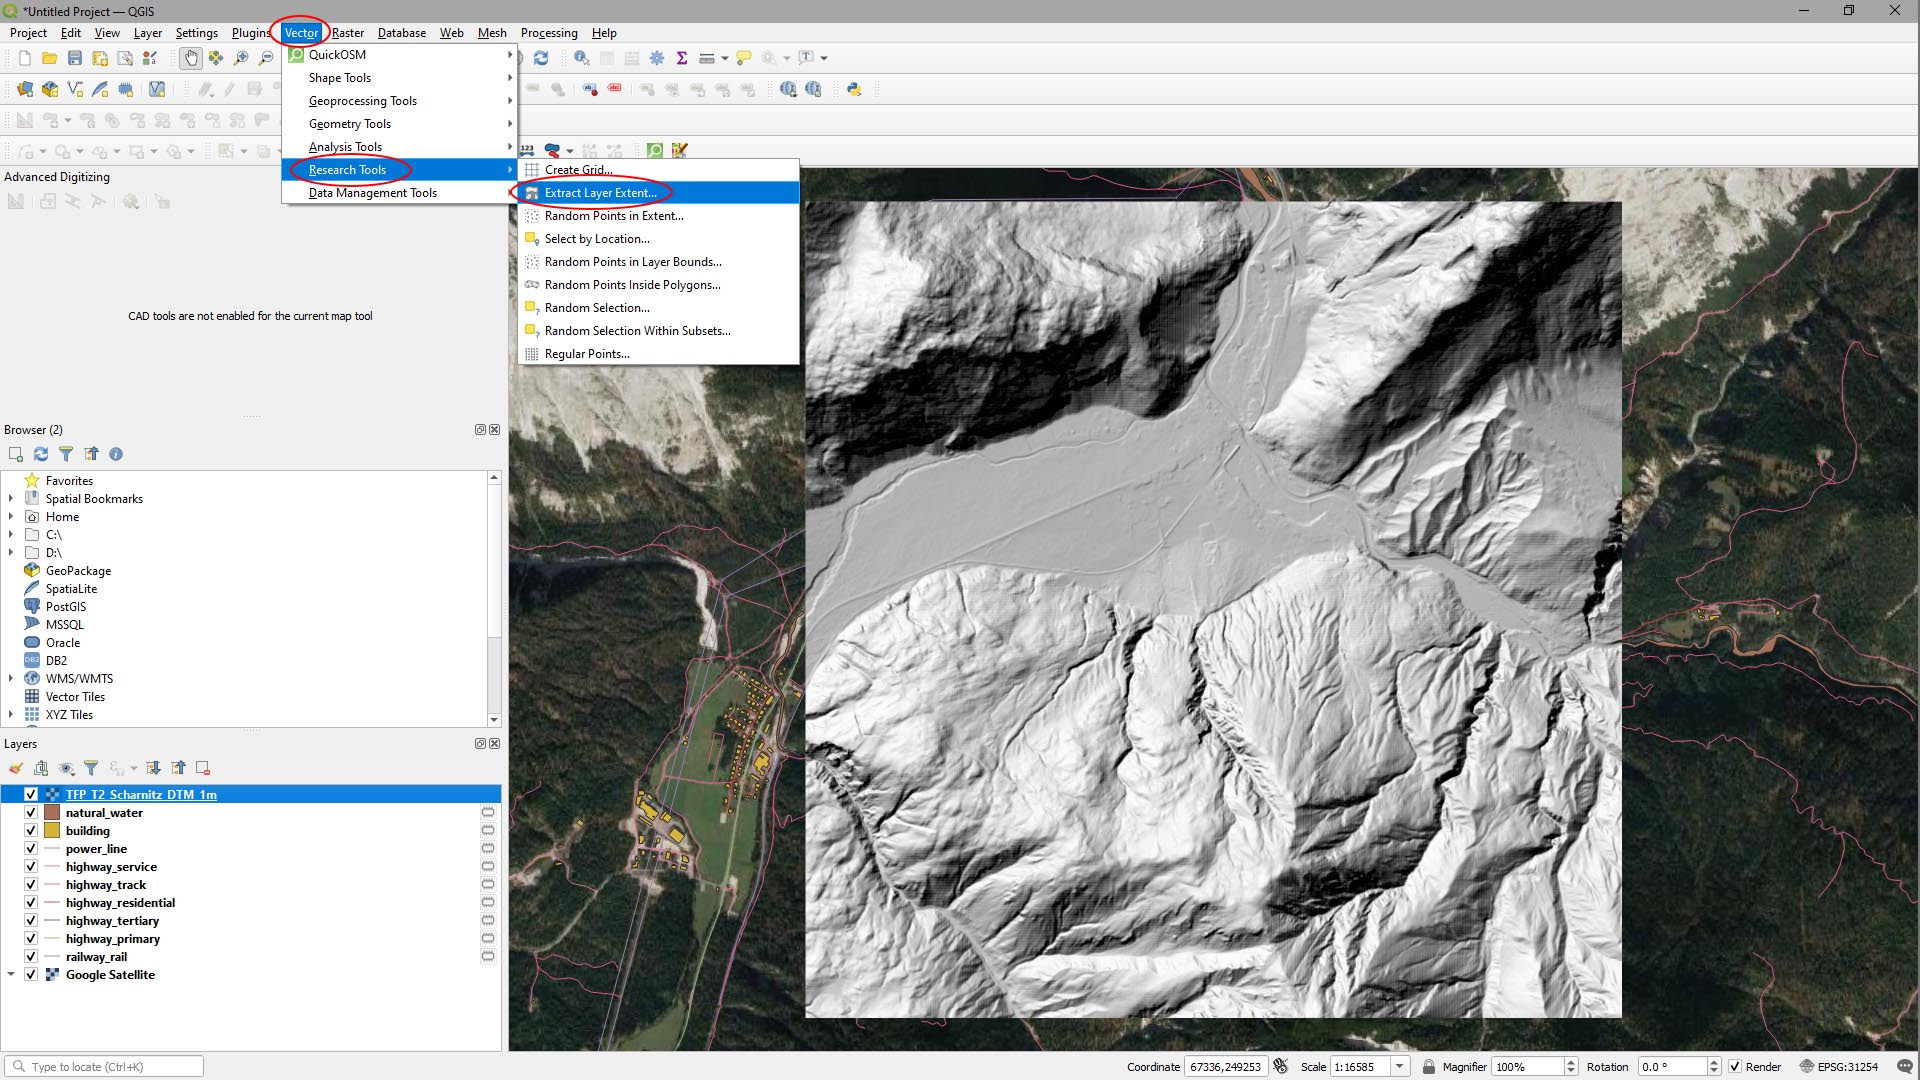
Step 2
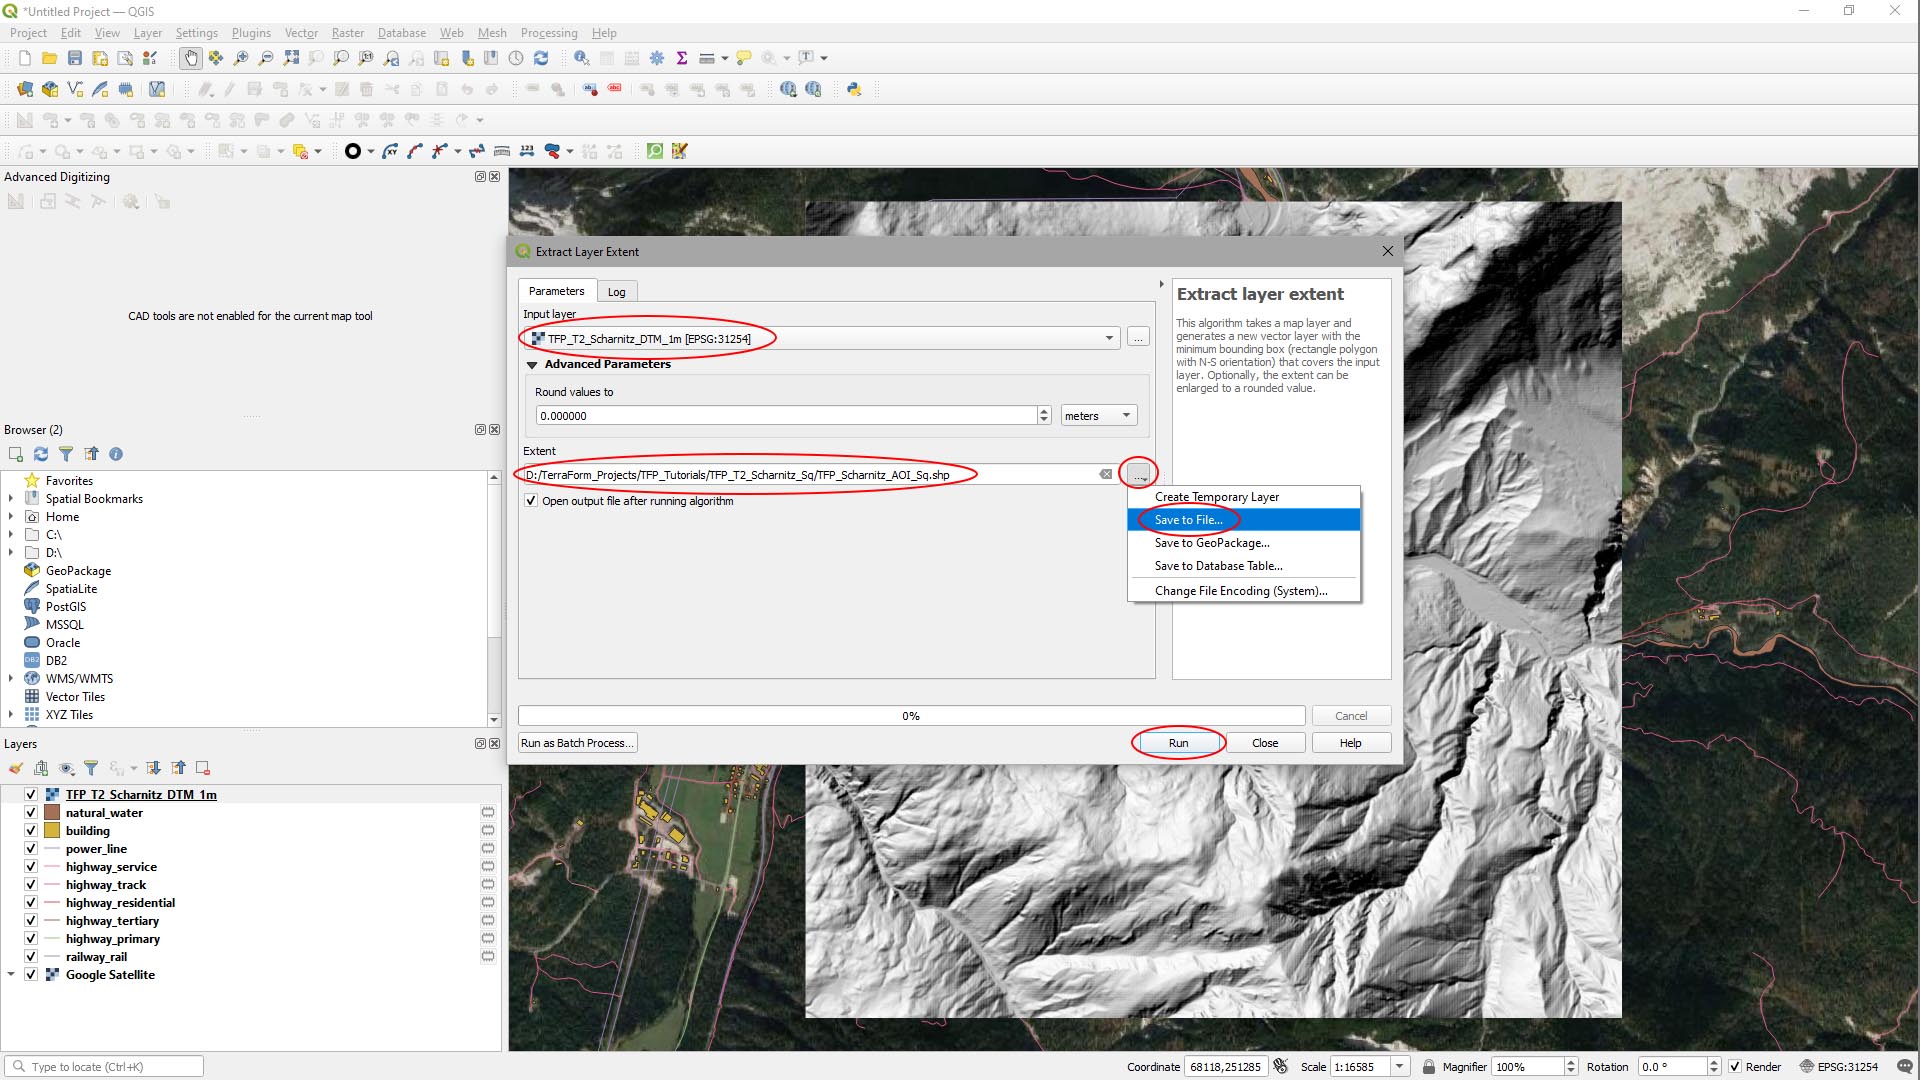
In the Extract Layer Extent window that appears:
- Make sure the Input Layer is set to the DTM layer.
- Click the … button to the right of the Extent option and click Save to File….
- Navigate to a folder and set a filename to store the .Shp file for the AOI to be created by this process.
- Click Run.
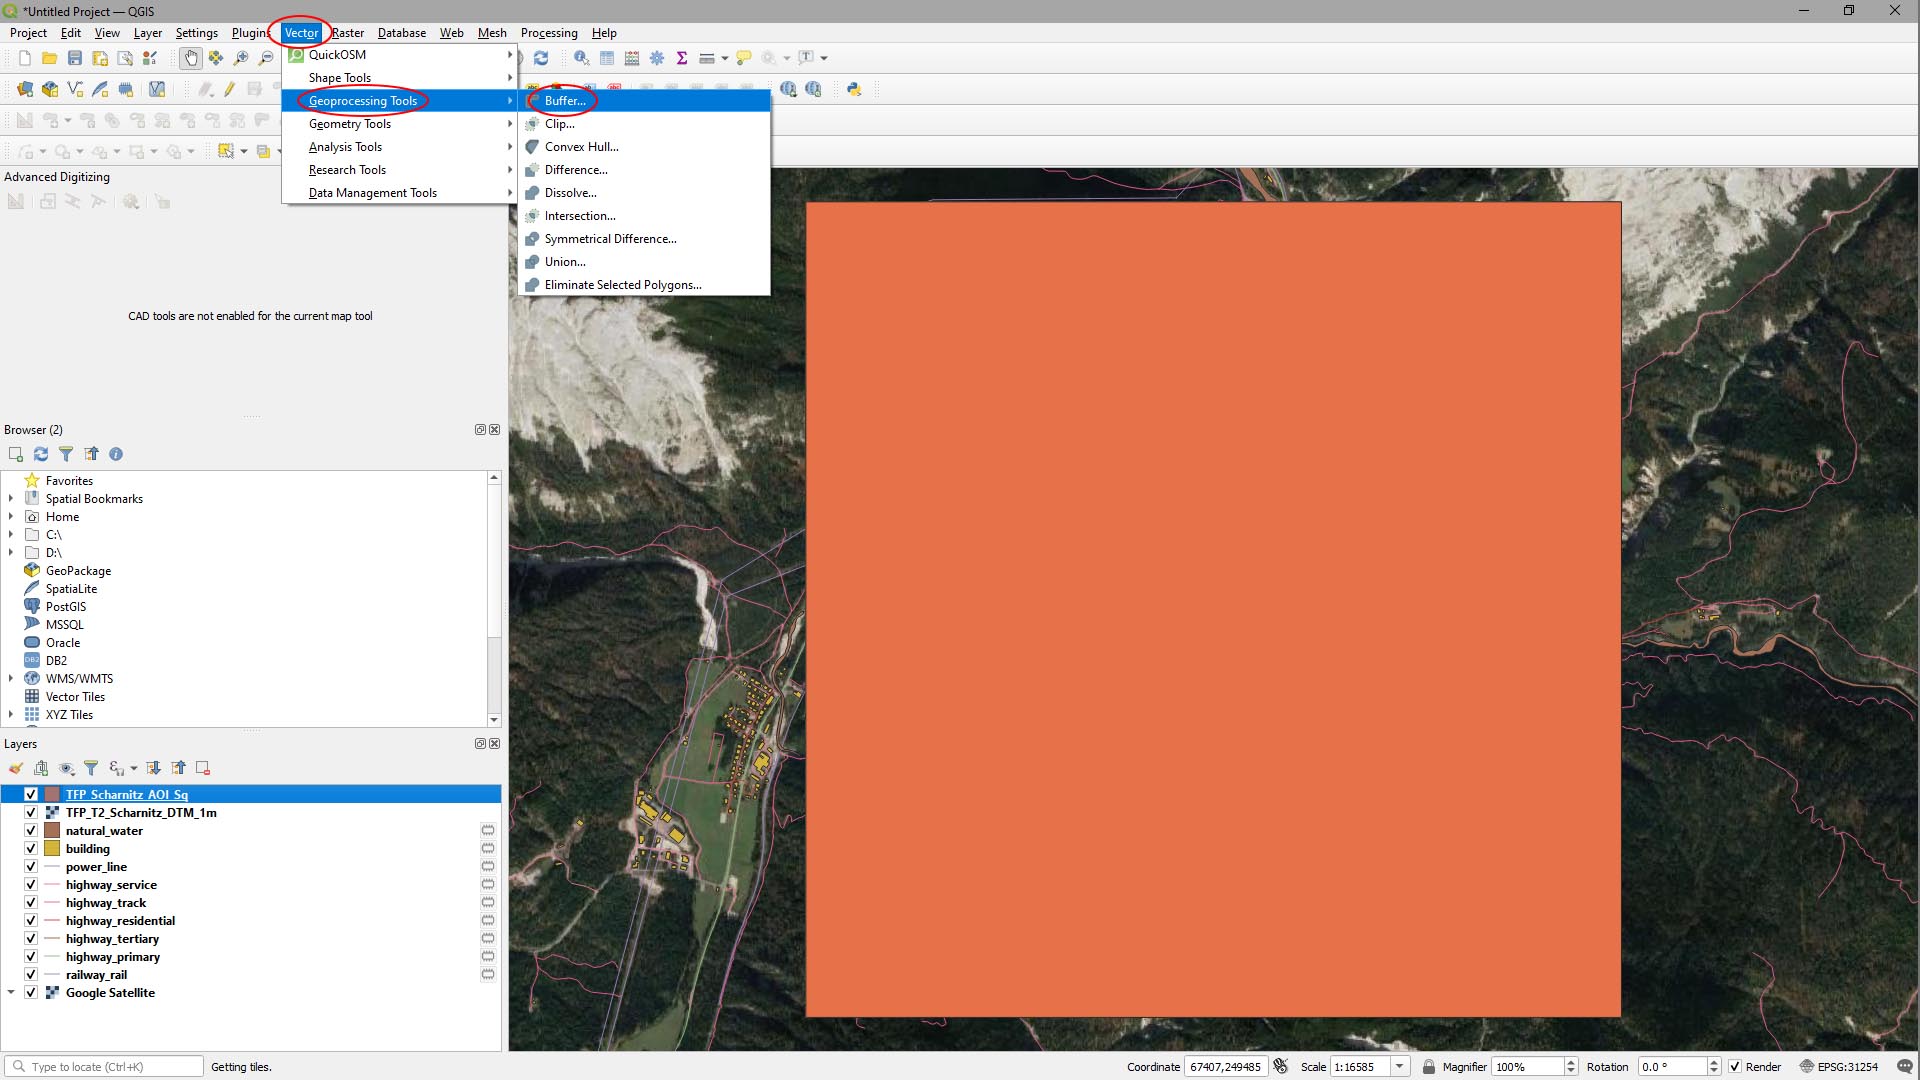
CREATE AOI FOR VECTOR DATA
To prevent vertices for the vector data falling outside the area of the landscape, we need to create a box inside the DTM’s AOI that’s slightly smaller – we’ll use that to clip the vector data to.
Step 1
- On the main menu, select Vector > Geoprocessing Tools > Buffer…
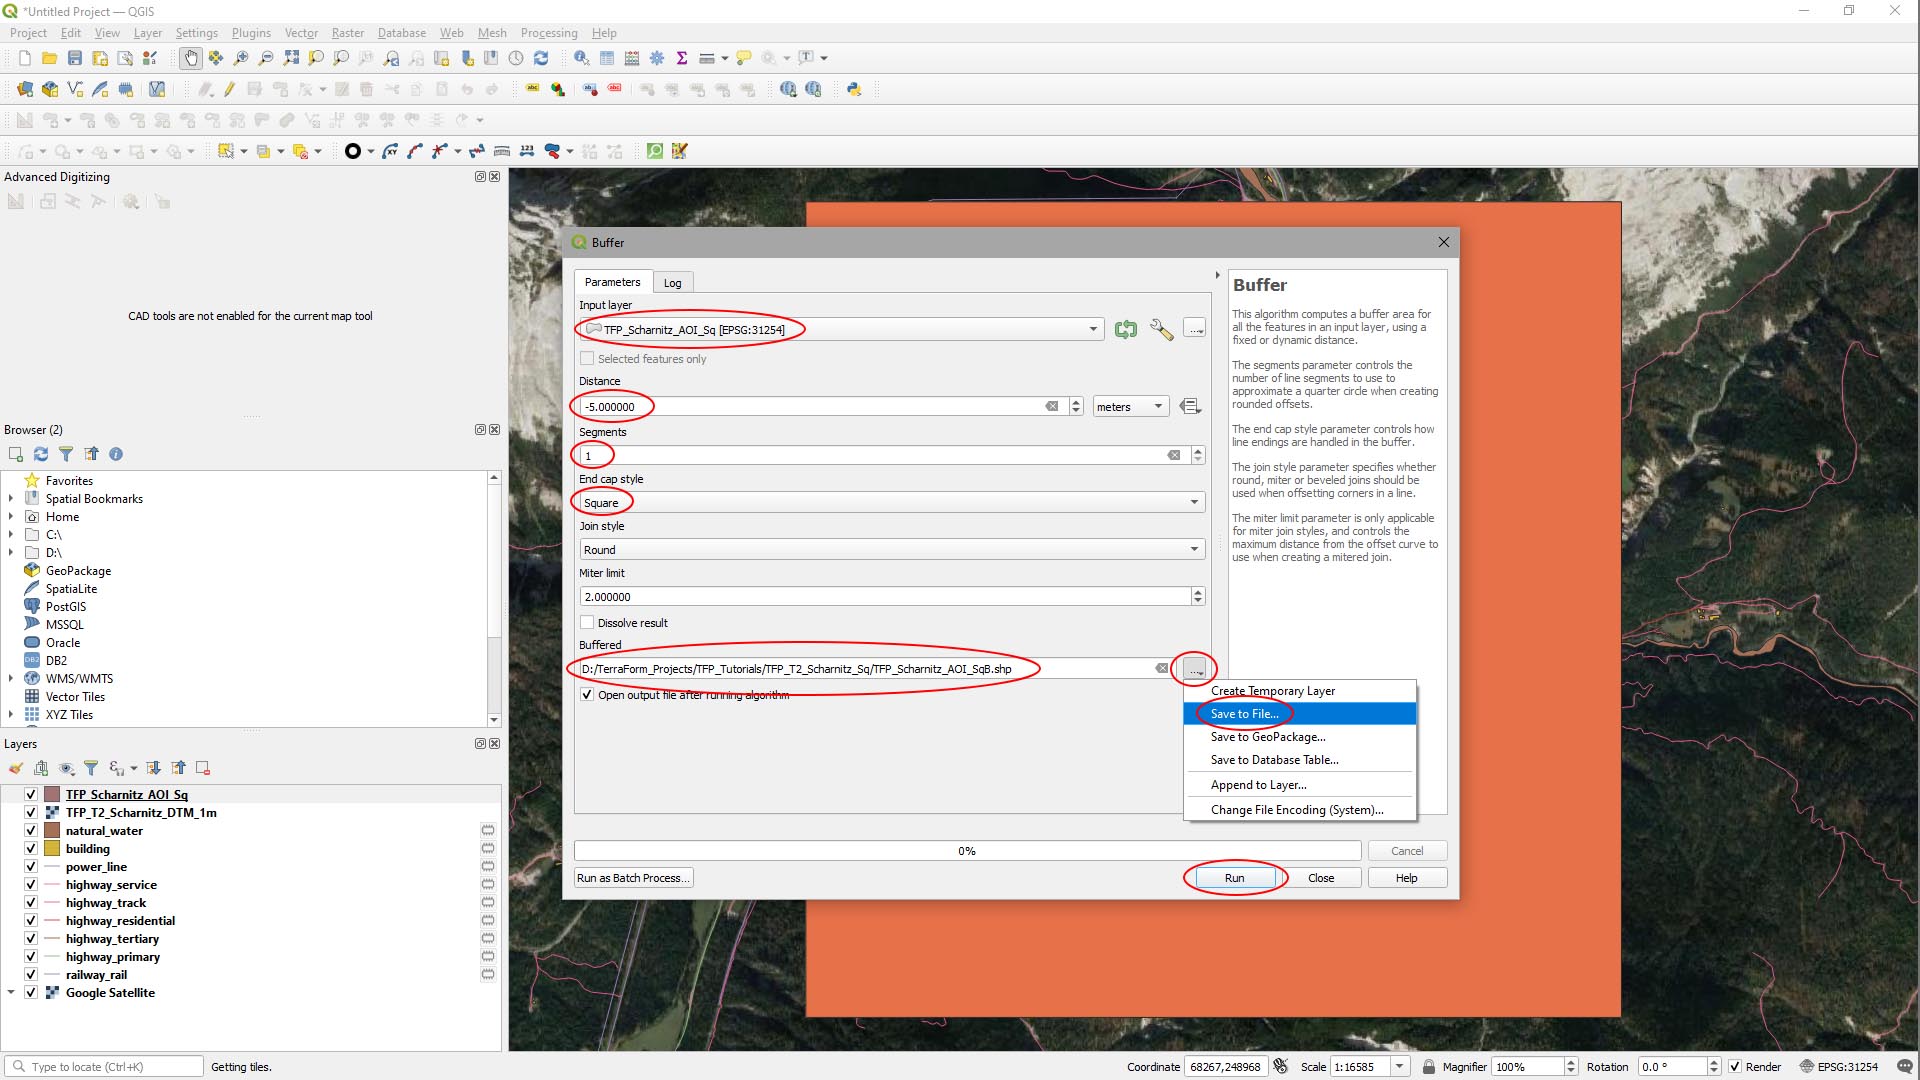
Step 2
In the Buffer window that appears:
- Set Input Layer to the AOI for the DTM.
- Set Distance to -5.000000 (i.e. 5m inside the AOI for the DTM).
- Set Segments to 1.
- Set End Cap Style to Square.
- Click the … button to the right of the Buffered field and select Save to File…
- Navigate to a folder and set a filename to store the .Shp file for the AOI to be created by this process.
- Click Run.
CLIP VECTOR DATA LAYERS
Finally, we need to clip the vector data to the buffered AOI we just created. We can hide the DTM and DTM AOI layers first.
Step 1
- In the Layers panel, uncheck the boxes to the left of the DTM and DTM AOI layers.
- On the main menu, select Vector > Geoprocessing Tools > Clip…
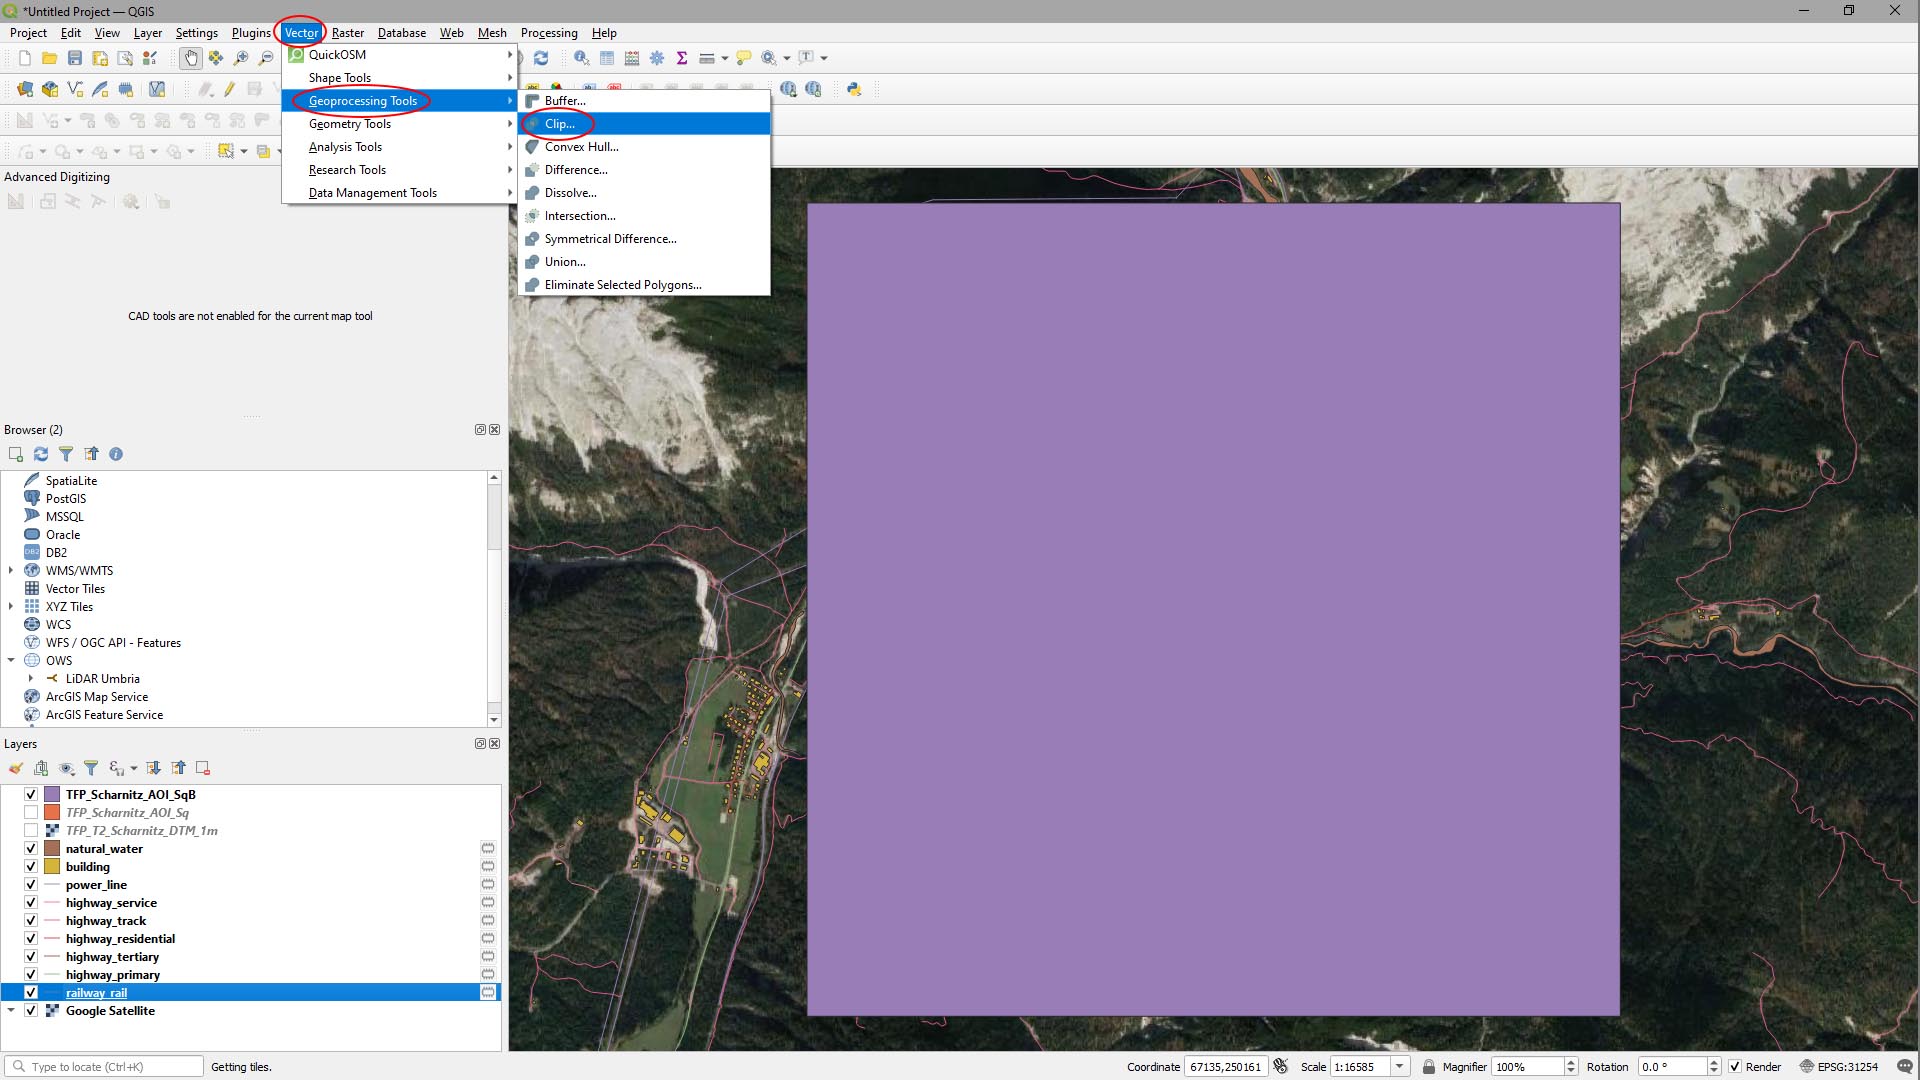
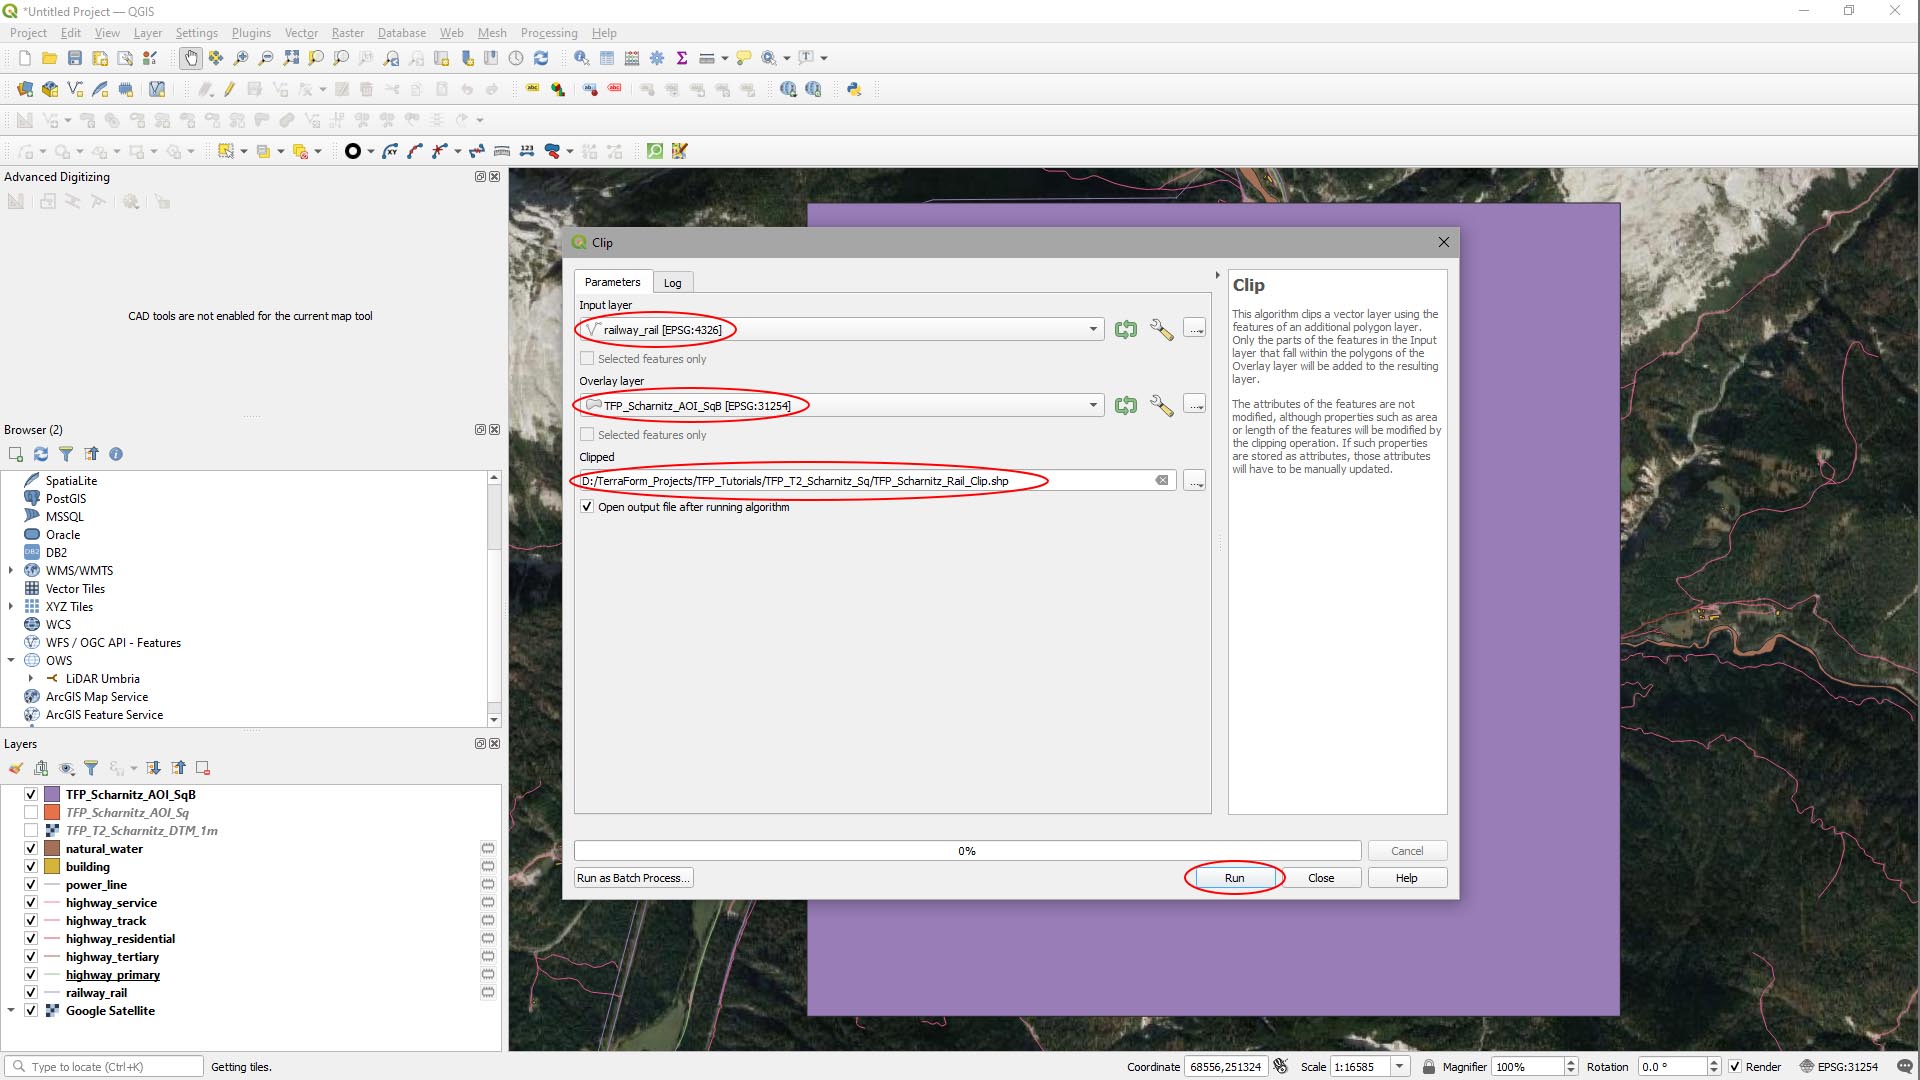
Step 2
In the Clip, set the options to Clip each vector layer to the buffered AOI.
- Set the Input Layer to the bottom vector layer in the project (in our case it’s railway_rail).
- Select the buffered AOI layer in Overlay Layer.
- Click the … button to the right of the Clipped field and select Save to File…
- Navigate to a folder and set a filename to store the .Shp file for the AOI to be created by this process.
- Click Run.
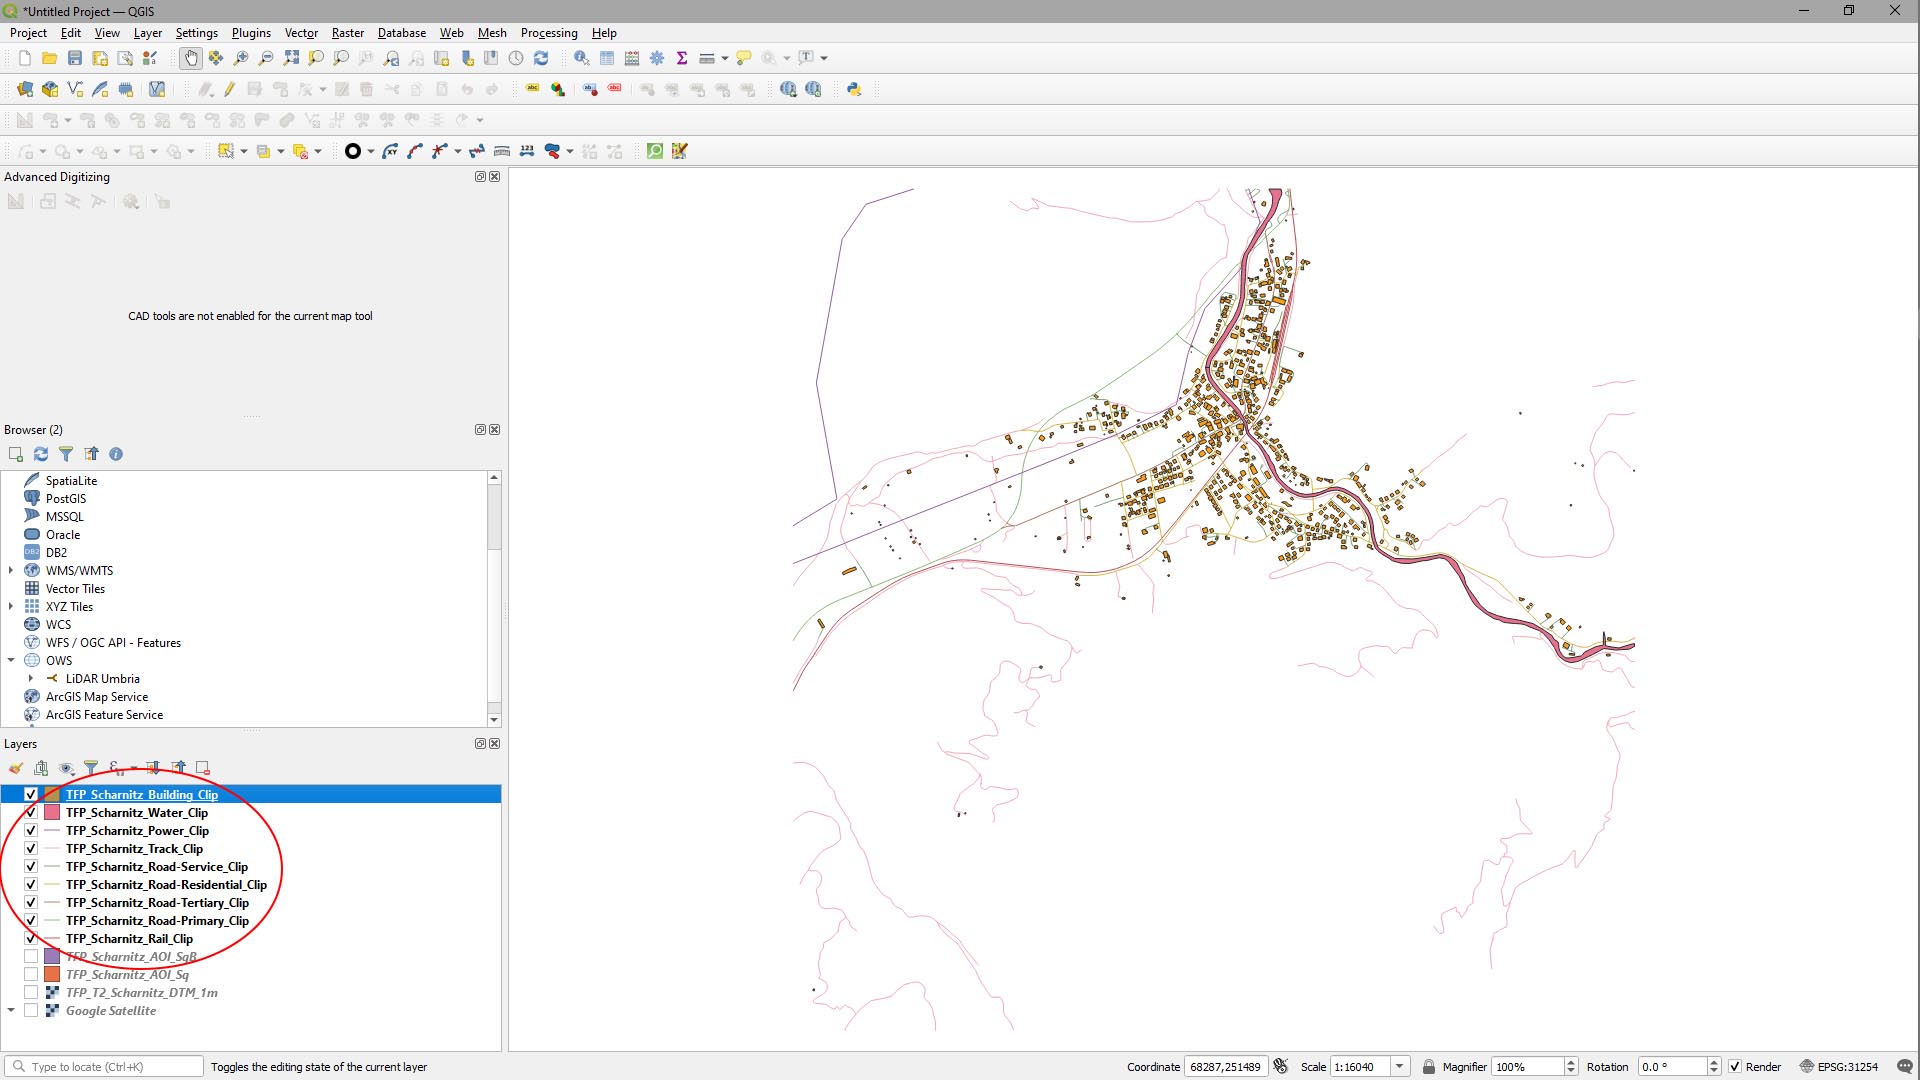
Step 3
Repeat Steps 1 and 2 (directly above) for the remaining vector layers you added to your project. You can then remove the original Quick OSM vector layers.
This is what our QGIS project looks like once this step is complete:
SAVE QGIS PROJECT
You can now save your QGIS project so that you can jump back to this step, should you need to.
- On the main menu, select Project > Save As…, navigate to your source data folder and give it a useful filename.