How Can We Help?
Spline Blueprint – Area Spawner
This blueprint will populate the area enclosed by a spline with static mesh objects. You can use it to create field of crops, forests, orchards, and much more.
It’s free for you to use, you’re welcome to include it in your own projects and modify it for your own purposes.

Included within the download:
- Area Spawner Blueprint
- Demo map including a landscape of Twin Mountain (no material applied)
- GIS vector line data in the Twin Mountain area.
IMPORTANT
The vector data included with this download is from the Twin Mountain area we used in Tutorial 1. You’ll need the DTM from that sample pack to follow the examples below. You can get it here.
Adding to your Project
To add the blueprint to your project, extract the .zip file and copy the TerraForm folder to the Content folder of your project.

>> QUICK ACCESS
We’ve included a demo level (.umap) that you can load once you’ve added the blueprint folders to your project (Content > TerraForm > Assets > AreaSpawner > Maps > TFP_BP_AreaSpawner_Demo.umap). It contains the landscape with the area spawner blueprint already imported.
Importing GIS Data
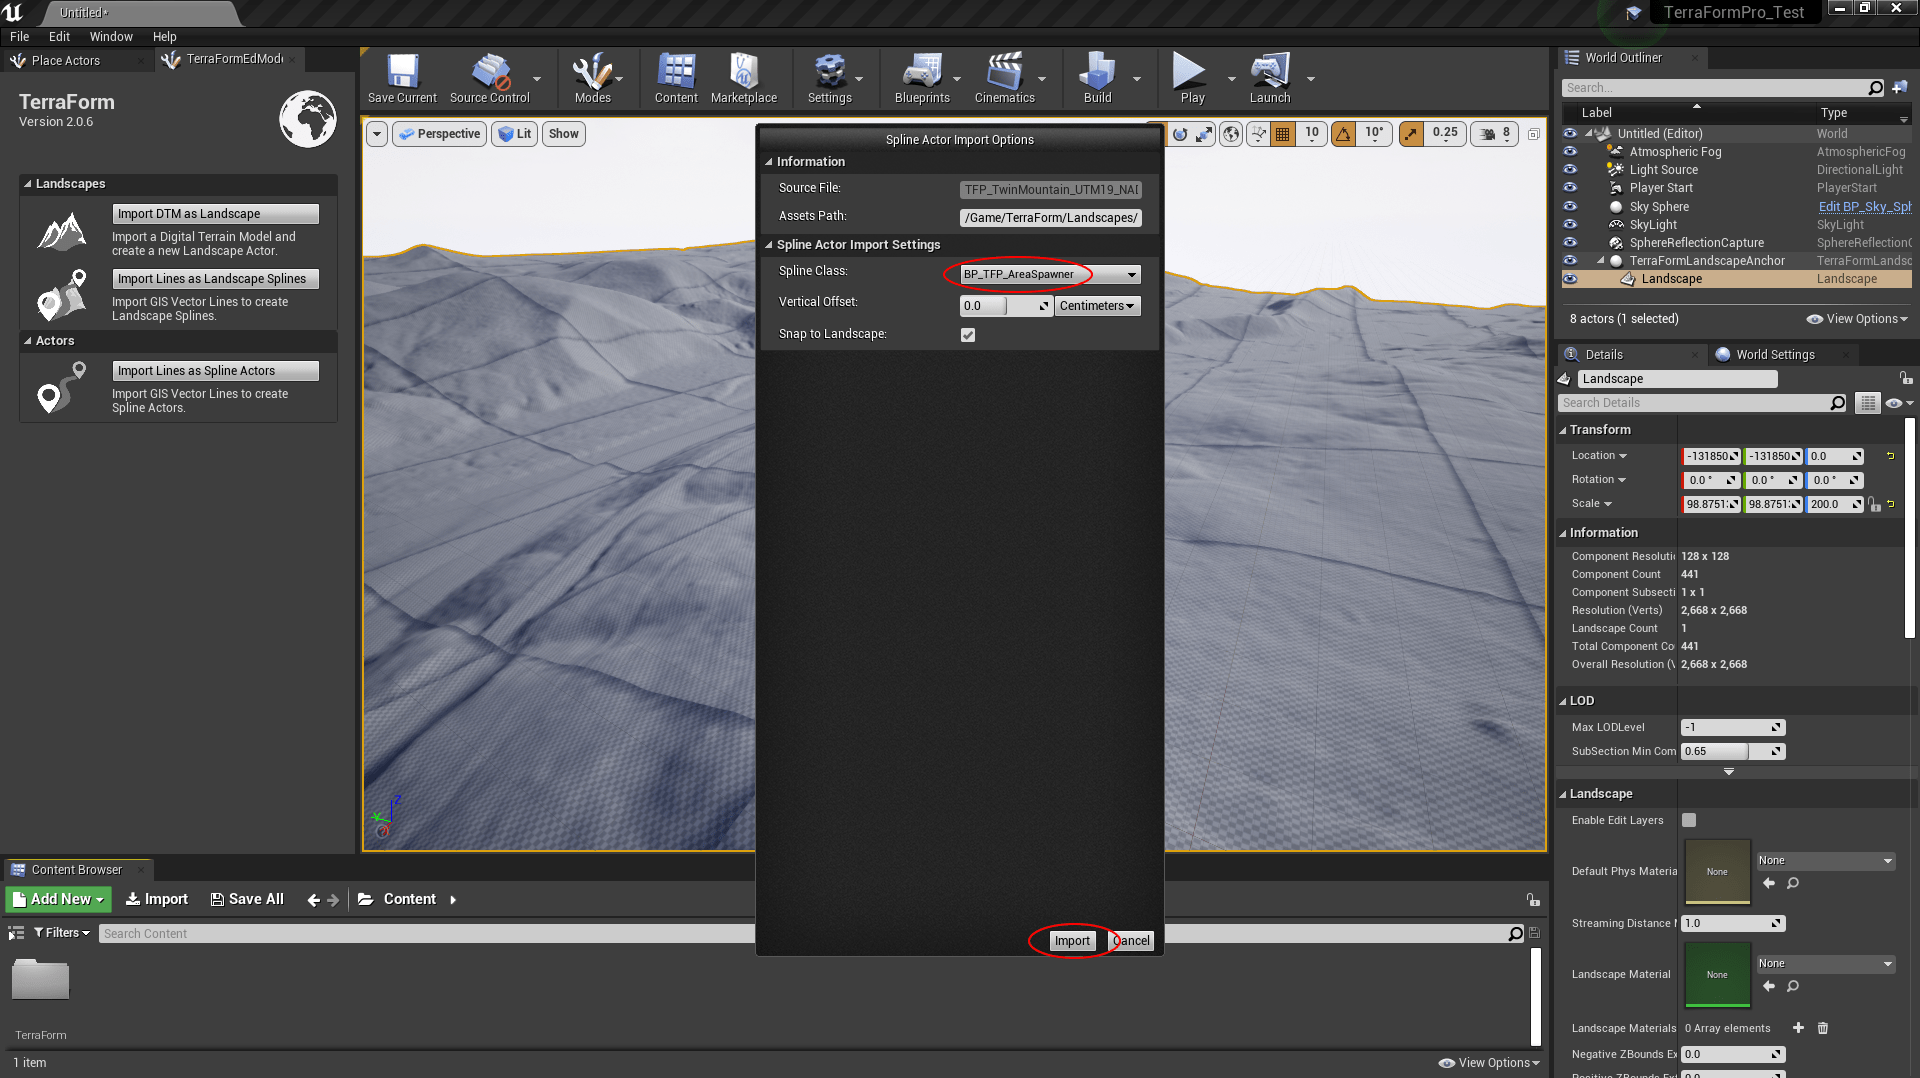
We’re starting from the point of having already imported the DTM (see Steps 8 & 9 of Tutorial 1), but without applying a Landscape material.
- Select the Landscape.
- In the TerraForm panel, select Import Lines as Spline Actors.
- Use the Import Spline Actors window to navigate to the Vectors folder inside the GISData folder of the extracted TFP_BP_AreaSpawner.zip.
- Select TFP_TwinMountain_UTM19_NAD83_Crops.shp
- Hit Open.
In the Spline Actor Import Options window:
- Select BP_TFP_AreaSpawner as the Spline Class.
- Click Import.
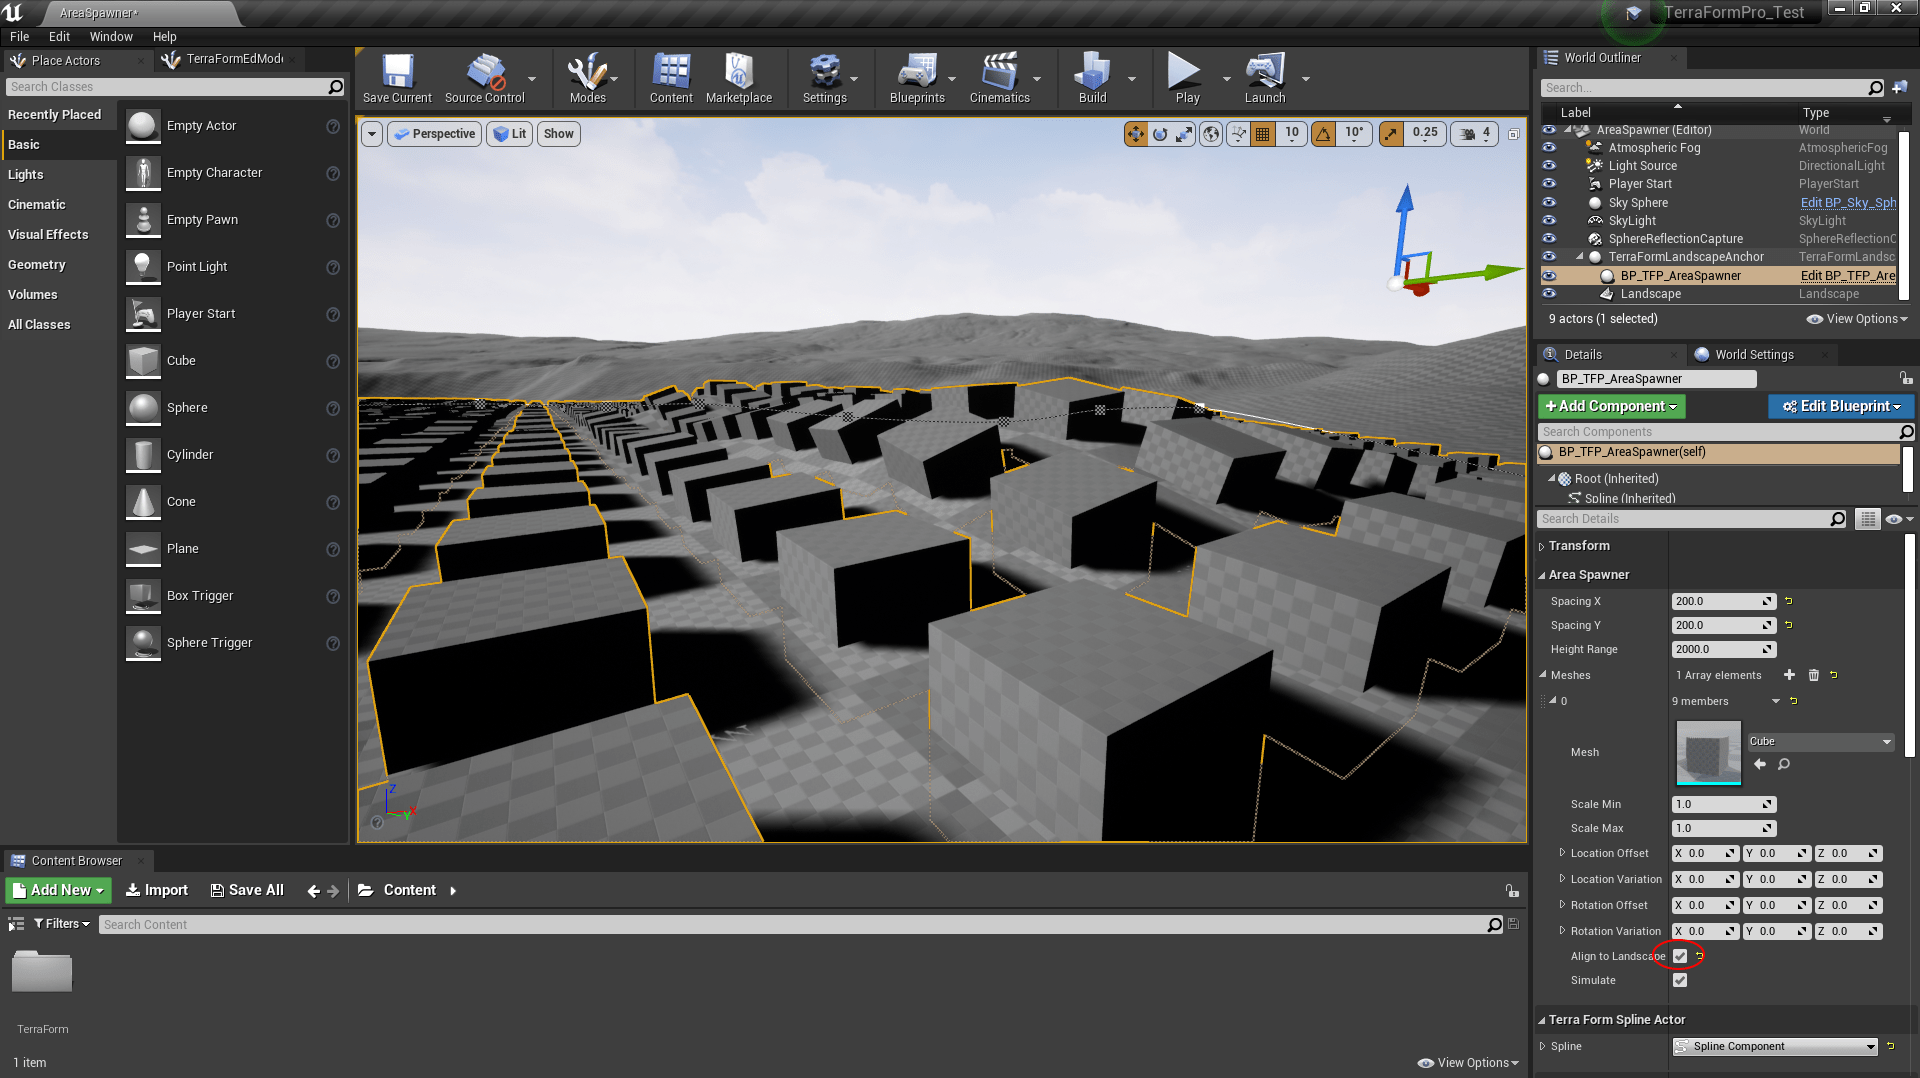
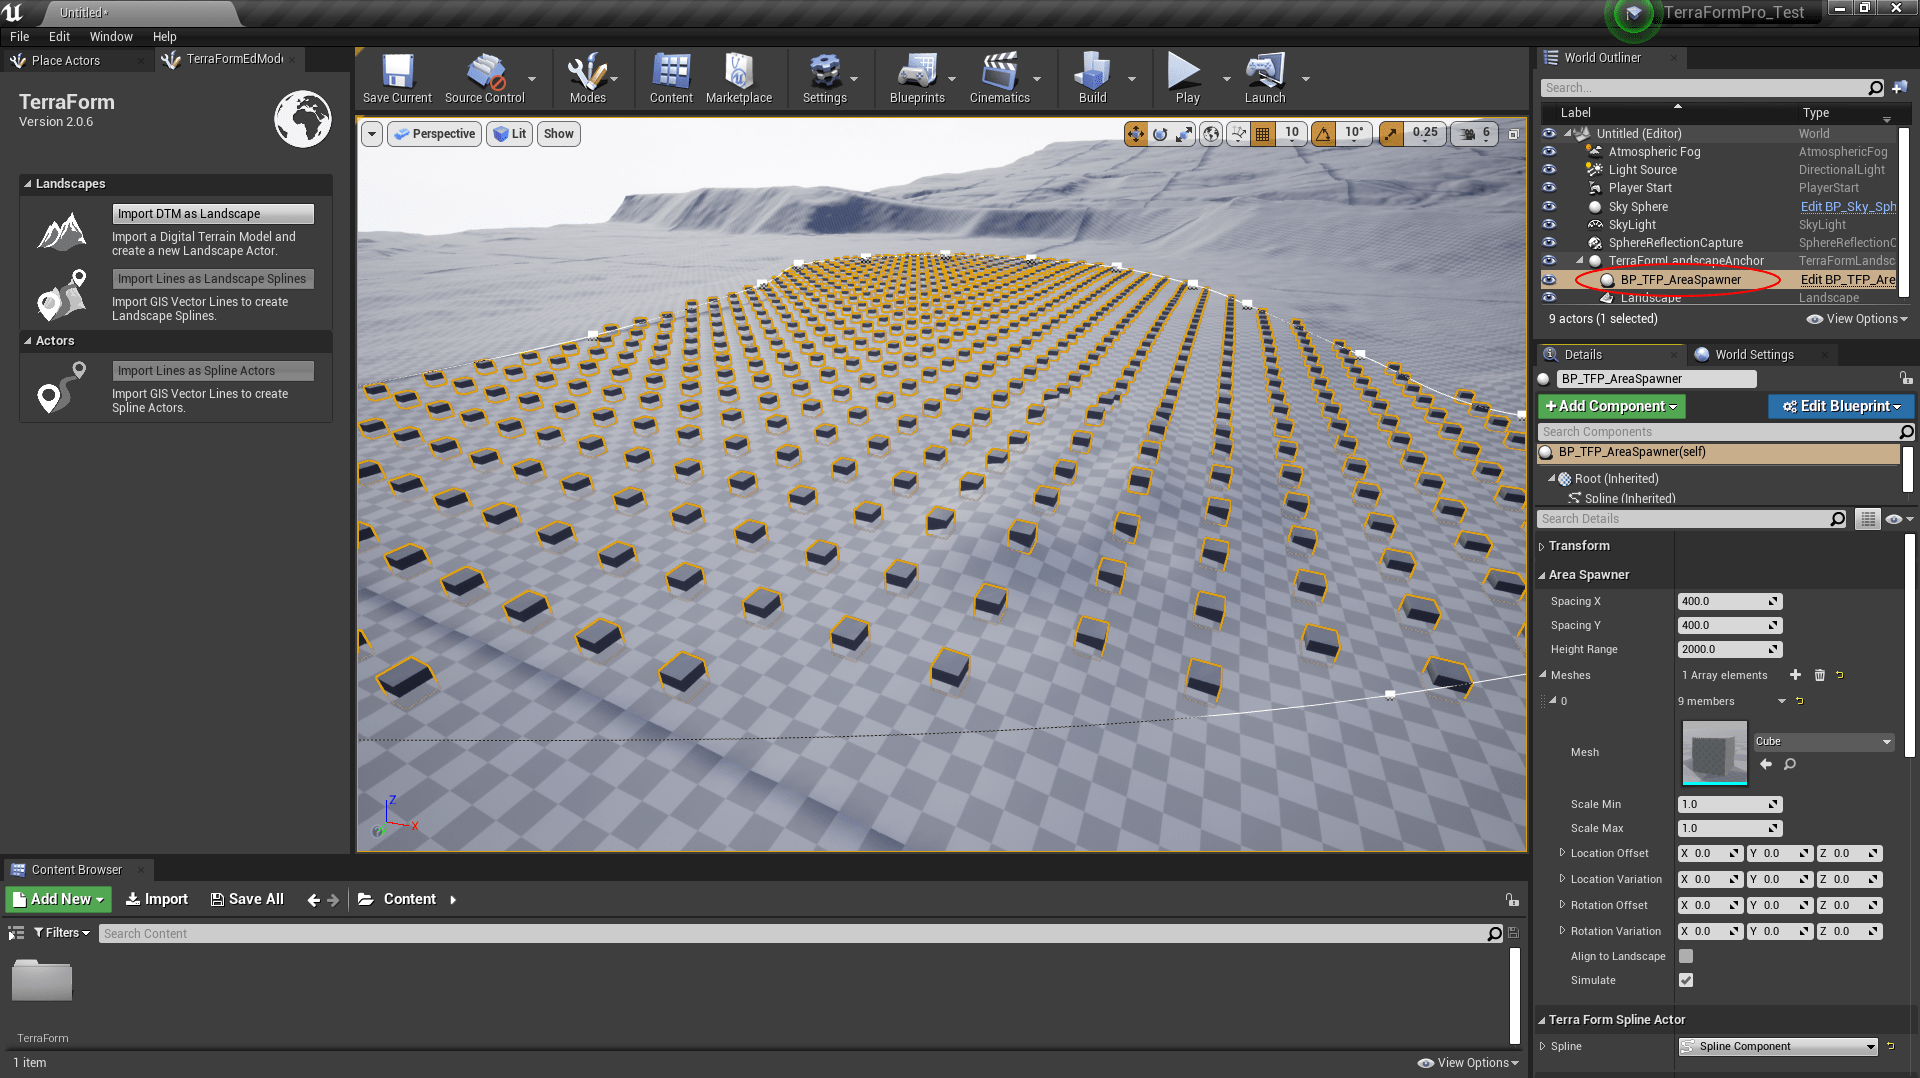
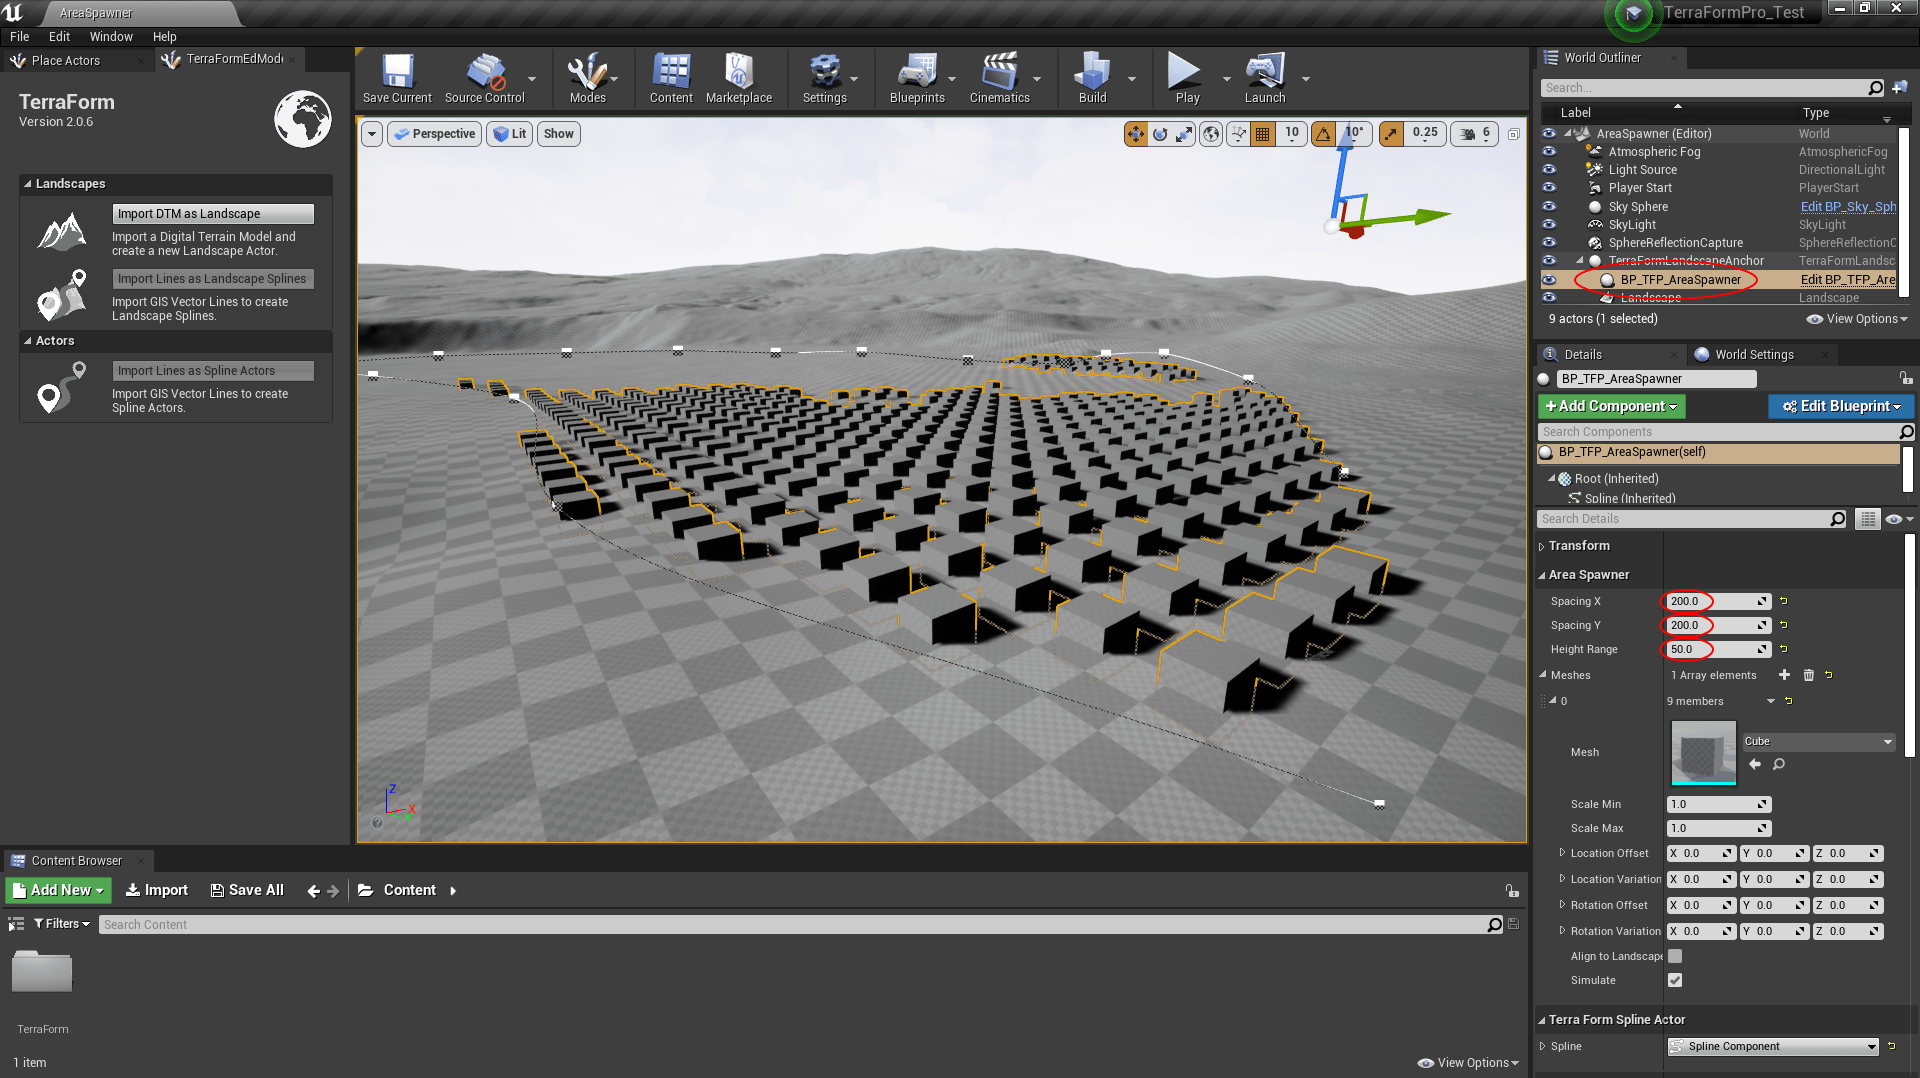
The area spawner loads using a default cube static mesh actor as a placeholder. You can adjust the area encompassed within the spline by simply dragging the spline points in the editor window.
Area Spawner Settings
Select the blueprint (BP_TFP_AreaSpawner) in the World Outliner to modify its settings:
- Spacing X: Adjusts the distance between static mesh objects along the X-axis.
- Spacing Y: Adjusts the distance between static mesh objects along the Y-axis.
- Height: The height range above and below the first point of the spline to look for landscape on which to place a static mesh.
Static Mesh Settings
With the blueprint selected, expand the ‘Meshes’ section.
- Mesh: The static mesh object placed by the spawner. Just drag your own static meshes here to replace the cube placeholder.
- Scale Min: The minimum scale of the static mesh actors (scale is randomised between this value and the ‘Scale Max’ value.
- Scale Max: The maximum randomised scale of the static mesh actors.
- Location Offset: A fixed offset from the existing point location along the X, Y, and Z axes.
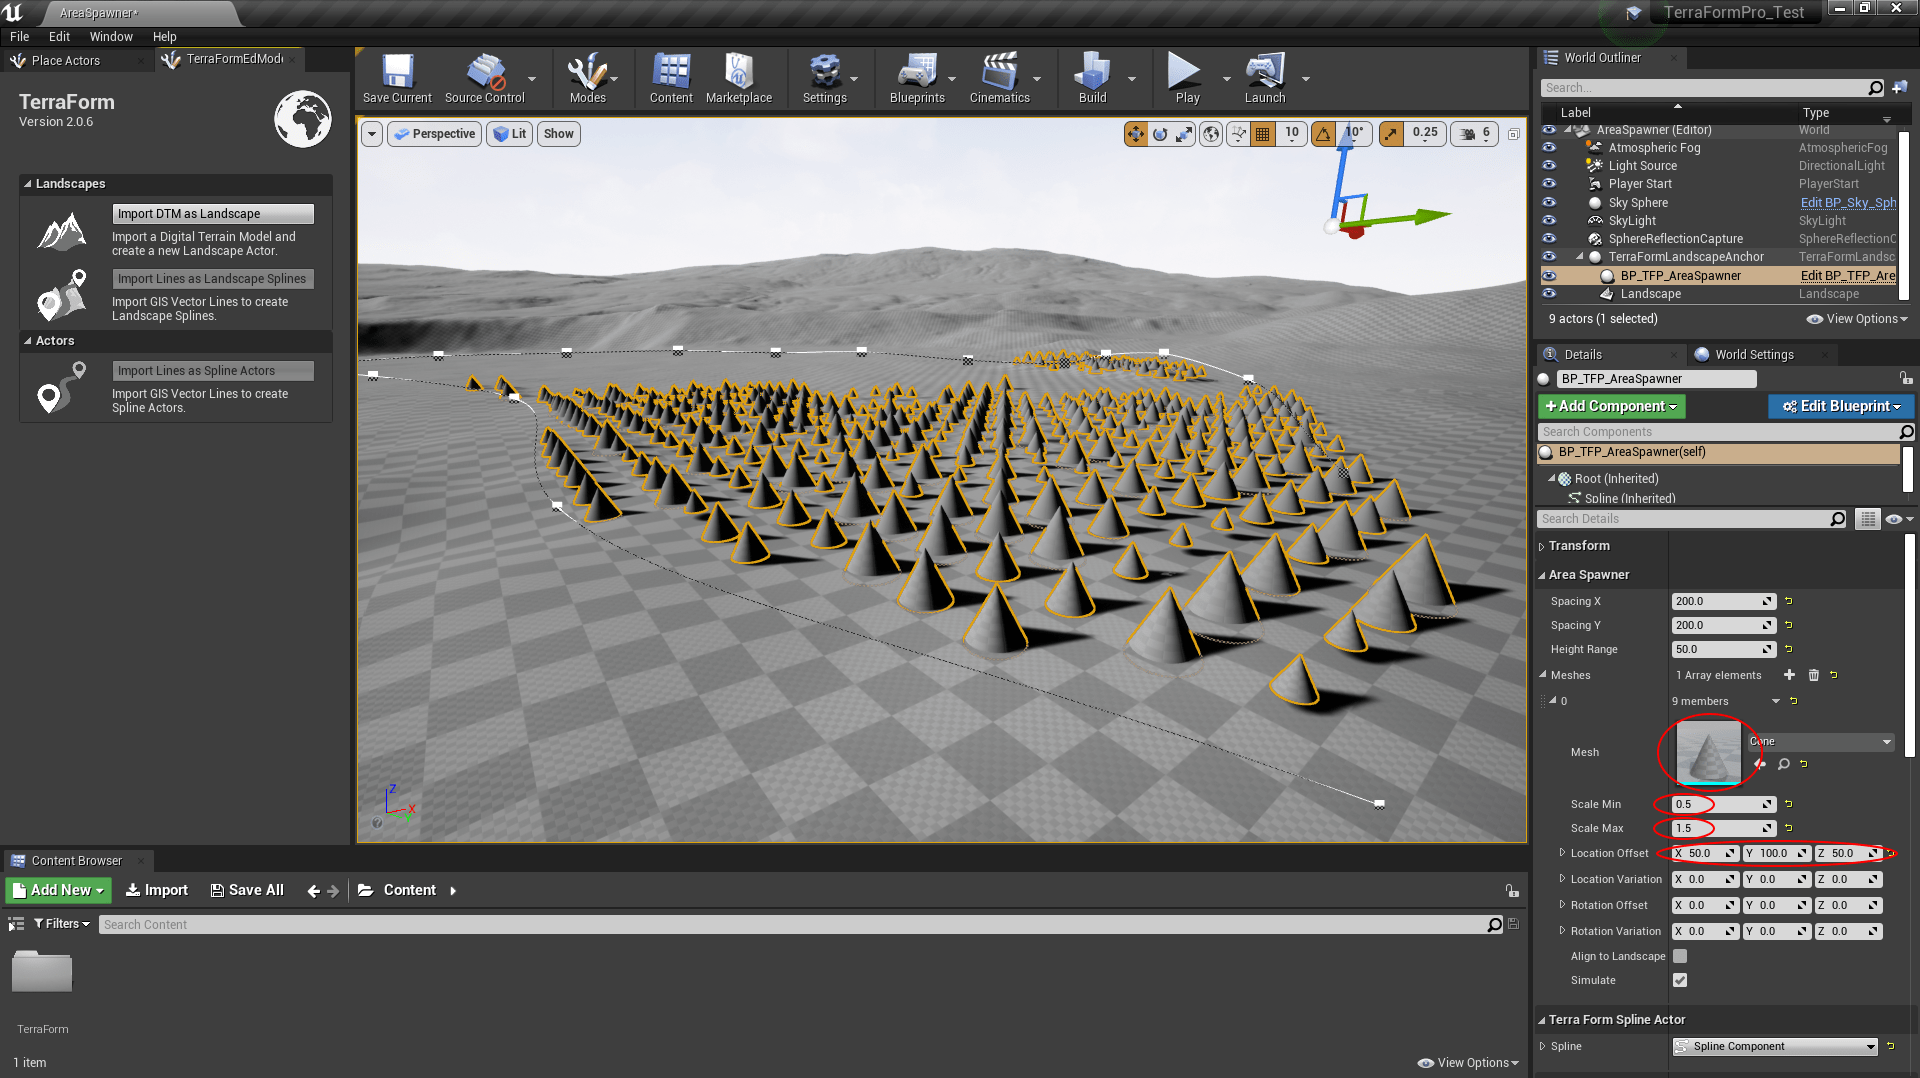
- Location Variation: The maximum randomised distance offset of static mesh actors.
- Rotation Offset: A fixed rotation offset of static mesh actors.
- Rotation Variation: The maximum randomised variation in rotation of static mesh actors.

- Align to Landscape: Whether or not static meshes should be aligned to the landscape normal.